Skip to content
Add as Preferred Source

cloud transfer

30 posts with the tag "cloud transfer"

Blober vs rclone for Proton Drive and Proton Photos
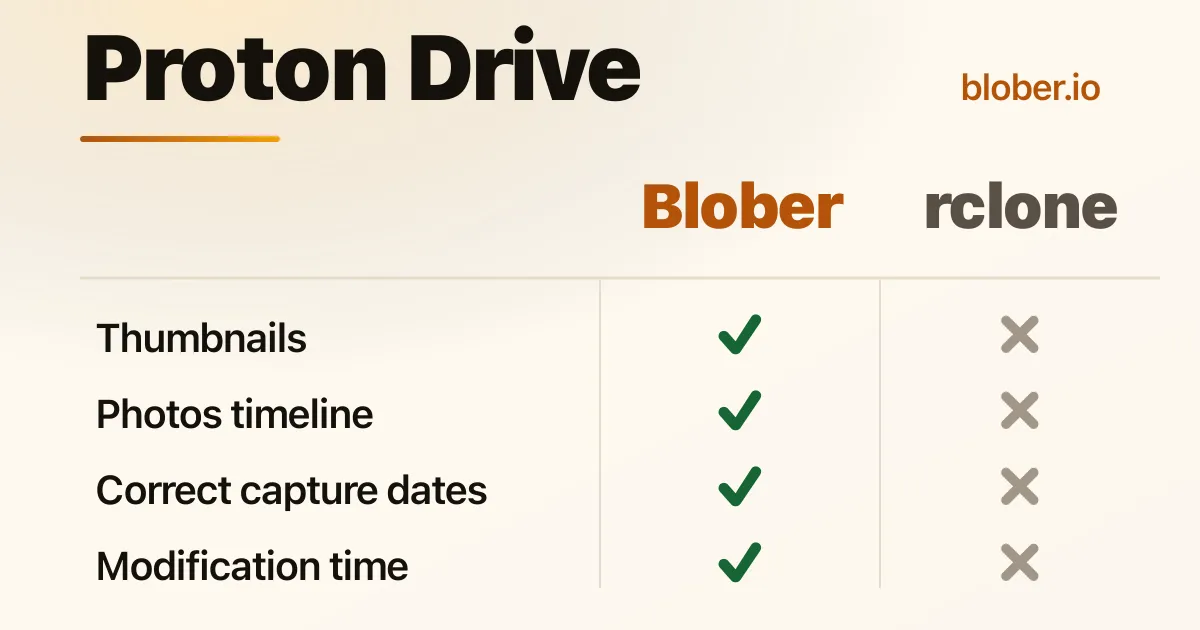
If rclone already moves your other clouds around, adding Proton Drive looks like the obvious next step. It is a real rclone backend, open source, and for scheduled jobs and mounts it does a genuinely good job. The catch only shows up when the job involves photos or videos.

You use rclone to backup a camera roll, then open Proton expecting the Photos tab to be full. The files are there, just not where or what you expected: a folder in My Files full of generic file icons, and nothing in the Photos timeline.

People describe it plainly:

Uploading images via rclone results in generic file icons instead of visual thumbnails inside the Proton Drive interface.

That line comes from a thread where a NAS owner set up rclone with Proton Drive and asked why nothing looked like a photo[1]. It is not a Proton bug. It is what happens when a general file mover uploads into a service whose photo features depend on extra data the mover never sends.

Bot blober and rclone use Proton's own encryption, so privacy is identical either way. The difference is what survives the upload: thumbnails, capture dates, and which surface the media ends up on. For a photo library, those decide whether the result is usable.

Why the previews and thumbnails go missing

Section titled "Why the previews and thumbnails go missing"

Proton Drive is end to end encrypted, so Proton's servers never see the inside of your files. They cannot generate a preview from the original, because nothing is decrypted until it reaches your device.

That means the uploader has to make the thumbnails. Proton's own apps decode each image or video on your device, build the small preview images, encrypt them, and store them beside the original[2]. Those extra blocks are what the interface renders as a tile or a preview.

rclone's Proton backend only speaks the file side of the API. It uploads the original and stops there, with no thumbnail blocks and no preview. On the rclone issue tracker this shows up as a known missing feature: the client would have to generate the preview and upload it for the file to display one[3]. Proton then has nothing to render but a generic icon.

There is also no fix later. Proton Drive has no option to set or replace a thumbnail on a file that is already uploaded, and its servers cannot generate one after the fact. To get a preview you have to upload the file again with a client that sends thumbnails. So the tool you choose on day one decides what your library looks like from then on.

Blober uploads the same thumbnail data Proton's own clients do. Before an upload it decodes the media, produces Proton's standard preview sizes, and sends them alongside the original. Images and videos both show real previews in My Files, and photos get a proper tile in the Photos timeline. Audio gets the same care, and here Blober goes further than rclone could: a music file's embedded album art (the cover on an mp3 or m4a) is read straight off the file and uploaded as its thumbnail, so audio shows a real cover tile instead of a generic icon.

Proton Photos organizes the timeline by each photo's capture time. That value comes from the photo's EXIF data and is set when the file is uploaded. When it is missing, a photo has no real capture date, so it lands wherever upload time puts it.

The rclone backend documentation is direct about the underlying gap: the backend does not support updating modification times yet[4]. rclone treats photos as files. Migrate a few years of pictures that way and you get a timeline that groups by upload date, not by when anything was taken.

Blober reads the EXIF capture time and hands it to Proton with the upload, and it carries over the file's own dates from the source. Photos group under the day they were actually taken.

The files land in the wrong surface

Section titled "The files land in the wrong surface"

Proton keeps two surfaces under one login: My Files, a folder tree, and Photos, a timeline with albums. Where a photo lands decides how you see it later.

rclone is a file backend, and it only ever sees the file side. Its remote maps to the My Files tree, and rclone forum threads describe trying to reach Proton's separate Photos area and failing, because that library sits outside the folder tree the backend exposes[5]. Sync a camera roll this way and every picture lands in a folder, none of them appear in the Photos tab, and there is no album step to put them there.

Blober is built around the destination you choose. Pick the Photos surface and each upload becomes a timeline photo. Pick My Files and it is a regular file. Because Proton Photos is a flat timeline without folders, Blober automatically keeps the path rules you set sensible on either destination.

What the setup actually looks like

Section titled "What the setup actually looks like"

Most of the rclone column below comes from rclone's own Proton Drive documentation[6].

Bloberrclone (Proton Drive)
InterfaceDesktop appTerminal commands and config files
Proton loginSign in inside the appUsername and password prompts plus 2FA or OTP, with an optional mailbox password for two-password accounts
KeysHandled for youEncryption keys must already exist from a normal browser login, and there is no official Proton API documentation to lean on when something breaks
StatusGA productCommunity backend, still marked Beta and classed as Tier 4
ThumbnailsGenerated for images, videos, and audio (album art)Not generated
Capture timeRead from EXIFNot set
Modification timesPreservedNot supported by the backend
Photos surfaceA real destinationFiles and folders only
Fits bestPhoto migrations, people who do not live in a terminalScripted sync, mounts, headless servers

That last row is the honest summary. rclone is the right tool when the job is moving files on a schedule or mounting Proton as a drive and you do not care about Proton's photo features. It is the wrong tool when the point of the move is getting a photo library to look right inside Proton.

If you are migrating a photo library, especially out of Google Photos, you want the uploader to behave like Proton's own client: generate previews, carry the capture dates, and put media where the Photos tab can show it. That is what Blober does.

If you are a terminal user syncing folders, running backups on a schedule, or mounting Proton on a server, rclone is a strong, established choice and you already know whether its tradeoffs matter to you.

For a photo library, that choice is the difference between files in a folder and a Photos tab that works the way Proton intends.

Why do my rclone-uploaded photos have no thumbnails in Proton Drive? Proton is end to end encrypted, so its servers cannot create previews; the uploading client has to. rclone's backend only moves files and sends no thumbnail data, so Proton shows a generic icon.

Can I add a thumbnail to a file I already uploaded with rclone? No. Proton Drive does not let you set or replace a thumbnail on an existing file, and its servers cannot generate one later. You would have to upload the file again with a client that produces thumbnails, which is what Blober does.

Does rclone upload into Proton Photos albums or the timeline? No. Its Proton backend works with files and folders in My Files only. Photos uploaded that way do not appear in the Photos timeline and are not added to albums.

Does Blober make thumbnails for audio files? Yes, and rclone cannot. Blober reads a music file's embedded album art (the cover on an mp3 or m4a) and uploads it as a Type1 thumbnail, so audio gets a real cover tile instead of a generic icon. rclone generates no thumbnails at all.

How stable is rclone's Proton Drive backend? It is a community backend. rclone ships it as Beta and Tier 4, Proton publishes no official API documentation, and rclone's own docs warn that Proton's protocol changes may leave some accounts incompatible.

For Proton Drive, is Blober better than rclone? For scripted file sync into folders, rclone is the established terminal option. For a photo library, where previews, capture dates, and the Photos timeline matter, Blober is the better fit because it uploads the thumbnail and metadata Proton needs. Both encrypt your data the same way.
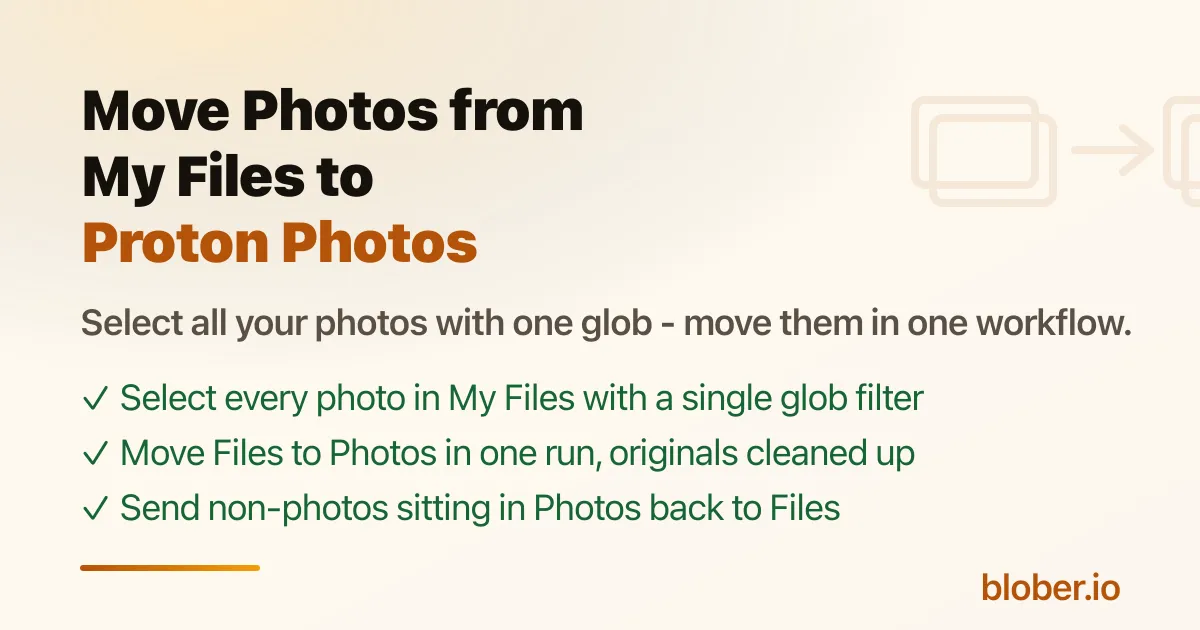
How to Move Photos from Proton Drive Files to Proton Photos (and Back)

The Move Proton Won't Let You Make

Section titled "The Move Proton Won't Let You Make"

You cannot move photos from My Files into Proton Photos. You are not missing an option or a setting: the two live in separate storage areas of your account - My Files holds folders, Proton Photos is a timeline (plus albums) - and Proton does not offer a way to move a photo from one to the other.

The only way a photo gets from My Files into the Photos timeline is to download it and upload it again into Photos. That is the community workaround: "You can upload them via the web version - not ideal but its a way of doing it"[1].

This is not user error. The most upvoted answer to exactly this question on Proton's forum says it plainly: "No, you are not doing anything wrong, this is not possible at the moment"[2]. The thread is full of the same frustration:

  • "I uploaded all my images in my proton drive, but I want to have them at the photos section. I can't seem to move them. Am I doing something wrong?"[3]
  • "The photos section is pretty much reserved for photos backup from phones at the moment. If you manually import, they go to files instead."[4]
  • A Proton idea on UserVoice asking for "a way I could import photos from files uploaded to the photo section of drive from already existing directories within proton drive" has gathered dozens of votes[5].

The Manual Workaround: Download, Then Re-Upload

Section titled "The Manual Workaround: Download, Then Re-Upload"

Proton's supported path for getting photos into Photos is the import flow: download your files locally, then upload them through the Photos tab (or the Windows app's Photos import). For a handful of files that is fine. For a real library it is a chore:

  • One by one. The web UI has no "select all in this folder and send to Photos," so you are clicking through hundreds of files.
  • No resume. A browser upload that fails halfway starts over, and nothing tracks which photos you already moved.
  • Duplicates are silent. Proton Photos does not dedupe on upload - re-uploading a photo that is already in the timeline creates a second copy instead of replacing it.
  • Cleanup is manual. After the upload you still have to delete the originals from My Files, file by file, or you end up with every photo in two places.

The same problem runs the other way: because Photos is built around phone backup, screenshots, PDFs, and documents you meant to keep as files can end up in the timeline, and there is no UI to send them back to a folder.

Move All Your Photos with One Blober Workflow

Section titled "Move All Your Photos with One Blober Workflow"

Blober connects to Proton Drive and treats both surfaces - My Files and the Photos timeline - as ordinary source and destination folders. It streams files from My Files to Photos.

To move your whole photo library from My Files to Proton Photos:

  1. In Blober, add Proton Drive as the source and browse into My Files.

  2. Add Proton Drive as the destination and choose the Photos surface.

  3. Select all photos with one glob instead of clicking files. In Source Configuration, set the Include Pattern to:

    **/*.{jpg,jpeg,png,webp,heic,gif}

You can also use the built-in Raw Photos extension preset for CR2/NEF/ARW/DNG/RAW.

  1. Run the workflow as a move. Blober copies each photo into Proton Photos and deletes the original from My Files in the same run.

The whole library lands in the Photos timeline in one run. Nothing is left behind in My Files, and there is no local download folder to clean up.

The Reverse: Non-Photos Sitting in Proton Photos

Section titled "The Reverse: Non-Photos Sitting in Proton Photos"

If files that are not photos ended up in your timeline - screenshots, documents, archives, or videos you would rather keep as ordinary files - Blober moves them back just as easily:

  1. Set Proton Photos as the source and My Files (a folder) as the destination.

  2. Use an Include Pattern that targets non-photo files, for example:

    **/*.{pdf,doc,docx,xls,xlsx,txt,zip}

    or exclude image extensions with an Exclude Pattern of **/*.{jpg,jpeg,png,webp,heic,gif}.

  3. Run it as a move. The non-photos leave the timeline and land in a real folder tree where you can organize them.

Can I move photos from My Files to Proton Photos in the web app? No. Proton offers no move between the two surfaces. The community answer is "not possible at the moment," and the only manual path is download + re-upload through the Photos import flow.

Why doesn't Proton support this? My Files and the Photos timeline are separate storage areas, and Proton does not offer a move between them. The only way a photo crosses is to download it and upload it again, which is what Blober automates.

Does Blober move the photos for me? Yes. It downloads each photo and uploads it into Photos, because that is the only way a file crosses from My Files to Photos. What Blober automates is the selection, the transfer, the retry, and the cleanup, so you do not do it by hand in a browser.

Will moving my photos create duplicates in Photos? Proton Photos does not dedupe on upload. A Blober move deletes each original from My Files after it is copied, so a re-run of the same workflow finds nothing left to move and does not duplicate anything.

How to Move Google Photos to Proton Drive (Without Google Takeout)

Google Photos to Proton Drive: Two Very Different Paths

Section titled "Google Photos to Proton Drive: Two Very Different Paths"

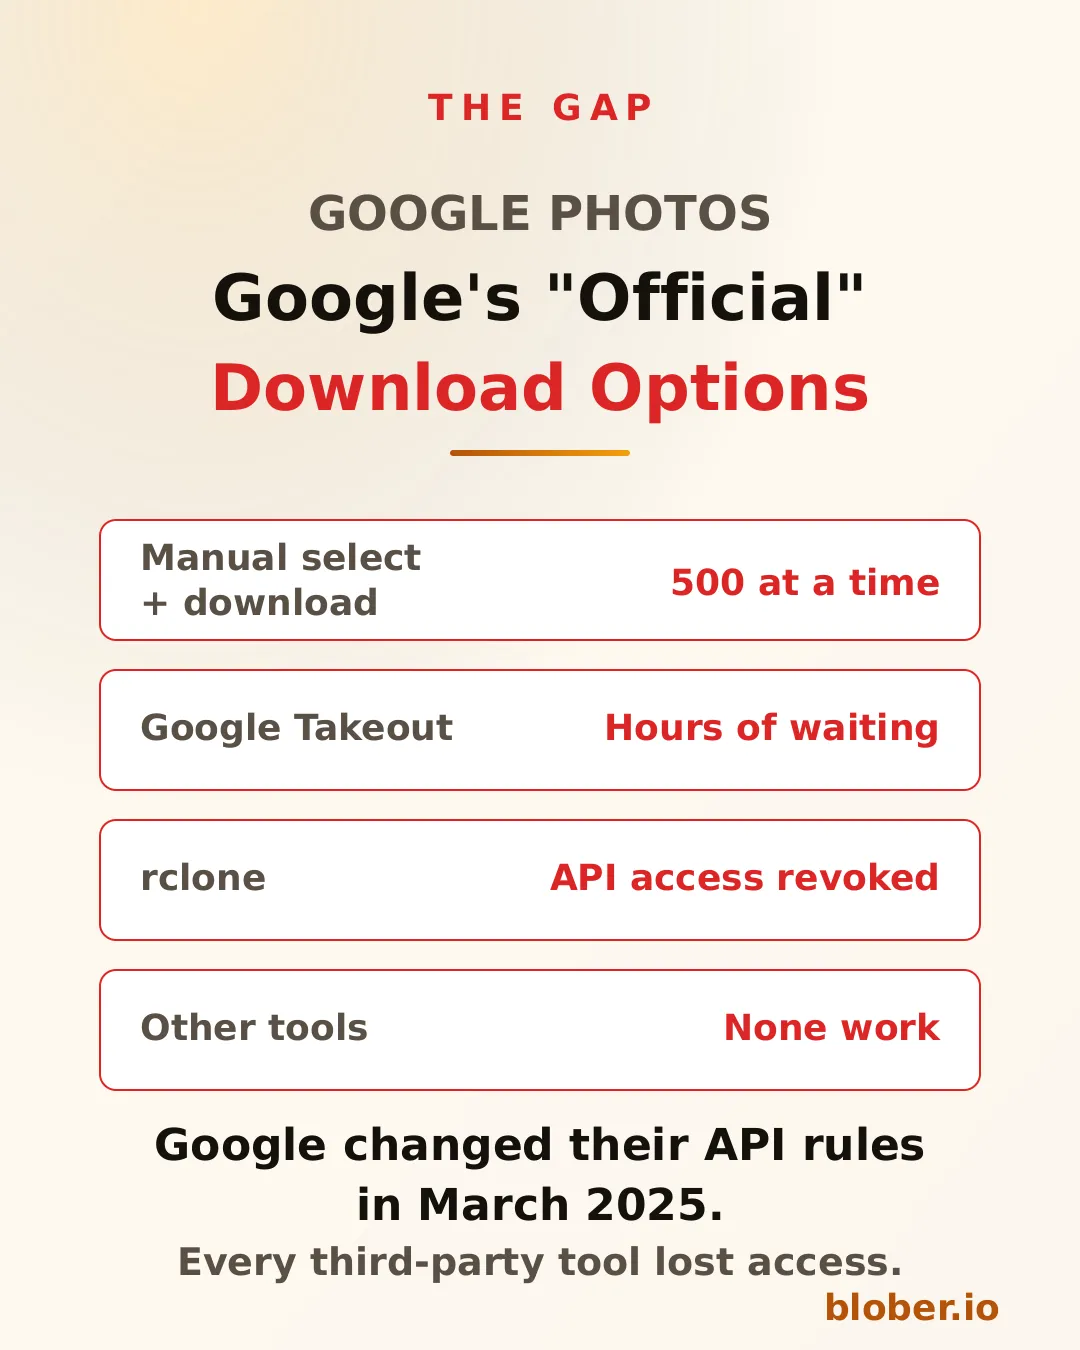
Google has no "download all" button, and every official route for moving your library out is slow and manual. If you are switching to Proton Drive for privacy, you have two practical paths.

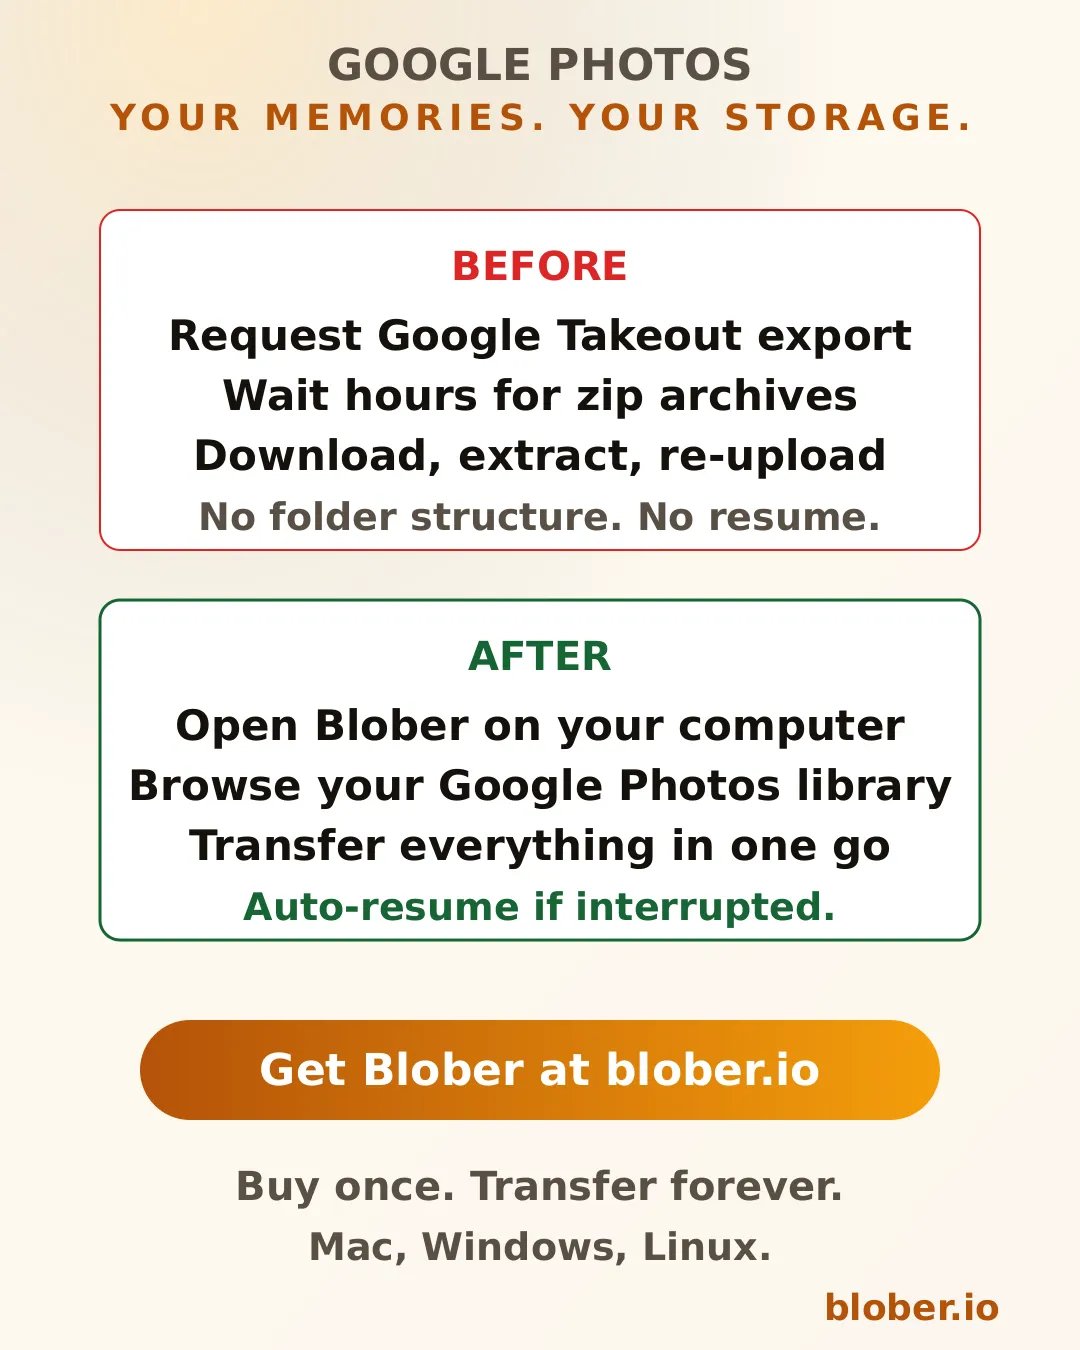
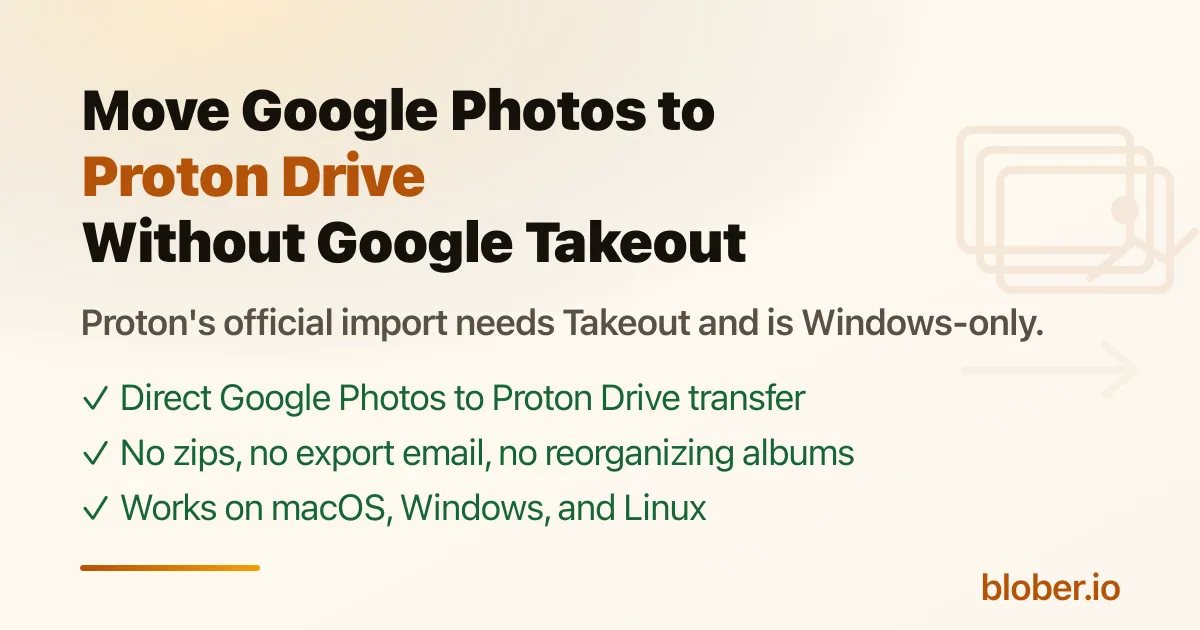
Proton's official way exports your whole library through Google Takeout, then imports it into Proton Drive; the desktop import is Windows-only. Blober connects to Google Photos directly and transfers your photos to Proton Drive without Takeout, on any platform. This guide walks through both with the trade-offs, so you can pick the one that fits your library.

Path 1: Proton's Official Way (Google Takeout)

Section titled "Path 1: Proton's Official Way (Google Takeout)"

Proton's official guide, "How to import from Google Photos into Proton Drive"[1], has three steps:

  1. Export your Google Photos. Sign in at takeout.google.com, select Google Photos, and create an export. Google prepares the archive in the background and emails you a download link, which is valid for one week.
  2. Download your export. Download all parts, then unzip them.
  3. Import into Proton Drive. Either drag the unzipped folders into the Photos tab in the web app, or use the Windows desktop app: Photos import, then Import from Google Photos.

Proton's own documentation flags the rough edges:

  • It is Windows-only for the desktop import. The feature announcement says "Google Photos import now supported on Drive for Windows" and notes "Photo import support for macOS is coming soon"[2].
  • Takeout scatters albums. "Google Takeout splits large exports into multiple parts, but it may not keep photos from the same year in the same part... This can cause issues if you're using Proton Drive's desktop app, which builds albums based on folder structure"[3]. Proton's advice is to manually reorganize photos into year folders before importing.

For a small library, this path works. For tens of thousands of photos, it is a multi-day chore: wait for the export, download zips, extract, reorganize, then upload.

Path 2: Blober (Direct Google Photos to Proton Drive)

Section titled "Path 2: Blober (Direct Google Photos to Proton Drive)"

Blober is a desktop app that connects to Google Photos and to Proton Drive as two endpoints, then transfers the photos you select between them.

  1. Connect Google Photos in Blober (you see your whole library in a file browser).
  2. Connect Proton Drive (a browser window opens to Proton's own login page; your password never touches Blober).
  3. Select the photos you want and start the transfer.

Google Photos Is Flat - and So Is Proton Photos

Section titled "Google Photos Is Flat - and So Is Proton Photos"

Google Photos has no folders. When you browse your library in Blober, the date-based view you see (for example 2026-08-23/IMG...) is a virtual grouping Blober builds so you can find photos by when they were taken - nothing is moving between real Google folders. There is no source folder tree to preserve.

Where your photos land in Proton then depends on which surface you choose as the destination:

  • A folder in Proton Drive (My Files) - for example the root or a Google Photos folder. My Files is a normal folder tree, so Blober's YYYY-MM-DD/{filename} organization creates real date folders here.
  • The Proton Photos surface (the timeline). Proton Photos is flat: it has no folders, only a date timeline plus albums. A YYYY-MM-DD/{filename} template cannot create folders on this surface, so every photo is uploaded flat into the timeline and sorted by its capture date instead. In Blober's preview the destination shows as Photos/{filename}, which reflects that. Google Photos albums are not recreated on either surface.

Pick My Files if you want a real date-folder structure. Pick Proton Photos if you want the timeline and albums. You can also move between the two later - see How to Move Photos from My Files to Proton Photos.

The differences from Takeout:

Google Takeout + Proton importBlober
Export waitHours to days for the archive emailNone
Zips and unzippingYes, often 2 GB partsNo
Album structureCan scatter photos across folders; manual reorganizing advisedGoogle Photos albums are not recreated. YYYY-MM-DD folders are created when the destination is a Proton Drive (My Files) folder; the Proton Photos surface is a flat timeline and has no folders
PlatformDesktop import is Windows-only; web is drag-and-dropmacOS, Windows, Linux
Resume on failureNoYes, per-file progress with automatic retry
Direct to ProtonRequires local download and re-uploadStreams directly to Proton Drive
Disk spaceNeeds free local disk for the whole libraryStreams through memory, no full copy staged

Why Skip Takeout for Large Libraries

Section titled "Why Skip Takeout for Large Libraries"

Takeout is designed for backup, not migration. Its pain points are well documented in the community: the export can take a day or more, downloads split into 2 GB zips, there is no resume, and album metadata often lands in separate JSON files instead of real folders. People build entire tools to work around it. A developer who migrated 354 GB wrote up the script he built, "gphoto2proton," precisely because the official flows are so manual[4].

Blober removes those steps entirely: no export request, no zips, no reorganizing. It reads the library in place and writes it straight to Proton Drive.

  • Check your Proton storage first. The free plan is 5 GB. A large photo library needs Drive Plus (200 GB), Unlimited (500 GB), or Duo (2 TB)[5].
  • Keep originals until the transfer finishes. Verify a sample of photos in Proton Drive before deleting anything from Google Photos. Proton's own post-migration advice is to remove them from Google Photos only after they are safely stored[6].
  • Re-run for new photos. You can run the workflow again later to catch photos added since the last transfer. An interrupted run can be resumed from where it stopped.
  • HEIC and RAW files transfer as-is. Blober copies the original files, so formats and EXIF metadata are preserved.

Can Proton Drive replace Google Photos? For private, encrypted photo storage, yes. Proton Drive has automatic mobile photo backup, albums, favorites, filters, and a timeline[7]. It does not have Google's face recognition or unlimited free compression. The move is the hard part, which is what this guide covers.

Can I transfer all of my Google Photos to a hard drive? Yes. Connect Google Photos as the source in Blober and select your local disk as the destination. Blober downloads the whole library without Takeout, and re-runs can skip files that are already on the drive. See the related guide on backing up Google Photos below.

Does Blober use Google Takeout? No. Blober connects to Google Photos directly and transfers photos from the library, so there is no export request, no zip files, and no waiting for an email link. This is the key difference from Proton's official import flow.

Is Proton's Google Photos import available on macOS? Not yet. Proton's desktop import feature is Windows-only as of 2026, with macOS "coming soon"[8]. Blober runs on macOS, Windows, and Linux.

Will my albums be preserved when moving to Proton Drive? With Takeout, album structure can be scattered across folders, and Proton advises manually reorganizing by year to get clean albums[9]. With Blober, Google Photos albums are not recreated. Each photo lands in a YYYY-MM-DD folder when the destination is a Proton Drive (My Files) folder; if the destination is the Proton Photos surface, photos land flat in the timeline because Proton Photos has no folders - only a timeline and albums.

How do I move Google Drive files (not photos) to Proton Drive? Proton offers a manual import guide for Google Drive files that uses drag-and-drop[10]. Blober also handles Google Drive to Proton Drive transfers directly, alongside photos. See Migrating To or From Proton Drive.

Proton Drive Is Hard to Migrate To or From. Blober Makes It Easy.

The Privacy-First Cloud That Is Awkward to Move Files Into

Section titled "The Privacy-First Cloud That Is Awkward to Move Files Into"

Proton Drive is one of the most privacy-respecting cloud storage services you can pick. End-to-end PGP encryption, Swiss jurisdiction, open-source clients, and a zero-access architecture: not even Proton can read your files. Over 100 million accounts trust it[1]. If privacy comes first, Proton Drive is a strong choice.

The catch is that Proton built sync clients, not transfer tools. The apps sync a folder between your device and Proton Drive, which works fine while Proton is your only cloud. The moment you want to pull files in from Google Drive, Dropbox, or S3, or move a Proton library out to cold storage, you are on your own. The official path is to download everything locally and re-upload it. That is fine for a few gigabytes. For 500 GB of photos spread across three Google accounts, it is a weekend you do not get back.

This guide runs through the pain points one by one, with sources, then shows what Blober does about each. It is also honest about when rclone is still the better tool.

Where Proton Drive Is Officially Supported

Section titled "Where Proton Drive Is Officially Supported"

Proton offers native clients on four platforms, plus web access:

PlatformClientSyncFile BrowserBulk Transfer From Other Clouds
WindowsDesktop appFolder syncVia webNo
macOSDesktop appFolder syncVia webNo
iOSMobile appPhoto backupIn-appNo
AndroidMobile appPhoto backupIn-appNo
LinuxNo clientNoWeb onlyNo
WebBrowserNoYesNo

Look at the last column. Across every platform, on every client, there is no built-in way to transfer files from another cloud into Proton Drive. You download to your machine first, then let the sync client pick the files up, which means you need enough free local storage to hold everything in transit.

If you are on Linux it is worse: there is no desktop client at all. You get the web interface, which works, but it does not support drag-and-drop bulk uploads from other services either.

1. The official apps are sync clients, not migration tools

Section titled "1. The official apps are sync clients, not migration tools"

Proton ships folder-sync apps for Windows and macOS, and photo backup on mobile. None of them can pull files from another cloud. If you want 200 GB of photos from Google Drive inside Proton Drive, the official path is: download everything to your machine, then let the sync client upload it. That needs free local disk equal to your whole library, and it sends every byte over the network twice.

The feature requests confirm the gap. Proton's own UserVoice has long-running requests for exactly this, including "Easy Switch for Google Photos" and a post titled "To switch from Google Photos, Proton drive is not the deal"[2].

2. Google Photos import means Takeout, and the desktop import is Windows-only

Section titled "2. Google Photos import means Takeout, and the desktop import is Windows-only"

Proton's official "How to import from Google Photos into Proton Drive" guide[3] is a Takeout pipeline: export from Google Takeout, wait for the email link, download the zips, unzip them, then import the folder in the web app or the Windows desktop app.

Three things make this painful:

  1. It depends on Takeout. Google prepares the archive in the background, which "may take a while," and the download link expires after a week[4].
  2. The desktop import is Windows-only. The September 2025 announcement that "Google Photos import now supported on Drive for Windows" notes "Photo import support for macOS is coming soon"[5]. On a Mac you are left with the web drag-and-drop path.
  3. Takeout scatters albums. Proton's own guide warns: "Google Takeout splits large exports into multiple parts, but it may not keep photos from the same year in the same part. As a result, photos from the same time period may end up scattered across different folders"[6]. Users then reorganize by year by hand to get clean albums.

3. rclone's Proton Drive support is Tier 4

Section titled "3. rclone's Proton Drive support is Tier 4"

rclone is the standard open-source answer, and its Proton Drive backend works, with caveats worth knowing before you trust a library to it. The rclone docs are explicit:

  • The backend "is currently in Beta" and is rated Tier 4, rclone's lowest support tier[7].
  • Modification times are not preserved: "Proton Drive Bridge does not support updating modification times yet"[8].
  • Setup puts your password in a config file. Config asks for username, password, 2FA, and optionally your OTP secret and mailbox password[9].
  • The underlying library is honest about risk: "There are likely quite a few errors in this library, as there isn't official documentation available"[10].
  • Caching goes stale with concurrent clients: "if there are concurrent clients accessing the same mount point, then we might have a problem with caching the stale data"[11].

4. There is no full Linux desktop client

Section titled "4. There is no full Linux desktop client"

As of 2026 Proton has no full-featured Linux desktop sync client. The June 2026 Proton Drive CLI announcement says a "full-featured desktop client with sync is on its way"[12], and the engine-rebuild post confirms Proton is "actively building one of the community's most-requested features: the Proton Drive client for Linux"[13]. Until then, Linux users get the CLI, which is not a drop-in replacement. Proton's own words: "only the applications include a full synchronization engine that runs in the background"[14].

5. The iOS Files integration is temporarily gone

Section titled "5. The iOS Files integration is temporarily gone"

Proton removed its iOS Files (File Provider) integration and is rebuilding it. A June 2026 post by Proton's iOS lead explains the constraint: the extension runs in a sandboxed process capped at roughly 20 MB of memory, and Proton is reworking its SDK to fit. Proton says "we'd be surprised if this isn't resolved within the year"[15]. In the meantime, iOS users cannot browse their whole Proton Drive from the Files app.

6. Docs and Sheets are rough for power users

Section titled "6. Docs and Sheets are rough for power users"

Proton Docs and Sheets are improving, but community feedback is candid. A top r/ProtonDrive post is titled "As Always Proton Sheet is Buggy and Proton Docs is slow to add feature!" and reports Sheets freezing on large datasets and missing document features like shapes[16]. Other recent complaints include spreadsheet tab ordering reverting on reopen and no PDF export from Sheets. This matters if you are planning to move a heavy Google Workspace workflow over to Proton.

rclone is the canonical open-source tool for cloud storage. It supports 70+ backends and is genuinely excellent at what it does, and its Proton Drive backend works, with the caveats listed above. If you are already in the rclone ecosystem and those tradeoffs fit, rclone is a perfectly good option. Blober is a different style of tool for a different style of user, and the rest of this article is about that.

How Blober Handles Proton Drive Differently

Section titled "How Blober Handles Proton Drive Differently"

Blober takes a different approach: instead of asking for your credentials in a config file, it asks Proton for them.

When you connect Proton Drive in Blober, a browser window opens to Proton's own login page. You sign in with your email, password, and 2FA exactly as you would in any browser. There is no config file with credentials on disk, and nothing to type into a CLI. The provider guide covers how Proton Drive login works in Blober.

What Blober supports with Proton Drive

Section titled "What Blober supports with Proton Drive"
OperationSupportedDetails
BrowseYesNavigate your full folder tree
DownloadYesParallel, resumable downloads
UploadYesParallel uploads, auto-creates folders
DeleteYesMoves to Proton Trash (recoverable)
MetadataYesFilename, size, created and modified dates
Multiple accountsYesEach account gets its own session; run transfers in parallel

What Blober does that Proton's client can't

Section titled "What Blober does that Proton's client can't"
  1. Transfer from any supported provider directly to Proton Drive. Google Drive, Dropbox, AWS S3, Azure Blob, Backblaze B2, Cloudflare R2, DigitalOcean Spaces, Wasabi, Rabata, GoPro Cloud, local disk. No intermediate downloads.
  2. Transfer from Proton Drive to any other provider. Moving away from Proton, or shifting a subset to cold storage on Backblaze? Blober handles it.
  3. Selective file transfer. Browse the source, pick exactly the files you want, transfer only those. Not a full sync of everything.
  4. Saved workflows. Set up "Dropbox to Proton Drive" once and run it whenever you want. The workflow remembers source path, destination path, filters, and file naming templates.
  5. Runs on Linux. Blober works on Windows, macOS, and Linux. Since Proton does not ship a Linux desktop client, Blober is one of the few ways to get a desktop-native Proton Drive experience on Linux without a browser.
  6. Resumable transfers. If your session expires mid-transfer, Blober prompts you to sign in again and picks up where it left off. No files are lost or duplicated.

One detail matters for Google Photos specifically. Blober lists your library chronologically and keeps each photo's capture date, so a transfer lands in date-based folders. It does not recreate Google Photos albums as Proton albums, because Google provides no API for that kind of access. See How to Move Google Photos to Proton Drive.

Here is the situation Blober is built for.

You are on Google Drive or Dropbox, you have decided to move to Proton Drive for privacy, and you have 200 GB of documents and photos spread across folders. Today your options are:

Option A: Manual download and re-upload

  1. Download 200 GB from Google Drive to your machine (hours, needs free disk space)
  2. Wait for the Proton Drive sync client to upload it all (hours more; encryption is CPU-heavy)
  3. Repeat for Dropbox
  4. Hope nothing failed silently

Option B: Google Takeout plus manual upload

  1. Request a Takeout archive (can take days)
  2. Download the archive(s)
  3. Extract, organize, upload to Proton Drive
  4. Storage used: 3x (source cloud + local archive + Proton)

Option C: rclone

  1. Run rclone config and set up your Google/Dropbox and Proton remotes
  2. Provide your Proton credentials when prompted
  3. Run rclone copy gdrive: protondrive: with the flags that fit your scenario
  4. Drive everything from the CLI, including monitoring and restarts

Option D: Blober

  1. Sign in to Google Drive (OAuth) or Dropbox (OAuth)
  2. Sign in to Proton Drive (browser login)
  3. Select the files you want
  4. Start the transfer, then re-run the same workflow whenever you need to

Blober vs rclone for Proton Drive: Side by Side

Section titled "Blober vs rclone for Proton Drive: Side by Side"
Bloberrclone
Auth methodBrowser login on Proton's own pageCredentials in rclone config
InterfaceNative desktop GUICLI
Resume on failureAutomaticManual restart
LinuxNative desktop appCLI
Cross-provider transferBuilt-in (pick source and destination)rclone copy source: dest:
Multiple Proton accountsEach one its own sessionSeparate config remotes
Scriptable automationSaved workflowsCron-friendly CLI
Mount as filesystemNot supportedSupported (FUSE)

A note on modification times, because rclone's Proton backend does not preserve them at all. Blober reads source timestamps for metadata and naming. If preserving exact modification times on Proton is a hard requirement for you, verify it on your own transfer before committing a large library.

Blober is a good fit if:

  • You are migrating into Proton Drive from Google Drive, Dropbox, or another cloud
  • You are moving out of Proton Drive, or shifting a subset to cold storage
  • You are on Linux and want a desktop-native way to manage Proton Drive files
  • You would rather log in through a browser than configure credentials in a file
  • You want a repeatable, named workflow you can re-run later

rclone is a good fit if:

  • You are already in the rclone ecosystem and want one tool for everything
  • You need scriptable, cron-based automation
  • You want to mount Proton Drive as a filesystem (FUSE)
  • You prefer CLI control over a GUI

Is rclone safe to use with Proton Drive? It works, but treat it as experimental. rclone rates the backend Tier 4, calls it "in Beta," and notes the bridge library "likely" has errors[17]. Modification times are not preserved, and setup stores your Proton password and 2FA secret in the rclone config file.

Why can't I import Google Photos to Proton Drive on my Mac? Proton's Google Photos import is Windows-only as of 2026; the announcement says macOS support "is coming soon"[18]. On macOS you are limited to the web drag-and-drop path, which still needs a Takeout export first.

Does Proton Drive work on Linux? Partially. Proton ships a CLI for Linux and is building a full desktop client[19]. There is no official GUI sync client for Linux today. Blober runs natively on Linux and provides one.

Does Blober store my Proton password? No. Blober opens Proton's own login page in a browser window. You sign in there, exactly as you would on drive.proton.me, and your password never passes through Blober.

Is Blober a sync tool? No. Blober is a transfer tool. It moves a selected set of files from one provider to another and stops. Nothing runs in the background and overwrites files, unlike a sync client.

Where do my Google Photos land when I move them with Blober? In Proton Drive's folder tree, organized by each photo's capture date. Blober lists Google Photos chronologically and does not recreate Google Photos albums. If you want the Proton Photos timeline and album view instead, Proton's official Google Photos import (Windows-only) is the supported route, and it sorts imported photos into albums from the folder structure. See How to Move Google Photos to Proton Drive.

Move a Proton Drive library in or out without filling your disk. Blober signs you into Proton through Proton's own login page, then transfers to or from 20+ providers with parallel, resumable transfers. Runs on Windows, macOS, and Linux.

Download Blober at blober.io

Blober vs RcloneView

RcloneView and Blober are both desktop apps that move files between cloud storage providers and your own drives without routing data through a middleman server. That is where the similarity ends.

RcloneView is a GUI over rclone, made by Bdrive, the company behind NetDrive[1]. It wraps rclone's command line in a visual file manager, so it inherits rclone's strengths (70+ providers, client-side encryption, cloud mounting)[2] and its limits (whatever rclone cannot do, RcloneView cannot do either).

Blober is a purpose-built transfer app with a one-time license, saved workflows, resumable task history, and two capabilities no rclone-based tool has: native GoPro Cloud support and full Google Photos downloads.

For everyday transfers between mainstream providers, both tools cover the same ground:

  • Desktop GUI, no terminal required
  • Cloud-to-cloud and cloud-to-local transfers that run on your machine
  • Local credential control, with no SaaS dashboard holding your tokens
  • Drag-and-drop, job tracking, and transfer monitoring

If you only move files between Google Drive, Dropbox, and an S3 bucket, either app will do the job. The decision comes down to provider coverage, pricing model, and the edge cases below.

FeatureBloberRcloneView
InterfaceNative desktop GUIrclone GUI
Provider count18 shipped, growing70+ (inherits rclone)
GoPro Cloud✅ Yes (exclusive)❌ No
Google Photos (full library)✅ Yes❌ No
Cloud-to-cloud transfer✅ YesYes
Local filesystem✅ YesYes
Mount cloud as a local driveNoYes (free)
Client-side encryptionPlannedYes (free, rclone Crypt)
Two-way syncPlannedYes
Job schedulingNoYes (subscription)
Metadata path templates✅ YesNo
Workflow persistence✅ Yes, resumable stateJob saving only
Background after closing windowPartial (macOS only)✅ Yes (system tray)
Prevent OS sleep during transfers✅ Yes (while app runs)Not documented
Mobile photo backupNoYes (subscription)
Pricing model✅ One-time licenseFree core + annual subscription
Data path✅ DirectDirect

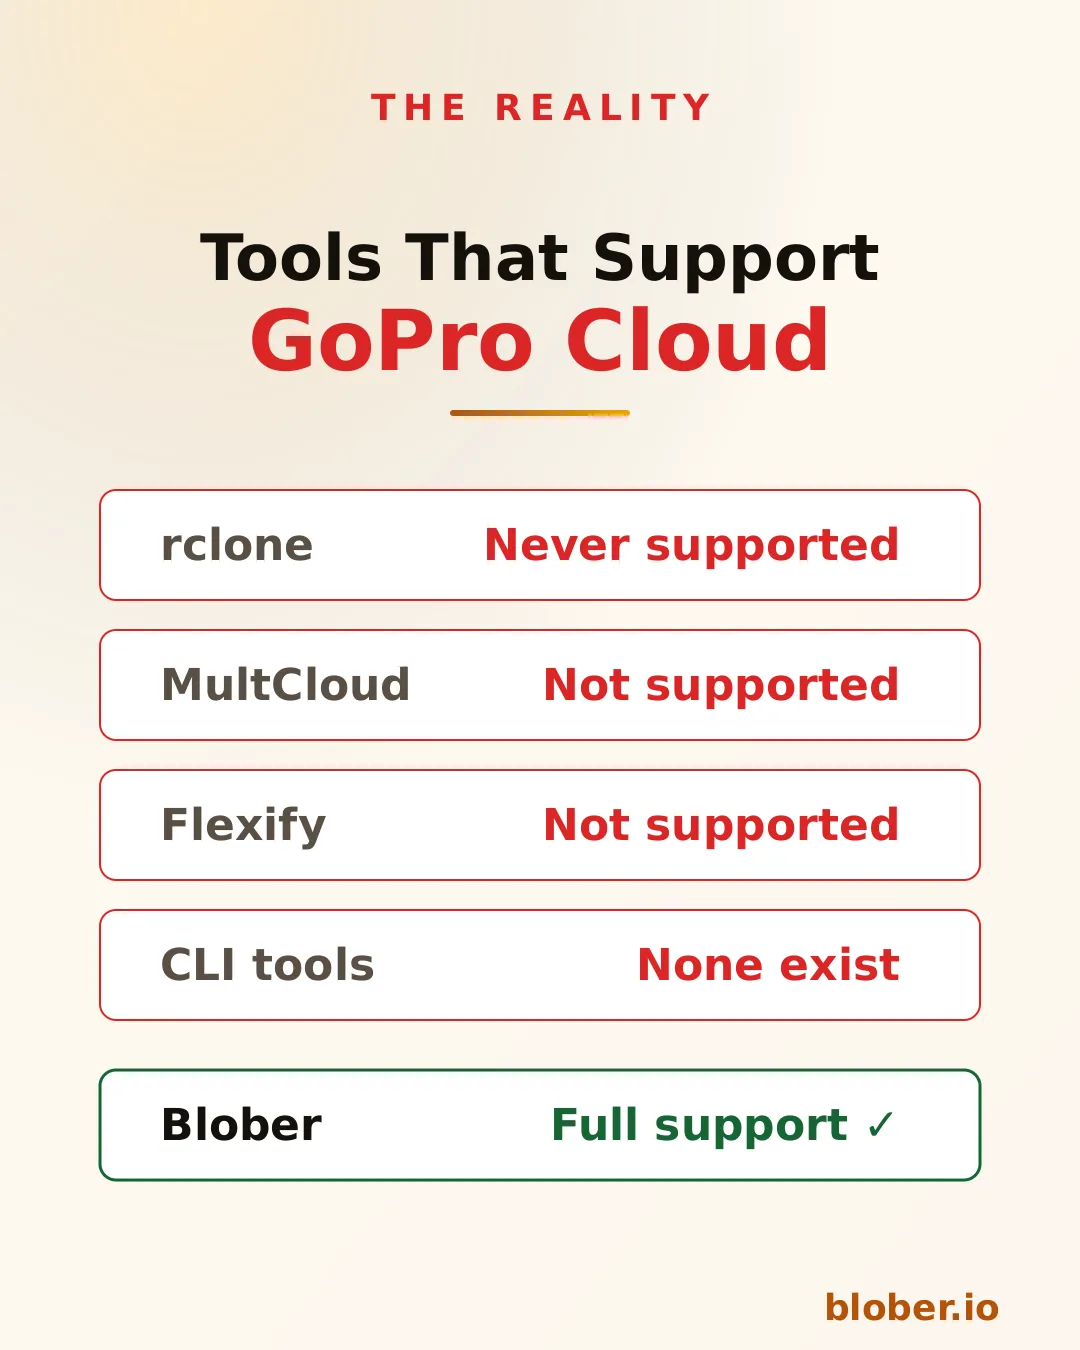
rclone has no GoPro Cloud backend, so RcloneView cannot connect to GoPro Cloud either. If you shoot with a GoPro and want to move your media from GoPro Cloud to Backblaze B2, AWS S3, Wasabi, or a local NAS, neither rclone nor RcloneView can help.

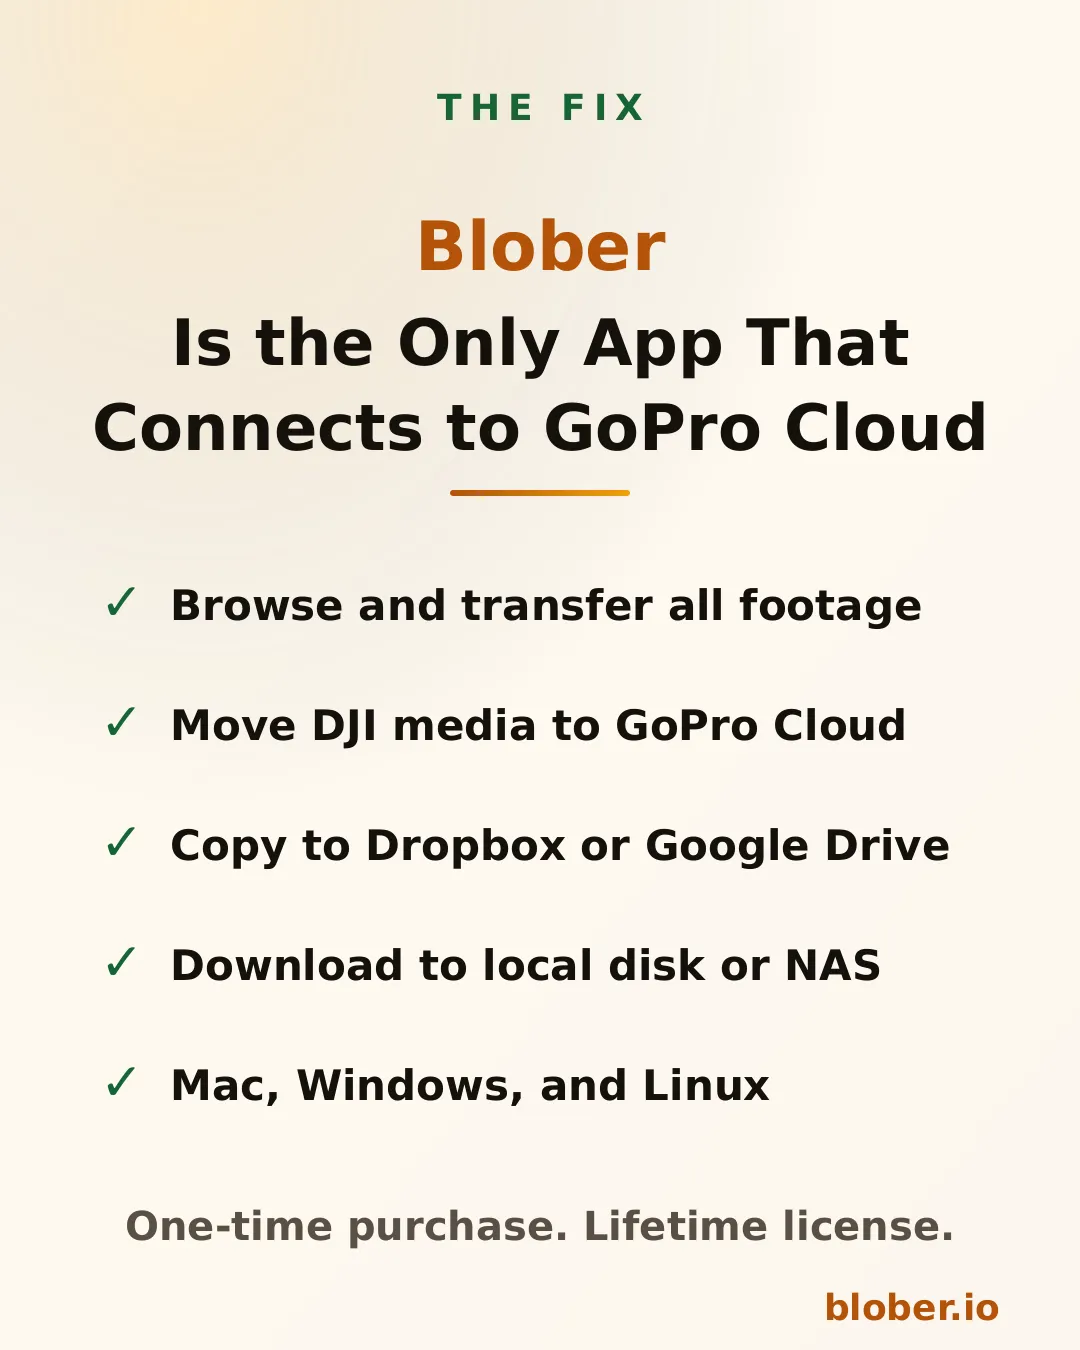
Blober is the only transfer tool with native GoPro Cloud integration. That makes it the choice for photographers, videographers, and agencies that manage GoPro media libraries.

Google Photos: rclone's Limits Apply to RcloneView

Section titled "Google Photos: rclone's Limits Apply to RcloneView"

RcloneView lists Google Photos among its providers, but it relies on rclone's Google Photos backend. That backend carries real limits, documented by rclone[3]:

  • Since March 31, 2025, rclone can only download photos it uploaded itself. Your pre-existing Google Photos library is off limits.
  • rclone's shared Google Photos client ID is being retired during 2026, so users must create and maintain their own Google Cloud app to keep it working.
  • Downloading full-resolution originals requires a separate headless-browser proxy tool.

Blober connects directly to Google Photos and downloads your entire library at original quality, no Takeout export required. For anyone moving years of photos out of Google Photos, this is the deciding factor.

This is where the two differ most in daily use. RcloneView saves jobs, a real improvement over raw rclone, and by default it keeps running in the system tray when you close its window, so transfers continue in the background.

Blober has jobs and tasks too, but it also saves the whole transfer as a reusable workflow: source, destination, filters, and path templates, all in one configuration you rerun with a single click. Rerun it any time. An interrupted transfer resumes from stored state, skipping files it already finished, instead of starting over. Blober also keeps the operating system from sleeping while the app runs, so a long transfer is not cut off when the machine would otherwise doze off.

For long-running moves over unreliable connections, or media archives with tens of thousands of files, that is the difference between babysitting a transfer and walking away.

Blober can organize files as it copies them. Path templates build the destination folder from file metadata: created date, file name, size, or extension. A year of camera uploads can land in /2026/08/GOPRxxxx.mp4 automatically, instead of one flat folder.

RcloneView writes to the folder you choose, and building that structure means scripting it yourself in every job.

To be fair, RcloneView wins in several areas. Choose it if you:

  • Need a provider Blober has not shipped yet (rclone covers 70+)
  • Want to mount cloud storage as a local drive
  • Want transfers to keep running in the system tray after you close the window
  • Need two-way sync, scheduling, or a mobile photo backup app
  • Prefer a free tool for occasional transfers
  • Already rely on rclone configs, daemons, or the rclone ecosystem

Is RcloneView just a GUI for rclone?

Yes. RcloneView is a GUI front-end built around rclone, so it inherits what rclone supports and what it lacks[4]. It can mount cloud storage and apply rclone's encryption, but it cannot add providers rclone has no backend for, such as GoPro Cloud.

Can RcloneView download my Google Photos?

Only photos rclone uploaded itself. Since March 31, 2025, rclone's Google Photos backend cannot download media it did not upload, so a pre-existing library is out of reach without Google Takeout. Blober connects directly to Google Photos and downloads the whole library at original quality.

Is RcloneView free?

RcloneView is freemium. The free tier covers browsing, transfers, mounting, and encryption, and a paid subscription unlocks scheduling, mobile backup, and multi-window support[5]. Blober is a one-time purchase with no subscription.

Does RcloneView keep running when I close the window?

Yes. Closing the window hides RcloneView to the system tray and transfers keep running in the background. Blober handles that differently: instead of hiding in the tray, it keeps the operating system from sleeping while the app runs and resumes an interrupted transfer from stored state.

Can either tool move GoPro Cloud footage?

No rclone-based tool can, because rclone has no GoPro Cloud backend. Blober is the only transfer tool with native GoPro Cloud integration.

What is a Blober workflow?

A workflow is the whole transfer saved as one reusable configuration: source, destination, filters, and path templates. Rerun it with one click, reuse it after an interruption, and pick up from stored state.

Choose Blober if you:

  • Need GoPro Cloud support (only Blober has it)
  • Want to download your full Google Photos library without Takeout
  • Transfer large volumes on a one-time license, not a recurring subscription
  • Value resumable workflows and metadata-based organization
  • Care about data sovereignty, with no third-party servers touching your files

For a closer look at the same tradeoffs against the raw CLI, read Blober vs rclone.

Download Blober at blober.io

Download All Your Box Files Without the ZIP-and-Time-Out Trap

Client deliveries over Box run into the same problem every time. The web downloader handles a single file fine, and the trouble starts the moment you select a folder.

Select more than one file in Box and it builds a server-side zip before it gives you anything. For a folder of video files that zip takes a long time to prepare, the browser download can stall or time out, and when it fails you start the whole batch again.[1] People who keep a Box account because a client or a school requires it hit this every time they need their own files back.

Box's Fair Use Policy caps bandwidth at about 1 TB per user per month. Exceed it and Box emails you, throttles the account for the rest of the month, and warns that it may permanently reduce your bandwidth or suspend the account.[2] For someone who only holds a Box account to receive client footage, a couple of large deliveries can use up the cap in one month.

The download method matters here. Pulling the same set of files twice because a zip timed out is double the bandwidth. So is downloading to your machine and then uploading again to the cloud where you actually want the files.

The desktop app that mounts Box as a drive has its own problems. Slowness that appears for no reason,[3] files that refuse to upload after an OS update, folders that will not open.[4] Relying on Box Drive to copy a large folder out can stall exactly when you need the data most.

Blober downloads files one at a time, over the API

Section titled "Blober downloads files one at a time, over the API"

Blober connects to Box through the API, not the web client and not Box Drive. That changes the download in a few concrete ways:

  • each file downloads on its own, so there is no server-side zip to wait for or retry;
  • progress is per file, and an interrupted task resumes without redoing what is already done;
  • you pick where the files land, which can be a local folder, an external drive, a NAS, or another cloud like Google Drive or pCloud, so you do not download once to your machine and upload again;
  • nothing depends on the state of the Box Drive app on your computer.

Connect Box as the source, choose a destination, select the folder, and run the workflow. A whole client's project is where the difference shows up immediately.

Why does Box zip my downloads?

The web interface batches multiple selected files into a server-side zip. It is convenient for a few documents and painful for a folder of large media files, because the zip preparation is slow and the download can time out.

What is the Box bandwidth cap?

Box's Fair Use Policy limits users to about 1 TB of bandwidth per month. Exceed it and Box can throttle the account for the remainder of the month and warn of further limits.[5] Downloading files once, deliberately, instead of retrying failed browser batches, keeps you inside it.

Do I need Box Drive to download my files?

No. Blober uses the Box API directly, so a slow or broken Box Drive does not block the transfer.

My Box account is free. Are there file size limits?

Free accounts cap individual files low (around 250 MB), and paid plans raise it, with Business listing 5 GB per file.[6] The limit that matters for a bulk download is on your plan's terms, not on Blober's side. Blober transfers the files your account can hold.

Can I download Box files straight to another cloud?

Yes. Pick any supported provider as the destination and Blober streams each file there, so the data does not stage as a full second copy on your disk.

What happens if the download drops halfway?

Resume the task. Completed files stay completed and the rest continue.

Blober is a one-time purchase with a lifetime license. No subscription, no transfer fees, no per-GB cap. It runs on Mac, Windows, and Linux.

Download Blober at blober.io

pCloud Uploads Are Slow. The Client, Not the Service, Is Usually Why.

Slow pCloud uploads are routinely blamed on pCloud. The bottleneck is usually the desktop client, not the service. There are two paths into pCloud, and they behave very differently.

Where the slowness usually comes from

Section titled "Where the slowness usually comes from"

The pCloud desktop client, the thing that mounts a P: drive and syncs folders, does a lot of work per file. It stages uploads through a local cache, so the final stage of an upload touches disk on your machine.[1] It serializes work, so small files queue up and take a long time.[2] And it does not always recover cleanly, so people end up reinstalling it and testing their connection while the real cause sits in the app.[3]

The same account and the same connection produce two very different results depending on which path the bytes take. The client path crawls. The API path runs at the speed your connection allows.[4]

That split is why the common workaround is to zip a folder first, upload the one big file, then unzip it in the cloud. It is a workaround for the client's behavior with many small files, not for the service.

pCloud exposes a normal API. Files upload over it with a single request, and the API does not carry the client's cache or serialization. Terabyte-scale libraries move over that path at full connection speed. It is the same route Blober takes.

Blober is a desktop app, but it does not use the pCloud client or the P: drive mount. It talks to the pCloud API directly, without the command line:

  • you pick the source and destination in a file browser instead of typing rclone flags;
  • each file uploads as its own request with progress shown;
  • a file that fails on a transient error (pCloud returns 4xxx for throttling and 5xxx for temporary failures)[5] is retried automatically;
  • completed files stay done when a task is interrupted, so a dropped connection does not restart the whole job.

The guide on connecting pCloud covers the authorization, which takes seconds because Blober ships the public app keys.

Two limits stay honest. If pCloud is throttling a specific account or a busy network path, no tool changes that, and Blober does not pretend otherwise. And pCloud has no resumable upload for a single large file, so a multi-gigabyte file that fails retries from the start of that file.[6] The difference is that the rest of the task is untouched and the same file does not fail silently in a queue while you wait.

If uploads from the pCloud client have been the problem, try a Blober workflow before you abandon the plan. The files you are trying to upload will tell you whether the service or the client was the slow part.

Does Blober make pCloud upload faster?

It removes the desktop client's cache and serialization, which is the reported bottleneck. It does not override server-side throttling, so results depend on the account and the connection.

Do I still need to zip folders before uploading?

No. Zipping was a workaround for the client. Blober sends the files as they are.

What happens if a file fails mid-upload?

Blober retries the file and keeps the task going. Files already uploaded stay uploaded. A single large file that fails starts over because pCloud has no resumable upload, but nothing else in the job is redone.

Does Blober use the pCloud Drive cache on my disk?

No. It streams through the API, so it does not fill the local cache the desktop client uses.

I have a lifetime plan. Does that matter for uploads?

No. Blober connects to the account either way.

Is this the same as rclone?

The upload path is the same idea. Blober is the part rclone is not: a visual app where you browse both sides, build the workflow, and watch progress without editing a config file.

Blober is a one-time purchase with a lifetime license. No subscription, no transfer fees, no per-GB cap. It runs on Mac, Windows, and Linux.

Download Blober at blober.io

Dropbox to Google Drive Without Downloading: What That Really Means

"Transfer without downloading" usually means "do not make me save the whole library to my disk and upload it again by hand."

It does not mean the file jumps from Dropbox into Google Drive without any computer reading and uploading the bytes.

The Google Drive API supports simple, multipart, and resumable uploads. Each method sends file data to Google in the request body. Google does not provide a Drive endpoint where a migration tool submits a Dropbox URL and asks Drive to fetch it.[1]

Some computer must read the Dropbox file and push those bytes to Drive.

The manual method stores a full local copy first:

Dropbox -> local disk -> Google Drive

It is easy to understand and uses no migration service. It also needs free disk space for the library and creates two separate jobs to monitor.

A desktop transfer can read part of a Dropbox file and upload that part to Drive while the rest is still arriving:

Dropbox -> your computer's memory -> Google Drive

The data uses your internet connection, but the app does not need to stage the entire library on disk. Blober uses this model.

A hosted migration service can run the same read-and-upload work on its own server:

Dropbox -> migration provider -> Google Drive

Your laptop does not need to stay online. The provider's server, credentials, transfer limits, and retention practices become part of the route.

Do not assume every hosted service stores a full second copy. Ask the provider. The relevant question is where the bytes and credentials pass, not whether the marketing page uses the phrase "cloud to cloud."

Streaming does not remove provider limits

Section titled "Streaming does not remove provider limits"

A streamed transfer still follows both APIs. Dropbox must allow the download. Google Drive must accept the upload. Rate limits, large-file rules, name conflicts, and provider-native records can still affect the result.

Google Docs, Sheets, and Slides need special handling in the reverse direction because they are not ordinary downloadable files in the same way as a PDF or JPEG.

A migration copies or moves a selected set. Two-way sync watches both providers and reconciles later changes.

If you need a one-time provider switch, use a migration workflow and keep the source until the destination is verified. If you need both accounts to mirror every future edit, choose a sync product and define conflict rules before enabling it.

  1. Transfer one representative folder.
  2. Check nested folders and filenames.
  3. Open small documents and large media files.
  4. Review failures and provider-native records.
  5. Copy the rest.
  6. Keep Dropbox unchanged until the Drive copy is trusted.

"Without downloading" can describe a useful convenience. The honest version should always say where the transfer runs and whether a full local copy is stored.

Blober streams each file from Dropbox through your computer to Google Drive without staging the whole library on disk. Your credentials stay local and no Blober server sits in the path.

Download Blober at blober.io

Consolidating Multiple Cloud Accounts Into One (Without Losing Folder Structure)

Merging Scattered Cloud Accounts, Done Right

Section titled "Merging Scattered Cloud Accounts, Done Right"

To consolidate files spread across several clouds, pick one destination, then copy each source into its own folder there so nothing collides, keeping the original folder tree intact. The hard part is not the copying. It is doing it without flattening your structure or creating a thousand duplicates.

Most people accumulate clouds by accident: a personal Dropbox, a work Google Drive, an old S3 bucket from a project, a free account that came with a device. Finding one file means remembering which silo it is in. Consolidating fixes that, if you do it carefully.

Before moving anything, choose where everything will live. Match it to how you work:

  • Google Drive or Dropbox if you mostly open and share documents and want easy collaboration.
  • A NAS or external drive if you want the files under your own roof and off a subscription.
  • Object storage like Backblaze B2 or Wasabi if it is mostly a large archive you rarely touch.

Pick one. Splitting the destination defeats the point.

Preserve the Structure, Avoid Collisions

Section titled "Preserve the Structure, Avoid Collisions"

This is where consolidations go wrong. Two sources both have a folder named "Projects," they merge, and now you cannot tell which file came from where. The fix is simple: give each source its own top-level folder in the destination, for example from-dropbox/, from-drive/, from-old-s3/, and copy each source's tree underneath. You keep every original path, and nothing overwrites anything.

Blober preserves folder structure when it copies, so the tree you had in each source lands intact in the destination. Point it at a source, choose the destination folder, and it recreates the hierarchy rather than dumping files into one flat pile.

If one of your sources is Google Drive, remember that Google Docs, Sheets, and Slides are not real files. They are pointers to Google's editor, and copying them without exporting leaves you with empty links. Decide how those should come across before you move them, so your consolidated library holds real documents, not dead shortcuts.

Run the moves source by source rather than all at once, so you can check each as it lands. When everything is in place, open a few files from each from-* folder and confirm the counts look right. Once you trust the consolidated copy, you can retire the old accounts on your own schedule.

How do I combine files from different cloud accounts? Choose one destination, then copy each source into its own folder there so nothing collides. A tool like Blober copies between accounts directly and keeps the folder structure intact.

Will consolidating clouds create duplicate files? Not if you give each source its own top-level folder in the destination. That keeps same-named folders from merging and overwriting each other.

Does moving files between clouds keep my folder structure? With Blober, yes. It recreates the source's folder tree in the destination rather than flattening everything into one folder.

What happens to Google Docs when I consolidate? Google Docs, Sheets, and Slides are editor links, not files. Export them to a real format as part of the move, or you will copy empty pointers.

Pull files from every cloud you use into one home, with the folder structure intact. Blober connects to a wide and growing range of cloud providers plus local storage and copies between them directly.

Download Blober at blober.io

How Freelancers Keep Client Files Organized Across Clouds

Freelancers end up with files scattered across every client's cloud plus their own, and the fix is a simple routine: work from your own organized storage, archive each project when it closes, and hand off a clean copy. The trick is making the moves between all those clouds painless enough that you actually keep up with them.

If you freelance, you know the mess. One client lives in Dropbox, another shares through Google Drive, a third dropped files in an S3 bucket two years ago. Your own work sits somewhere else again. Finding a single old deliverable means logging into four accounts.

1. Pull each project into your own organized storage. Whether that is a NAS, a drive, or your own cloud, give every client and project a consistent folder. You work from a structure you control, not from whatever each client happened to set up.

2. Archive when a project closes. Finished work does not need to sit in fast, active storage. Move it to a cheaper archive, object storage like Backblaze B2 or a NAS, and keep your working space lean. You still have it if the client comes back a year later.

3. Hand off a clean copy. When a project wraps, deliver a tidy copy into the client's cloud of choice, with the folder structure intact, so the handoff looks professional and nothing is missing.

Blober is the part that moves files between all these places without the download-and-reupload slog. It connects to every major cloud provider plus local storage, preserves folder structure, and copies directly between accounts. A few ways freelancers use it:

  • Pull a client's Dropbox or Drive into your own organized archive at the start of a job.
  • Move a finished project from active storage to a cheaper archive when it closes.
  • Deliver the final files into the client's cloud, structured the way they expect.

Because it runs on your machine rather than a third-party server, client files are not passing through someone else's relay, which matters when the work is under NDA.

Keep the Originals, Protect the Relationship

Section titled "Keep the Originals, Protect the Relationship"

One habit that saves freelancers repeatedly: keep your own archived copy of every project even after handoff. Clients lose files, ask for a re-send months later, or come back for a follow-up. An organized archive turns those moments into a two-minute favor instead of a scramble, and that reliability is part of why they rehire you.

How should freelancers organize files across multiple clients? Work from your own consistent folder structure rather than each client's setup. Pull projects into your storage, archive them when they close, and keep an organized copy of everything.

How do I move a client's files out of their Dropbox or Drive? With access to the account, Blober copies the files directly into your own storage, keeping the folder structure intact, without downloading and re-uploading.

Where should I archive finished freelance projects? Cheaper, durable storage such as a NAS or object storage like Backblaze B2. Keep active projects in fast storage and move closed ones to the archive.

Is it safe to move client files with a transfer tool? Blober runs on your own machine with your credentials, so files are not routed through a third-party server. That keeps client work out of an external relay.
Keep client work organized across every cloud you touch. Blober moves files directly between the major cloud providers and local storage, preserves folder structure, and runs on your own machine.

Download Blober at blober.io

Server-to-Server vs Download-and-Reupload: Why the Difference Decides Your Transfer

The Two Ways to Move Files Between Clouds

Section titled "The Two Ways to Move Files Between Clouds"

There are two ways to move files from one cloud to another. The common way downloads every file to your computer and uploads it again to the destination, which leaves a full copy on your disk and makes your machine the slow part. The other way, often called server-to-server or a direct transfer, streams the data between the two services without staging a full copy on your disk, so local disk space stops being the limit.

The difference is invisible for ten files and decisive for ten thousand. Understanding it saves you from a stalled migration halfway through a terabyte.

A Quick Word on "Server-to-Server"

Section titled "A Quick Word on "Server-to-Server""

The label is looser than it sounds. A literal server-to-server copy, where the two providers hand the bytes straight to each other and nothing passes through you, only happens in narrow cases: within a single provider, or between two services that specifically support it. What a desktop tool like Blober gives you instead is a streamed copy. The data flows through the app rather than being staged on your disk, so disk space stops being the limit, though the bytes still travel over your own connection. The win is skipping the second full copy, not escaping your network.

Download-and-Reupload, and Where It Breaks

Section titled "Download-and-Reupload, and Where It Breaks"

Drag a cloud folder to your desktop and back into another service, or let a sync client mirror it locally, and you are doing a download-and-reupload. It works, and for small jobs it is fine.

It breaks in three ways at scale. First, disk: a 2 TB move needs 2 TB of free space, which most laptops do not have. Second, time: every byte makes two trips through your machine. Third, fragility: a sync client chewing through thousands of files will choke, duplicate, or stall, and you babysit it.

A direct transfer connects to both services and streams data from the source to the destination without writing a full local copy to disk. The practical wins:

  • Disk space stops being the limit. You can move far more than your free disk, because the files are not staged there.
  • It runs in parallel. Many files move at once instead of one slow queue, which is what actually makes a big library finish.
  • It resumes where it stopped. If a transfer drops partway, resuming it continues with only the files that did not make it, instead of starting the whole job over.

A direct transfer is not magic, and it helps to know the real boundaries. The data still travels over the connection of wherever the tool runs, so your bandwidth is part of the equation. Egress, what a source provider charges to read your data out, still applies regardless of the tool, so plan the move as one clean pass rather than repeated pulls. What you avoid is the second full copy on your disk and the double handling that comes with it.

Where Your Data Goes (and Does Not)

Section titled "Where Your Data Goes (and Does Not)"

There is a second axis worth separating from disk: who handles your data. Some cloud-to-cloud services route your files through their own servers, which means a third party touches them. Blober is a desktop app, so it runs on your machine with your credentials, and your data is not parked on someone else's server in the middle. You get the direct-transfer benefit without handing your files to a relay.

What is a server-to-server transfer? Strictly, it means the two providers move the data between themselves so it never touches your machine, which only works in specific cases. In practice, most "server-to-server" tools stream the data through the tool instead. Blober does this from your own machine: the files are never staged as a full copy on your disk, though they do travel over your connection.

Do I have to download files to move them between clouds? Not with a direct-transfer tool. Blober streams between the source and destination without writing a full copy to your disk, so disk space is not the limit.

Why is my cloud-to-cloud transfer so slow? A download-and-reupload sends every byte through your machine twice and often runs one file at a time. A parallel direct transfer keeps many files moving at once, which is far faster for large libraries.

Does a direct transfer avoid egress fees? No. Egress is charged by the source provider for reading your data out, no matter which tool you use. A direct transfer avoids the wasted second trip and the local copy, not the provider's egress.

Move large libraries between clouds without filling your disk. Blober streams files directly between a broad, growing set of cloud providers and local storage, in parallel, and runs on your machine rather than a third-party server.

Download Blober at blober.io

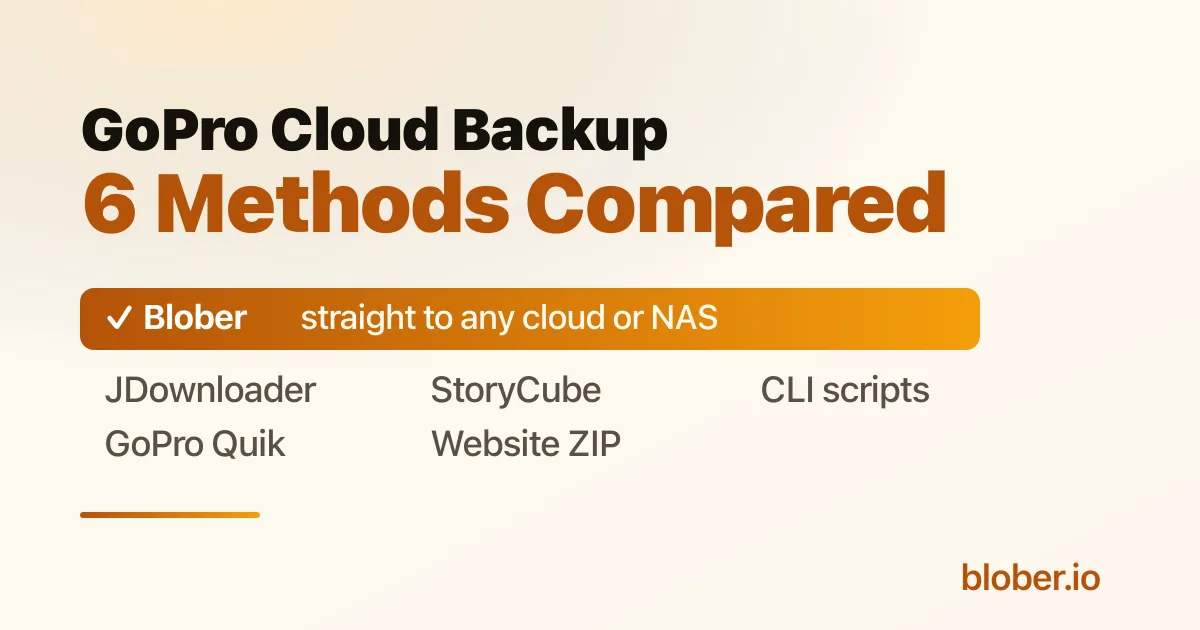
GoPro Cloud Backup: 6 Methods Compared (and the Best for Each Job)

Backing Up a Full GoPro Cloud Library

Section titled "Backing Up a Full GoPro Cloud Library"

The problem: GoPro Cloud has no "Download All" button. The website lets you grab about 25 files at a time as a ZIP, and large batches often stall. For a year of 5.3K footage, clicking through 25-file batches is not a real plan.

The short answer: there are five honest ways to get your whole library out, and they split into two camps. Most of them download your footage to your computer first and leave the rest to you. One of them, Blober, moves the library straight from GoPro Cloud to another cloud or a NAS with no download-and-reupload round trip. Which one is "best" depends on where you want the footage to land. Below is each option, what it does well, and where it slows down.

Why Bulk Download Is Hard in the First Place

Section titled "Why Bulk Download Is Hard in the First Place"

GoPro Cloud is built around the capture-and-edit loop, not around handing you your raw archive. Three facts shape every method here:

  • The web portal caps batch downloads at roughly 25 files, bundled into a ZIP. Big batches time out, and you repeat the process by hand.
  • There is no public API and no official cloud-to-cloud export.
  • Your library is tied to the subscription. Cancel it and access ends, so a copy you own matters.

Keep those in mind and the trade-offs between the methods make sense.

Method 1: The GoPro Website (Manual ZIP Download)

Section titled "Method 1: The GoPro Website (Manual ZIP Download)"

How it works: sign in at gopro.com, open your media library, select up to 25 items, and download the batch as a ZIP. Repeat until you have everything.

Good for: a small number of clips, or grabbing one shoot. It is official, free with your subscription, and needs nothing installed.

Watch for: the 25-file cap turns a large library into dozens of manual rounds. Large ZIPs can fail or time out, and you only find out after the wait. Everything lands on your local disk, so getting it into another cloud later is a separate job.

Method 2: The GoPro Quik App (Phone or Tablet)

Section titled "Method 2: The GoPro Quik App (Phone or Tablet)"

How it works: open Quik, go to Media then Cloud, select your files (you can select all), tap share, and save them to your device. From there you move them off the phone.

Good for: people who mostly shoot and review on a phone and only need a modest number of clips on the camera roll. Official and free with the subscription.

Watch for: the files land in phone storage first, which fills fast with 5.3K video, and you still have to move them to a computer or another cloud afterward. It runs one device at a time and is slow over a phone connection. Not practical for hundreds of gigabytes.

Method 3: ASUS StoryCube (Windows)

Section titled "Method 3: ASUS StoryCube (Windows)"

How it works: StoryCube is an ASUS-engineered, AI-powered media manager. As of October 2025 it is the first Windows app to connect to GoPro Cloud, including .360 footage. It auto-organizes clips by activity, previews and reframes GoPro MAX footage, and lets you drag clips into editors like Adobe Premiere Pro or CapCut.

Good for: Windows creators who want to organize and edit, especially 360 video. The AI sorting and 360 reframing are genuinely useful, and ASUS laptop buyers may get a GoPro Premium subscription included. If your goal is to edit on a PC, this is a strong, official option.

Watch for: it runs on Windows only, so Mac and Linux users are out. It is built to organize and edit on your machine, not to migrate your library into Dropbox, Google Drive, a NAS, or object storage. As a back-up-to-anywhere tool, that is the gap.

Method 4: JDownloader 2 (Free Download Manager)

Section titled "Method 4: JDownloader 2 (Free Download Manager)"

How it works: JDownloader is a free, open-source download manager with a GoPro Plus Media Library plugin. You add your GoPro account, paste the media-library link, and it scans your whole library and batch-downloads it to a local folder with no 25-file cap.

Good for: a free way to pull your entire library down to your computer in one pass. It is open source, cross-platform, and removes the batch limit. If local disk is your destination and you do not mind a busy interface, it does the job at no cost.

Watch for: you type your GoPro password directly into the app's account manager, and an active subscription is required. It downloads to local storage only, so footage destined for Dropbox or a NAS still needs a manual upload after. The general-purpose interface takes a little learning.

Method 5: Open-Source CLI Scripts (e.g. GoPro Plus Downloader)

Section titled "Method 5: Open-Source CLI Scripts (e.g. GoPro Plus Downloader)"

How it works: community projects such as the GoPro Plus Downloader run from the command line or Docker. You supply an auth token and user ID pulled from your browser session, and the script pages through your library and downloads everything, which suits unattended NAS and Synology jobs.

Good for: developers and homelab users who like automation. It is free, open source, has no 25-file limit, and drops cleanly into a Docker or NAS routine.

Watch for: you extract a JWT token and user ID from your browser dev tools, and the token expires, so you redo it now and then. It is command-line first with no graphical browser, and it downloads to a local volume, so onward delivery to another cloud is on you. Maintenance follows the project's author.

Method 6: Blober (Straight to Another Cloud, NAS, or Local)

Section titled "Method 6: Blober (Straight to Another Cloud, NAS, or Local)"

How it works: Blober is a desktop app for Mac, Windows, and Linux that connects to GoPro Cloud as a first-class provider. You sign in through a normal browser login, Blober captures the session, and you get a visual file browser of your whole library. Select one file, a folder, or your entire storage, choose a destination, and run.

Here is what sets it apart from every method above: the destination can be another cloud or a NAS, and the transfer goes directly there. Blober moves GoPro Cloud footage to Dropbox, Google Drive, Backblaze B2, Wasabi, AWS S3, Cloudflare R2, Azure Blob, or DigitalOcean Spaces, as well as to a local drive or a Synology or QNAP share. The files never have to be downloaded to your computer and re-uploaded by hand.

Good for: backing up or migrating a full library to storage you own, or to another cloud, in one step. The parts that matter:

  • No 25-file limit. Transfer 10 files or 10,000 in a single run.
  • Direct cloud-to-cloud movement, so there is no download-then-reupload round trip.
  • Parallel transfers that keep your connection busy, roughly four times faster than GoPro's one-at-a-time app, with auto-resume if the connection drops.
  • A browser-based login, so your credentials are not stored or sent to any server. Everything runs on your machine.
  • Path templates like /{camera_model}/{capture_date}/{filename} that turn a flat dump into a tidy archive.
  • Full original quality, with no re-encoding.

Watch for: Blober is a one-time purchase rather than free. It runs workflows on demand, so it is a refresh you trigger yourself, not a scheduled background sync. If your only goal is a single local copy and cost is the deciding factor, the free tools above also work.

Move your GoPro Cloud library straight to Dropbox, a NAS, or Backblaze B2. Download Blober.

MethodPlatformBeats the 25-file capStraight to another cloud or NASSetupCost
GoPro website (ZIP)Any browserNoNo (local ZIP)NoneFree with subscription
GoPro Quik appiOS, AndroidYesNo (via phone)NoneFree with subscription
ASUS StoryCubeWindows onlyYesNo (organize and edit)App installFree, ASUS-tied
JDownloader 2Win, Mac, LinuxYesNo (local only)ModerateFree
CLI scriptsDocker, CLIYesNo (local only)TechnicalFree
BloberWin, Mac, LinuxYesYesApp installOne-time

Prices and features change, so confirm current details with each provider.

  • You want a few clips fast with nothing installed: the GoPro website is fine.
  • You live in the Quik app and only need some footage on your phone: use Quik.
  • You are on Windows and mainly want to organize and edit, especially 360: StoryCube is a great fit.
  • You want a free full download to your computer and do not mind setup: JDownloader, or a CLI script if you automate a NAS.
  • You want your whole library on another cloud, a NAS, or cheap object storage in one step: Blober, because it is the only option that moves it there directly.

The honest framing: if local disk is your final destination and free is the priority, the free tools are good, and you should use them. The moment your destination is another cloud or a NAS, every other method makes you download first and upload second. That is the step Blober removes.

A Direct Transfer, Start to Finish

Section titled "A Direct Transfer, Start to Finish"
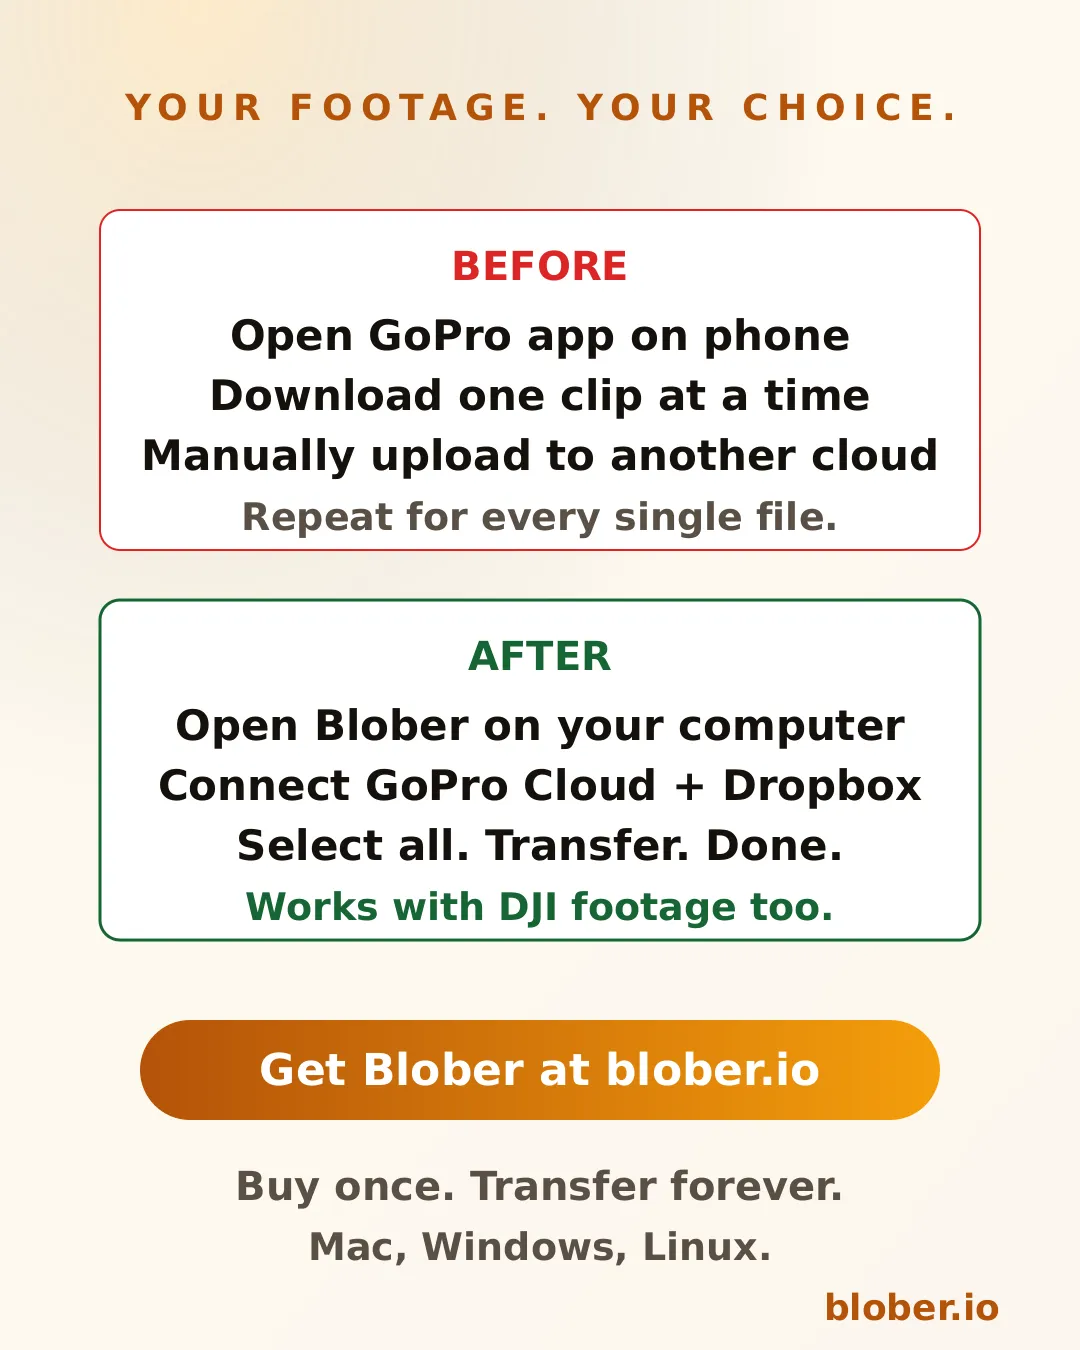
  1. Open Blober and create a workflow. Pick GoPro as the source and click the GoPro login. Sign in, and Blober captures your session.
  2. Browse your library and tick what you want, or select the entire storage.
  3. Choose a destination: Dropbox, Google Drive, Backblaze B2, a NAS, or any supported provider.
  4. Optionally set a path template so files arrive organized by camera and date.
  5. Run it. Watch live progress, and let auto-resume handle any dropouts.

For a large archive you can start it and leave it running overnight.

Can I download my entire GoPro library at once? Not through the GoPro website, which limits you to roughly 25 files per ZIP. JDownloader, CLI scripts, and Blober all remove that cap. Blober also sends the library straight to another cloud or a NAS instead of only to your local disk.

How do I move GoPro Cloud footage to another cloud? Blober transfers GoPro Cloud directly to Dropbox, Google Drive, Backblaze B2, Wasabi, AWS S3, Cloudflare R2, Azure Blob, or DigitalOcean Spaces, with no download-and-reupload step.

What is the best way to download GoPro Cloud videos for free? JDownloader's GoPro Plus plugin, or an open-source CLI script. Both pull your full library to local storage at no cost. You handle any later upload yourself.

Will I lose my footage if I cancel GoPro? Access to the cloud library ends when the subscription ends, and GoPro does not publish how long files are kept afterward. Back up everything before you cancel. See How to Cancel GoPro Plus Without Losing Your Footage.

Does anything handle 360 footage? StoryCube previews and reframes GoPro MAX 360 footage on Windows. Blober transfers the .360 files themselves to your chosen destination at full quality.

Is the browser login safe? Blober uses GoPro's own browser login and keeps the session on your machine. Your password is not stored or sent to any server. The session lasts about 20 hours, then you sign in again.

Keep a copy of your footage on storage you control. Blober is the only app that moves your GoPro Cloud library straight to another cloud, a NAS, or a local drive, and it is a one-time purchase with no subscription and no per-GB fees.

Download Blober at blober.io

Dropbox and Google Drive: Sync, Transfer, or Migrate?

Sync, Transfer, or Migrate: Which One Do You Need?

Section titled "Sync, Transfer, or Migrate: Which One Do You Need?"

The problem: "sync Dropbox to Google Drive," "transfer Dropbox to Google Drive," and "migrate Dropbox to Google Drive" sound like the same task, so people pick the wrong tool and end up with duplicates, a full hard drive, or a subscription they did not need.

The short answer: they are three different jobs. Pick by how often the files need to move.

You want to...That is calledHow often it runsRight tool
Move everything once and leave Dropbox behindMigrateOne timeA direct transfer app like Blober
Keep both accounts and copy new files over now and thenTransfer / incremental refreshOn demand, repeatedBlober, when the receiving copy is a NAS, local drive, or Azure Blob
Keep both accounts mirrored automatically, in the backgroundLive syncContinuous, both directionsA dedicated sync service (see below)

Most people who type "sync Dropbox to Google Drive" actually want the first or second one. They are switching providers or making a backup copy, not running a permanent mirror. If that is you, a migration is simpler, cheaper, and leaves nothing running in the background.

A migration moves your files from Dropbox to Google Drive once. After it finishes, you verify everything arrived, then cancel or downgrade Dropbox. There is no ongoing connection.

This is the right choice when:

  • Your company moved to Google Workspace and Dropbox is being retired
  • You are consolidating two accounts into one
  • You want your files out of a provider you are leaving

The fastest way to do this without filling your local disk is a direct cloud-to-cloud transfer. Blober streams each file from Dropbox straight to Google Drive, so you do not download the whole library to your computer first. Step-by-step guides:

Transfer (Incremental Refresh): Copy New Files When You Want

Section titled "Transfer (Incremental Refresh): Copy New Files When You Want"

Sometimes you keep using both accounts but want one to receive copies of the other. For example, you work in Dropbox but keep a copy of finished projects in Google Drive.

Blober handles the repeat-copy side with saved workflows, but only when the receiving destination can tell a new file from an existing one. Google Drive permits multiple files with the same name, so re-running a workflow into the same Google Drive folder copies files again instead of skipping them. For a copy that refreshes cleanly, point the workflow at a NAS, a local drive, or Azure Blob: on those destinations a re-run adds only the files that are not there yet. If the second copy must live in Google Drive, select only the folders or files you added since the last run and copy those.

What this is not: it does not watch your folders and copy changes the instant they happen, and it does not run on a schedule by itself. You start each run. For many people that is enough, because they refresh the copy once a week or after a project wraps, not every minute.

Live Sync: When You Genuinely Need a Background Mirror

Section titled "Live Sync: When You Genuinely Need a Background Mirror"

Live sync keeps two locations matched automatically and continuously. Add a file on one side and it appears on the other within minutes, without anyone pressing a button. True two-way sync also handles edits and deletions in both directions.

Blober does not do continuous background sync today. Two-way sync is on the roadmap, but right now Blober is built for migrations and on-demand transfers, not always-on mirroring. If what you need is a real-time mirror between Dropbox and Google Drive, be honest with yourself about that and use a tool built for it:

  • Dropbox and Google Drive do not sync to each other natively. Neither company offers a built-in bridge to the other.
  • Dedicated sync services (for example MultCloud or similar cloud-to-cloud sync tools) can run scheduled or near-real-time syncs between the two. They work, but they route your files through their servers, and they charge a recurring subscription, often with a monthly data cap.

If you only need the mirror for a short project, a sync service on a free or trial tier may cover it. If you need it forever, weigh the ongoing cost against simply doing a clean migration and standardizing on one provider.

"Integration" Usually Means Something Else

Section titled ""Integration" Usually Means Something Else"

A lot of "Dropbox Google Drive integration" searches are really about connecting Dropbox or Drive to a third app: pulling a Dropbox file into Google Sheets, or attaching Drive files in another service. That is an app connector or an automation tool (such as a no-code automation platform), not a storage transfer. If that is what you are after, you do not need a migration tool at all. If you want the actual files to live in the other service, you are back to migrate or transfer above.

  • Moving off one provider for good? Migrate. Run a one-time transfer, verify, then cancel the old account.
  • Keeping both but want copies kept fresh? Keep the receiving copy on a NAS, local drive, or Azure Blob and re-run a Blober workflow, which skips what is already there.
  • Need changes mirrored automatically, both ways, all the time? Use a dedicated live-sync service, and accept the subscription that comes with it.

For the first two, here is the fastest path that does not fill your disk or charge per gigabyte: move Dropbox to Google Drive with a direct transfer.

Can I auto-sync Dropbox to Google Drive? Not with Blober today, and re-running into Google Drive is not the path either, because Google Drive allows duplicate names and a fresh run copies files again. Blober runs migrations and on-demand transfers, and re-runs skip what is already there when the receiving copy is a NAS, local drive, or Azure Blob. For continuous background sync in both directions you need a dedicated sync service. Two-way sync is on Blober's roadmap, but it is not live yet.

Is there a Dropbox to Google Drive migration tool that does not download everything first? Yes. Blober streams each file from Dropbox to Google Drive through your computer's memory, so you do not need free disk space equal to your whole library. Nothing is saved to your local disk during the transfer.

Will transferring create duplicates? On a first run, every file is copied once. Google Drive allows multiple files with the same name, so re-running into the same Google Drive folder adds a copy of every file. To refresh a copy without duplicates, keep it on a NAS, local drive, or Azure Blob, where a Blober re-run skips what is already there, or resume the same task after an interruption.

Can I move just one folder instead of my whole account? Yes. You browse your Dropbox in Blober and select a single folder, several folders, or everything. The choice is yours per workflow.

Do I need to keep Blober running for the transfer to continue? The transfer runs while Blober is open. If your connection drops, it resumes from where it stopped. Once a migration finishes, you can close the app. There is no background service left running.

For a clean one-time move or a repeatable copy between Dropbox and Google Drive, Blober is a one-time purchase. No subscription, no per-GB fees, no background service.

Download Blober at blober.io

How to Cancel GoPro Plus Without Losing Your Footage

GoPro Plus (now sold as GoPro Premium) costs $59.99/year. It gives you unlimited cloud storage for your GoPro footage, camera replacement coverage, and discounts on accessories. For active GoPro users, that's a reasonable deal.

The problem shows up when you want to leave.

GoPro Plus auto-uploads your footage to GoPro Cloud. Over time, you might have hundreds of gigabytes sitting there. When you cancel, you lose access to those files. GoPro does not give you a bulk export tool, there's no API, and the web interface lets you download at most 25 files at a time in zip bundles.

If you have 500 videos from two years of travel, surfing, or family events, downloading them 25 at a time is not practical. And the zip downloads often fail on larger batches.

When your GoPro Plus subscription ends:

  • You can no longer view or access your cloud footage
  • Your files remain on GoPro's servers for a limited time (the exact retention policy is not published)
  • No third-party tool has API access to help you
  • You lose camera replacement coverage and store discounts

The footage does not transfer anywhere. It sits in GoPro's cloud until they delete it. If you did not download it before cancelling, it may be gone.

How to Save Everything Before Cancelling

Section titled "How to Save Everything Before Cancelling"

Blober is the only desktop app that connects to GoPro Cloud. It was built specifically because no other tool can access GoPro's proprietary storage system.

Step 1: Download Blober and Connect GoPro Cloud

Section titled "Step 1: Download Blober and Connect GoPro Cloud"

Install Blober on your Mac, Windows, or Linux computer. Add GoPro Cloud as a provider and sign in with your GoPro account. Blober captures your session and gives you a visual file browser showing your entire cloud library.

Step 2: Choose Where to Save Your Footage

Section titled "Step 2: Choose Where to Save Your Footage"

You have several options:

Local hard drive or SSD The simplest option. Select all your GoPro Cloud files, pick a local folder as the destination, and transfer. Your footage downloads to your computer at full quality.

External drive or NAS If your internal drive does not have enough space, point Blober to an external drive, SD card, or network-attached storage (Synology, QNAP, etc.).

Backblaze B2 (cheapest cloud option) If you want your footage in the cloud but do not want to pay $59.99/year, Backblaze B2 stores data at $6.95/TB/month. For 1 TB of GoPro footage, that is about $83/year with no subscription lock-in, no download limits, and full API access.

Dropbox, Google Drive, or AWS S3 If you already use another cloud provider, Blober can transfer your GoPro footage directly there. No double-download needed.

Select your files (or select all), choose the destination, and click run. Blober transfers with parallel streams, auto-resume on failure, and progress tracking. For large libraries, you can leave it running overnight.

Once your footage is safely stored elsewhere, cancel your subscription through the GoPro app or website. Your files are yours, on storage you control.

Cost Comparison: GoPro Plus vs Alternatives

Section titled "Cost Comparison: GoPro Plus vs Alternatives"
Storage OptionCost (1 TB/year)Download LimitsAPI Access
GoPro Plus$59.99/year25 files at a timeNone
Backblaze B2~$83/yearUnlimitedS3-compatible
Wasabi~$84/yearUnlimitedS3-compatible
Local hard driveOne-time ~$40 (4TB HDD)N/AN/A
Google Drive (2TB)$100/yearUnlimitedYes

GoPro Plus is actually the cheapest cloud option per TB, but it comes with restrictions that the others do not have: no bulk downloads, no third-party tool access, and your footage is inaccessible the moment you cancel.

This is not a case of "just use rclone" or "try MultCloud." GoPro Cloud is a proprietary system with no published API. No transfer tool, CLI, or cloud sync service has ever supported it.

  • rclone: No GoPro backend. Never had one.
  • MultCloud: Does not list GoPro Cloud as a provider.
  • Flexify: No GoPro support.
  • CloudHQ, Mover, Movebot: None support GoPro Cloud.

Blober connects to GoPro Cloud through the same authentication path as GoPro's own web app. It is the only third-party tool that can read, download, and transfer your GoPro Cloud files.

What If You Want to Keep GoPro Cloud?

Section titled "What If You Want to Keep GoPro Cloud?"

Not everyone needs to cancel. If you shoot regularly and use GoPro's highlight tools, Plus is a solid deal. But even if you keep your subscription, having a backup somewhere else is just good practice.

Use Blober to mirror your GoPro Cloud to a local drive or Backblaze B2 as a safety net. That way, if GoPro changes their terms, raises prices, or has a service issue, your footage is protected.

Blober is a one-time purchase with a lifetime license. No subscription, no per-GB fees.

Download Blober at blober.io

How to Migrate from DigitalOcean Spaces to AWS S3

Growing Out of DigitalOcean Spaces

Section titled "Growing Out of DigitalOcean Spaces"

DigitalOcean Spaces is a good starting point for object storage. It is simple, affordable ($5/month for 250 GB + 1 TB transfer), and S3-compatible. For small to mid-size projects, it does the job.

But as your storage needs grow, you run into limitations:

  • Region constraints. Spaces are region-scoped. Each region only sees its own Spaces. Cross-region replication is not available.
  • No storage tiers. Everything is stored at the same tier. There is no equivalent to S3's Glacier or Intelligent-Tiering for cost optimization.
  • Limited ecosystem. AWS S3 integrates with hundreds of services: Lambda, CloudFront, Athena, Step Functions, SageMaker. DigitalOcean's ecosystem is smaller.
  • Bandwidth limits. The included 1 TB transfer can be burned through quickly on busy applications.

When a project outgrows Spaces, AWS S3 is the most common destination.

DigitalOcean runs Spaces across 7 regions: NYC3, SFO3, AMS3, SGP1, FRA1, SYD1, and BLR1. If you have Spaces in multiple regions, you need to handle each region separately.

Blober detects all your Spaces across all DigitalOcean regions automatically. When you connect your DigitalOcean account, Blober probes all 7 regions in parallel and presents a unified view of all your Spaces. You do not need to configure each region separately.

DigitalOcean recently introduced cold storage tiers for Spaces. Blober detects whether a Space is using Standard or Cold storage and flags it accordingly. This helps you make informed decisions about which S3 storage class to target.

Step 1: Connect DigitalOcean Spaces

Section titled "Step 1: Connect DigitalOcean Spaces"

Add DigitalOcean Spaces as a provider in Blober. You can use either:

  • S3-compatible credentials (Access Key + Secret Key) for basic access
  • Personal Access Token for richer bucket listing with project metadata

Blober discovers all your Spaces across all regions.

Add AWS S3 with your Access Key ID, Secret Access Key, and preferred region. Blober lists your S3 buckets.

Create a workflow with DigitalOcean as the source and S3 as the destination. Browse your Spaces, select files or entire Spaces, and choose the target S3 bucket and storage class.

Options for the destination:

  • Storage class: Standard, Intelligent-Tiering, Standard-IA, Glacier Instant Retrieval, Glacier, or Deep Archive
  • Target bucket: Any existing S3 bucket (or create one in the AWS console first)

Blober handles the transfer with parallel multipart uploads on both sides. S3-to-S3-compatible transfers are efficient because both services speak the same protocol.

DigitalOcean SpacesAWS S3 StandardAWS S3 Standard-IA
Storage (1 TB)$5/mo (250 GB included) + $20/mo extra$23/mo$12.50/mo
Bandwidth (1 TB)Included$90/mo$90/mo
PUT requests (100K)$0.50$0.50$1.00

DigitalOcean is cheaper for simple, low-traffic use cases. S3 is more cost-effective at scale with its tiering options, especially if you use Intelligent-Tiering or Glacier for archival data.

One-time purchase. Transfer as much as you need.

Download Blober at blober.io

How to Migrate from Google Drive to Backblaze B2

Why Move from Google Drive to Backblaze B2?

Section titled "Why Move from Google Drive to Backblaze B2?"

Google Drive is a collaboration tool with storage built in. Backblaze B2 is pure storage built for scale. The reasons people move between them usually come down to one or more of these:

  • Cost. Google One charges $100/year for 2 TB. Backblaze B2 charges $6.95/TB/month, but for archival or backup data you access rarely, the math works differently. If you are storing 5+ TB of media, raw footage, or project archives, B2 can be significantly cheaper depending on your access patterns.
  • Control. B2 gives you S3-compatible API access, which means you can integrate it with backup tools, CDNs, media workflows, and custom applications. Google Drive's API is more limited for bulk operations.
  • Redundancy. Keeping a copy of your Google Drive data in B2 means you are not dependent on a single provider. If Google changes pricing, restricts your account, or has an outage, your files are safe elsewhere.

Google Drive stores native files (Docs, Sheets, Slides) as cloud-only application states, not as downloadable files. When you need them outside of Google, they must be converted to Office formats first.

Google Takeout can export your Drive, but it takes hours, produces fragmented zip archives, and flattens your folder structure. For a migration to B2 specifically, Takeout is especially awkward because you would need to download everything locally, extract it, then upload it to B2 using a separate tool.

Blober connects to both Google Drive and Backblaze B2. It handles the tricky parts automatically:

  • Google Docs become .docx files during transfer
  • Google Sheets become .xlsx files during transfer
  • Google Slides become .pptx files during transfer
  • Regular files (photos, videos, PDFs) transfer as-is
  • Folder structure is preserved in your B2 bucket
  • Shared files are accessible through a "Shared with me" virtual folder
  1. Connect Google Drive: Add Google Drive as a provider in Blober. OAuth login through your browser.
  2. Connect Backblaze B2: Add B2 with your Application Key ID and Application Key. Blober auto-detects your bucket regions.
  3. Create a workflow: Set Google Drive as source, B2 as destination. Browse and select files or folders.
  4. Run: Blober streams files from Google Drive to B2 through your machine. No local storage needed for intermediate files.
Google One (2 TB)Backblaze B2 (2 TB)
Monthly$8.33~$14
Annual$100~$167
5 TB$25/month (Google One Premium)~$35/month
10 TB+Not available on consumer plans~$70/month
EgressFree (via Drive sync/download)Free up to 3x stored

For small amounts of active data, Google Drive is the better deal. For large archives, backups, and media libraries that you rarely access, B2's pay-for-what-you-use model wins.

Many people do not fully leave Google Drive. Instead, they keep it for active collaboration (shared documents, team folders) and move everything else to B2:

  • Current projects stay in Google Drive for real-time editing
  • Completed projects, old photos, and archives go to Backblaze B2
  • Blober handles the transfer once, then you adjust your Google storage plan

This hybrid approach gives you the best of both: Google's collaboration features for active work and B2's affordable storage for everything else.

One-time purchase. No subscription, no per-GB fees.

Download Blober at blober.io

How to Migrate Google Drive Files to AWS S3

Google Drive works great as a collaboration tool. Real-time editing, sharing links, 15 GB free storage. But when your data grows past a few hundred gigabytes, or when you need programmatic access, versioning policies, or storage tiering, Google Drive starts showing its limits.

AWS S3 is built for exactly those use cases. It handles petabytes, offers multiple storage classes, integrates with hundreds of AWS services, and gives you full API control. The gap between Google Drive and S3 is not about which is "better." It is about what each one is built for.

Moving from one to the other is where things get complicated.

Google Drive stores some files as native Google formats: Google Docs, Google Sheets, Google Slides. These are not actual files on disk. They are application states stored in Google's cloud. You cannot download a "Google Doc file" the way you download a PDF.

When you export from Google Drive (or use Google Takeout), these files get converted to their Microsoft Office equivalents: DOCX, XLSX, PPTX. But this conversion is often inconsistent with Takeout, and the folder structure gets flattened.

How Blober Handles Google Drive to S3

Section titled "How Blober Handles Google Drive to S3"

Blober connects to Google Drive via OAuth and to AWS S3 via access keys. It solves the two biggest pain points of this migration:

When Blober encounters a Google Doc, Sheet, or Slide, it automatically converts it to the corresponding Office format (DOCX, XLSX, PPTX) during transfer. This happens on the fly. You do not need to manually export anything.

The converted files land in your S3 bucket in a usable format that any application can read.

Blober recreates your Google Drive folder hierarchy in S3. If you have Work/Projects/2025/Proposal.docx in Google Drive, it becomes Work/Projects/2025/Proposal.docx in your S3 bucket. No flat dumps, no reorganization needed.

Google Drive has a "Shared with me" section that is separate from your main drive. Blober shows this as a browsable folder, so you can include shared files in your migration if needed.

  1. Connect Google Drive: Add Google Drive as a provider. Blober opens a browser window for OAuth authorization. Sign in and grant access.
  2. Connect AWS S3: Add S3 with your Access Key ID, Secret Access Key, and region.
  3. Create a workflow: Set Google Drive as source, S3 as destination. Browse your Drive, select files and folders.
  4. Choose S3 options: Pick the storage class (Standard, Intelligent-Tiering, Standard-IA, Glacier, etc.) and target bucket.
  5. Run: Blober transfers with progress tracking and auto-resume.

One advantage of moving to S3 is choosing the right storage class for your data:

Storage ClassUse CaseCost (per TB/mo)
StandardFrequently accessed files~$23
Intelligent-TieringUnknown access patterns~$23 (auto-optimizes)
Standard-IAInfrequent access, fast retrieval~$12.50
Glacier InstantArchive with instant access~$4
Glacier Deep ArchiveLong-term cold storage~$1

With Blober, you set the storage class when creating the workflow. All transferred files land on the tier you choose. If you want different tiers for different data, create multiple workflows.

  • Startups growing out of Google Workspace who need infrastructure-grade storage
  • Data teams that need to run analytics on files currently in Google Drive
  • Companies consolidating storage to AWS for compliance or integration reasons
  • Developers who want S3's API and event-driven architecture instead of Google Drive's sync model

One-time purchase. No per-GB fees, no subscription.

Download Blober at blober.io

How to Move Data from Azure Blob Storage to Cloudflare R2

Azure Blob Storage charges $0.087 per GB for data leaving their network. If you serve 1 TB of files per month to users or external systems, that is $87/month in egress alone, on top of storage costs.

Cloudflare R2 charges $0 for egress. Zero. Nothing. You pay for storage ($0.015/GB/month) and operations, but downloading data from R2 is free. For applications that serve files to users, APIs, CDNs, or other services, switching to R2 can cut your cloud bill significantly.

The most common reason is cost. If your Azure Blob account is mostly used for serving static assets, media files, backups that get restored frequently, or API responses, the egress fees can dwarf your storage costs. R2 removes that variable entirely.

Another reason is simplicity. R2 is S3-compatible, meaning any tool or SDK that works with S3 works with R2. If your application already uses the S3 API (many do, even on Azure), the migration is mostly about moving data and updating the endpoint.

Blober supports both Azure Blob Storage and Cloudflare R2 as native providers. The transfer works like any other Blober workflow: connect both accounts, select files, run.

Step 1: Connect Azure Blob Storage

Section titled "Step 1: Connect Azure Blob Storage"

Add Azure Blob as a provider with your connection string. Blober lists your containers and their contents.

Add Cloudflare R2 as a provider. You will need your Account ID along with an S3-compatible Access Key ID and Secret Access Key from the Cloudflare dashboard. If you also provide a Cloudflare API token, Blober can list your buckets through Cloudflare's native API with server-side pagination, which is more efficient for accounts with many buckets.

Set Azure Blob as the source and Cloudflare R2 as the destination. Browse your Azure containers, select the files or containers you want to migrate, and choose the destination bucket in R2.

Blober streams data from Azure through your machine to R2. It uses parallel uploads on both ends, so large files move efficiently. If the transfer is interrupted, Blober resumes from where it stopped.

What About Azure Egress Fees During Migration?

Section titled "What About Azure Egress Fees During Migration?"

This is the unavoidable part. Moving data out of Azure means paying egress. For the initial migration, you will pay $0.087/GB to get your data from Azure to your machine (where Blober runs), and from there to R2.

For 1 TB, that is about $87 in egress fees. That is a one-time cost. After the migration, your ongoing egress from R2 is $0.

If you were paying $87/month in Azure egress, the migration pays for itself in the first month.

Data SizeAzure Egress Cost (one-time)Monthly Savings on R2
500 GB~$43Depends on egress pattern
1 TB~$87Up to $87/month
5 TB~$435Up to $435/month
10 TB~$870Up to $870/month

This matters because your application code likely uses the AWS SDK or an S3-compatible client. After migrating data to R2, updating your app is often as simple as changing the endpoint URL and credentials. No SDK changes, no API rewrites.

Blober connects to R2 using the same S3 protocol, so the transfer is seamless.

When Azure Is Still the Right Choice

Section titled "When Azure Is Still the Right Choice"

R2 is excellent for serving files and eliminating egress. But Azure has features that R2 does not:

  • Storage tiers (Hot, Cool, Cold, Archive) for lifecycle cost optimization
  • Geo-redundant replication built into the platform
  • Azure Functions and event triggers tied to blob operations
  • Enterprise compliance certifications that some industries require

If you need those features, Azure is worth the egress premium. Many teams keep some data on Azure (for processing and compliance) and move the served/public data to R2 (for cost savings).

One-time purchase. Transfer as much data as you need.

Download Blober at blober.io

How to Move Files from Dropbox to Backblaze B2

Why People Leave Dropbox for Backblaze B2

Section titled "Why People Leave Dropbox for Backblaze B2"

Dropbox works well as a file sync tool. You drop files in a folder and they show up on all your devices. But as your data grows, Dropbox gets expensive. The Plus plan costs $120/year for 2 TB. If you have 5 TB or more, you need Dropbox Business at $180/year per user.

Backblaze B2 charges $6.95 per TB per month for storage. For 2 TB, that is about $14/month or $167/year. But here is where it gets interesting: most of the data sitting in Dropbox is not being actively synced. It is old projects, archives, backups, photos from three years ago. That data does not need instant sync to every device. It needs to be stored cheaply and retrieved when needed.

For archival and backup storage, Backblaze B2 is significantly cheaper. And unlike Dropbox, you only pay for what you use. No fixed plans, no storage ceilings.

The Problem with Moving Data Out of Dropbox

Section titled "The Problem with Moving Data Out of Dropbox"

The obvious approach is to download everything from Dropbox to your computer, then upload it to Backblaze B2. This works for small amounts of data. For 500 GB or more, it becomes painful:

  • You need enough free space on your local disk to hold the download
  • Downloading takes hours or days depending on your connection
  • Uploading to B2 takes equally long
  • If anything fails midway, you start over

Some people try rclone for this. rclone works, but you need to configure both remotes in a text file, understand the command syntax, and handle errors yourself. If you are comfortable with the terminal, rclone is a solid choice. If you are not, it is a wall.

Blober connects to both Dropbox and Backblaze B2. You set up both providers, select the files you want to move, and Blober handles the transfer. Files stream from Dropbox through your computer to Backblaze B2 without needing to store them locally.

Add Dropbox as a provider in Blober. Click the OAuth login button and authorize Blober with your Dropbox account. Blober stores your credentials locally on your machine, not on any server.

Add Backblaze B2 as a provider. You will need your Application Key ID and Application Key from the Backblaze dashboard. Blober verifies the connection and lists your buckets.

Create a new workflow with Dropbox as the source and Backblaze B2 as the destination. Browse your Dropbox files, select what you want to transfer, and choose which B2 bucket to send it to.

Click run. Blober transfers files with parallel uploads, progress tracking, and automatic resume if your connection drops.

Blober preserves your folder structure. If you have Projects/2024/Client-A/ in Dropbox, it creates the same path in your B2 bucket. You do not end up with a flat pile of files.

Dropbox PlusBackblaze B2 (2 TB)
Monthly cost$10/month~$14/month
5 TBNeed Business plan ($15/user/mo)~$35/month
10 TBNeed Business plan~$70/month
EgressFree (sync)Free to Cloudflare partners, $0.01/GB otherwise
API accessOAuthS3-compatible

For pure storage (not sync), B2 wins at every tier above 2 TB. And if you pair B2 with Cloudflare CDN through the Bandwidth Alliance, egress is free.

This is not about abandoning Dropbox entirely. Dropbox is great for active files you need on every device. The move that makes sense for most people is:

  • Keep Dropbox for current projects and actively used files
  • Move archives, old projects, and large media to Backblaze B2
  • Use Blober to transfer the archival data once, then cancel the upgraded Dropbox plan

Blober is a one-time purchase. No subscription, no per-GB transfer fees.

Download Blober at blober.io

How to Move Files from Dropbox to Google Drive

Move Dropbox to Google Drive Without Filling Your Disk

Section titled "Move Dropbox to Google Drive Without Filling Your Disk"

The problem: there is no built-in transfer between Dropbox and Google Drive. The manual route makes you download your entire Dropbox to your computer, then upload all of it to Drive. That needs free disk space equal to your whole library and sends every file over the network twice.

The short answer: you have three realistic options. Drag and drop through the desktop apps, upload through the browser, or run a direct cloud-to-cloud transfer with Blober that streams each file from Dropbox to Google Drive without saving it to your disk. Here is how they compare.

MethodLocal disk neededSpeedFolder structureBest for
Manual (desktop sync, then drag)Full library sizeSlow: download, then uploadYou may have to rebuild itA single small folder
Browser uploadEnough to download firstSlowPreserved if you recreate foldersA few gigabytes
Blober (direct)None, files stream through memoryAbout half the time, single passPreserved automaticallyWhole-account moves and large libraries

People switch from Dropbox to Google Drive for a few common reasons:

  • Their company standardized on Google Workspace and needs everything in Drive
  • Google One pricing is more competitive for their storage needs (2 TB for $100/year vs Dropbox Plus at $120/year)
  • They want the Google Docs, Sheets, and Slides collaboration features
  • They are consolidating everything under one Google account

The actual move is where friction shows up.

Without a migration tool, moving from Dropbox to Google Drive looks like this:

  1. Install the Dropbox desktop client
  2. Wait for all files to sync to your computer
  3. Drag those files into your Google Drive folder (if using the desktop client) or upload them through the browser
  4. Wait for everything to upload
  5. Verify nothing was missed

This requires enough local disk space to hold your entire Dropbox. If you have 500 GB in Dropbox and a 256 GB laptop, you are stuck.

Even with enough space, the process is slow. You are downloading everything from Dropbox's servers to your local disk, then uploading everything from your local disk to Google's servers. That is double the transfer time.

Blober connects to both Dropbox and Google Drive. Files stream from Dropbox through your computer to Google Drive without being stored on your local disk. You need just enough memory to buffer the current file being transferred, not enough disk space for your entire library.

  • No disk space worries. A 1 TB Dropbox migrates to Google Drive even on a laptop with 128 GB of storage.
  • Half the network time. Instead of download + upload (two trips), Blober streams the data through in a single pass. The download from Dropbox and upload to Google Drive happen simultaneously.
  • Folder structure preserved. Your Dropbox folder hierarchy recreates exactly in Google Drive.
  1. Connect Dropbox: OAuth login in your browser. Blober supports both long-term OAuth tokens (with refresh) and direct access tokens.
  2. Connect Google Drive: OAuth login in your browser. Blober accesses your Drive files.
  3. Browse and select: Navigate your Dropbox in Blober's file browser. Select specific folders or your entire Dropbox.
  4. Create a workflow: Set Dropbox as source, Google Drive as destination.
  5. Run: Blober transfers with auto-resume and progress tracking.

Moving your whole Dropbox? Blober streams it straight into Google Drive without filling your laptop. Download Blober, connect both accounts, and start the transfer.

Dropbox is one of the providers where Blober supports native copy and move operations. This means:

  • Copy duplicates files within Dropbox without re-downloading them
  • Move relocates files within Dropbox without a round-trip transfer

For the cross-cloud transfer to Google Drive, files stream through your machine as described above. But if you also need to reorganize files within Dropbox before or after the migration, Blober handles that natively.

Once your files are in Google Drive:

  • They are accessible from any device with a Google account
  • Google automatically indexes content for search
  • Office files (DOCX, XLSX, PPTX) can be edited natively in Google Docs/Sheets/Slides
  • Files sync across devices via the Google Drive desktop app

You can keep Dropbox installed alongside Google Drive if you need a transition period. Once you verify everything transferred correctly, you can downgrade or cancel Dropbox.

Can I transfer files from Dropbox to Google Drive without downloading them first? Yes. Blober streams each file directly from Dropbox to Google Drive through your computer. Nothing is saved to your local disk, so you do not need free space equal to your library size.

Does Blober preserve my Dropbox folder structure in Google Drive? Yes. Your Dropbox folder hierarchy is recreated exactly in Google Drive, including nested folders.

How long does a Dropbox to Google Drive migration take? It depends on how much data you have and your upload speed. Because Blober downloads and uploads in a single pass instead of two separate trips, it finishes in roughly half the time of a manual download-then-upload.

Can I sync Dropbox to Google Drive automatically? Not automatically. Blober moves and copies files on demand through workflows that you start when you need them. Run the migration once, and if it is interrupted, resume that same task so completed files are not moved again. It is built for migrations rather than always-on background sync.

Can I move from Dropbox to Google Workspace or a Shared Drive? Yes. Google Workspace accounts and Shared Drives appear in Blober once you connect Google Drive, so you can set either as the destination.

Most cloud-to-cloud services bill per gigabyte or charge a monthly fee for as long as you keep them. Blober is a one-time purchase. Moving 50 GB costs the same as moving 5 TB, and there is nothing to cancel once the migration is done. For a one-off move from Dropbox to Google Drive, that is the difference between paying once and renting a tool for a weekend.

Move your Dropbox into Google Drive without filling your disk or paying per gigabyte. One-time purchase, no subscription, no per-GB fees.

Download Blober at blober.io

How to Switch from Google Drive to Dropbox

Move Google Drive to Dropbox Without the Google Docs Trap

Section titled "Move Google Drive to Dropbox Without the Google Docs Trap"

The problem: Google Docs, Sheets, and Slides are not real files. They live only inside Google, so you cannot drag them into Dropbox, and Google Takeout exports your library as flat date-stamped zips that lose your folder names.

The short answer: you have three realistic options. Export each native file by hand, use Google Takeout and reorganize the zips afterward, or run a direct transfer with Blober that converts Google Docs to Office formats and rebuilds your folders in Dropbox automatically. Here is how they compare.

MethodGoogle Docs handlingFolder structureLocal disk neededBest for
Manual export, then uploadOpen and export each oneRebuild by handFull library sizeA handful of files
Google TakeoutExports to Office, inside flat zipsLost in date-stamped foldersSpace for every zipA full archive you will sort later
Blober (direct)Auto-converts to .docx, .xlsx, .pptxPreserved automaticallyNone, files stream through memoryMoving your account intact

Google Drive vs Dropbox: Different Strengths

Section titled "Google Drive vs Dropbox: Different Strengths"

Google Drive is tightly integrated with Google Workspace. If your team lives in Gmail and Google Docs, Drive is the natural file storage. But if you work with non-Google tools, or you need reliable desktop sync, offline access, and smart file management, Dropbox has a stronger desktop experience.

People switch from Google Drive to Dropbox for a few reasons:

  • Dropbox's desktop sync is more reliable for large file sets
  • Better support for non-Google file formats and creative tools
  • Dropbox Paper, Smart Sync, and team folder management
  • Moving away from Google Workspace entirely

Whatever the reason, the migration is the part nobody looks forward to.

Why the Switch Is Harder Than It Sounds

Section titled "Why the Switch Is Harder Than It Sounds"

Google Drive stores some files as native Google formats. Google Docs, Sheets, and Slides are not files in the traditional sense. They exist only in Google's cloud. You cannot drag a Google Doc into Dropbox.

If you try to move files manually, you need to:

  1. Open each Google Doc, Sheet, or Slide
  2. Download it as DOCX, XLSX, or PPTX
  3. Upload it to Dropbox
  4. Repeat for every native Google file

For regular files (PDFs, images, videos), you download from Google Drive and upload to Dropbox. But you still need enough local disk space to hold everything, and you need to recreate the folder structure manually.

Google Takeout exports everything as flat zip archives. Your carefully organized folder structure disappears into date-stamped directories.

Blober connects to both Google Drive and Dropbox. When it encounters Google Docs, Sheets, or Slides, it automatically converts them to their Office equivalents (DOCX, XLSX, PPTX) during the transfer. Regular files pass through as-is.

  • Google Docs become .docx files that open in Word, Dropbox Paper, or any text editor
  • Google Sheets become .xlsx files that open in Excel or Numbers
  • Google Slides become .pptx files that open in PowerPoint or Keynote
  • Regular files (PDFs, images, videos) transfer without conversion
  • Folder structure preserved exactly as it appears in Google Drive
  • Shared files accessible through the "Shared with me" virtual folder
  1. Connect Google Drive: OAuth login through your browser
  2. Connect Dropbox: OAuth login (or paste an access token)
  3. Browse and select: Navigate your Google Drive in Blober's file browser, select everything or specific folders
  4. Run the transfer: Files move from Google Drive to Dropbox through your computer

No local disk space needed for intermediate storage. Blober streams files directly from one cloud to the other.

Leaving Google Drive? Blober converts your Docs to Office files and rebuilds your folders in Dropbox in one pass. Download Blober, connect both accounts, and run it.

Once your files are in Dropbox, you can:

  • Install Dropbox on your devices for desktop sync
  • Share folders and files with Dropbox's sharing tools
  • Use Smart Sync to keep files in the cloud until you need them locally
  • Edit Office files directly (Dropbox has built-in Office integration)

The converted Google Docs are fully editable Office files. They are not locked into any format.

Can I move Google Drive to Dropbox without downloading everything first? Yes. Blober streams files directly from Google Drive to Dropbox through your computer, so you do not need local disk space for the whole library.

What happens to my Google Docs, Sheets, and Slides? Blober converts them automatically during the transfer. Docs become .docx, Sheets become .xlsx, and Slides become .pptx, all fully editable in Office, Dropbox Paper, or similar tools.

Does Blober transfer files shared with me? Yes. Files shared with your Google account appear under the "Shared with me" folder in Blober and can be included in the transfer.

Can I sync Google Drive to Dropbox automatically? Not automatically. Blober transfers files on demand through workflows that you run when you need them. Run the migration once, and if it is interrupted, resume that same task so completed files are not moved again. It is designed for migrations rather than continuous background sync.

Can I switch from Google Workspace or a Shared Drive to Dropbox? Yes. Workspace accounts and Shared Drives show up in Blober after you connect Google Drive, so you can use either as the source.

Most cloud-to-cloud services bill per gigabyte or charge a monthly fee for as long as you keep them. Blober is a one-time purchase. Moving 50 GB costs the same as moving 5 TB, and there is nothing to cancel once the switch is done. For a one-off move from Google Drive to Dropbox, that is the difference between paying once and renting a tool for a weekend.

Move your Google Drive into Dropbox with your folders and Office files intact. One-time purchase, no subscription, no per-GB fees.

Download Blober at blober.io

How to Switch from Wasabi to Backblaze B2

Two S3-Compatible Providers, Different Tradeoffs

Section titled "Two S3-Compatible Providers, Different Tradeoffs"

Wasabi and Backblaze B2 both position themselves as affordable alternatives to AWS S3. Both are S3-compatible. Both offer low-cost storage. But they have meaningful differences that lead people to switch from one to the other.

Wasabi charges $6.99/TB/month with no egress fees. Sounds perfect, until you read the fine print:

  • 90-day minimum retention. If you delete or overwrite a file within 90 days, you still pay for the full 90 days of storage.
  • Egress is "free" with conditions. Your monthly egress cannot exceed your stored data. If you store 1 TB and download 1.5 TB in a month, Wasabi may contact you about their "reasonable use" policy.
  • No native CDN partnerships. Wasabi does not have bandwidth alliance partnerships like Backblaze does.

Backblaze B2 charges $6.95/TB/month for storage and $0.01/GB for egress. But:

  • Free egress through Cloudflare. Through the Bandwidth Alliance, egress from B2 to Cloudflare is free. If you use Cloudflare as your CDN (many do), egress is effectively $0.
  • No minimum retention. Store and delete whenever you want.
  • Free egress allowance. B2 includes 3x your storage amount in free egress each month. If you store 1 TB, you get 3 TB of free downloads.

For most use cases, Backblaze B2 ends up cheaper or equivalent to Wasabi, with fewer restrictions.

Both Wasabi and Backblaze B2 speak the S3 protocol. This means Blober uses the same underlying S3 operations for both providers, making the transfer clean and predictable.

  1. Connect Wasabi: Add Wasabi as a provider with your Access Key, Secret Key, and region (Wasabi uses region-specific endpoints like s3.us-east-1.wasabisys.com).
  2. Connect Backblaze B2: Add B2 with your Application Key ID and Application Key. Blober auto-detects your bucket regions.
  3. Create a workflow: Source = Wasabi, Destination = B2. Browse your Wasabi buckets, select what to move.
  4. Run: Blober transfers with parallel multipart uploads and automatic resume.
  • Multi-region detection for B2. Backblaze B2 buckets can be in different regions. Blober fetches all buckets via B2's native API to determine the correct region for each, then configures the S3 endpoint accordingly.
  • Region-aware endpoints for Wasabi. Wasabi uses different endpoints per region. Blober maps your chosen region to the correct endpoint.
  • Large file support. Both providers handle multipart uploads. Blober chunks large files and uploads them in parallel.

When migrating from Wasabi, keep in mind the 90-day minimum retention policy. If you uploaded files to Wasabi less than 90 days ago, you will be charged for the full 90 days even after you delete them.

The practical approach:

  1. Transfer everything to Backblaze B2
  2. Wait until the oldest files in Wasabi pass the 90-day mark
  3. Then delete and close the Wasabi account

This avoids paying both Wasabi and B2 for the same data longer than necessary.

WasabiBackblaze B2
Storage per TB/mo$6.99$6.95
Egress per GB$0 (with conditions)$0.01 (free via Cloudflare)
Min retention90 daysNone
Free egress allowanceEqual to storage3x storage
CDN partnershipNoneCloudflare Bandwidth Alliance

One-time purchase. No recurring fees, no per-GB charges.

Download Blober at blober.io

How to Transfer Files from AWS S3 to Azure Blob Storage

Moving Between AWS S3 and Azure Blob

Section titled "Moving Between AWS S3 and Azure Blob"

AWS S3 and Azure Blob Storage are the two most popular object storage services in the world. Companies move data between them for all sorts of reasons: switching primary cloud vendors, setting up multi-cloud redundancy, following compliance requirements, or simply taking advantage of Azure's pricing for certain workloads.

The transfer itself is the hard part. Both providers have their own tools (AWS DataSync, Azure Data Box, AzCopy), but those tools are designed for their own ecosystem. Cross-cloud transfers with native tools usually require intermediate steps, scripting, or third-party managed services that charge per-GB.

You can download from S3 using the AWS CLI and upload to Azure using AzCopy. This requires local disk space for the intermediate files, separate authentication for each tool, and scripting to coordinate the two.

Services like Flexify charge per-GiB transferred. For large migrations (10 TB+), the fees add up. Your data also routes through their infrastructure, which may not meet compliance requirements.

rclone supports both S3 and Azure Blob. It works, but you need to configure both remotes, handle multipart upload settings, and manage the transfer from the command line.

Blober connects to both AWS S3 and Azure Blob Storage natively. You configure both providers with their respective credentials, create a workflow, and run the transfer. Files stream from S3 through your machine to Azure without intermediate storage.

What Blober Does That Matters for This Transfer

Section titled "What Blober Does That Matters for This Transfer"

Parallel uploads to Azure. Blober uses Azure's uploadStream with configurable concurrency. Large files are streamed in parallel chunks, which makes a noticeable difference on fast connections.

S3 streamed reads. On the source side, Blober reads S3 objects as streams through the AWS SDK. Large objects do not need to be staged as full local files before Azure upload begins.

Azure tier selection. When setting up Azure as your destination, you choose which storage tier new blobs land on: Hot, Cool, Cold, or Archive. This means you can migrate directly to the tier that matches your access pattern without a second step to change tiers after upload.

Deduplication options. You can configure Blober to skip blobs that already exist at the destination, or to overwrite them. This is useful for incremental migrations where you want to resume without re-transferring what is already there. Archived blobs are always skipped, because they cannot be rewritten.

  1. Connect AWS S3: Add S3 as a provider with your Access Key ID, Secret Access Key, and region. Blober lists your buckets.
  2. Connect Azure Blob: Add Azure Blob Storage with your connection string. Blober verifies and lists your containers.
  3. Create a workflow: Set S3 as source, Azure Blob as destination. Browse and select files or entire buckets.
  4. Choose Azure options: Pick the storage tier and the deduplication policy.
  5. Run: Blober transfers with progress tracking. If you stop and rerun later, skip-existing avoids sending blobs that already landed.

Most S3-to-Azure jobs are not a single file, they are whole buckets or whole prefixes. Blober is built for that.

  • Select an entire bucket or prefix. Browse your S3 bucket in Blober, select everything at the top level or drill into a prefix, and queue it all in one workflow. You do not enumerate keys by hand or script a loop.
  • Mass transfers run in parallel. Blober reads from S3 as streams and uploads to Azure with parallel streams, so a bucket with thousands of objects moves as a continuous pipeline rather than one object at a time.
  • Repeatable with skip-existing. Set Deduplication to Skip if a file with the same name exists. If a multi-terabyte run is interrupted, or you stop and continue tomorrow, re-running the workflow picks up only what has not transferred yet. That is what makes a mass migration practical: you are not forced to start the whole job over.
  • Land directly on the right tier. Pick the Azure tier for the whole job, so a bulk archive migration writes straight to Cool, Cold, or Archive instead of landing on Hot and needing a second pass.

For a move of 5 TB across 200,000 objects from us-east-1 to westeurope, you point Blober at the bucket, choose the destination container and tier, turn on skip-existing, and let it run. Progress is tracked per file, and rerunning the workflow after an interruption skips blobs that already completed.

If your S3 bucket is in us-east-1 and your Azure storage account is in westeurope, Blober handles the cross-region transfer. S3's cross-region copy limitations (which affect native S3-to-S3 copies) do not apply here because the data flows through your machine.

The tradeoff is that transfer speed depends on your internet connection. For very large migrations (50 TB+), this is usually slower than a datacenter-to-datacenter transfer. But for gigabytes to a few terabytes, running through Blober on a fast connection can be simpler than coordinating a managed migration service.

For an S3-to-Azure move, price the transfer in parts instead of trusting a single headline number:

  • AWS S3 source cost: data transfer out, source reads, and any retrieval fees if the source objects are in an infrequent-access or archive class[1].
  • Azure destination cost: Blob Storage usually does not charge for inbound data transfer, but new writes, storage tier, redundancy, and operation charges still matter[2].
  • Future Azure egress: if the data later leaves Azure, outbound bandwidth is priced separately by route, zone, and volume[3].

Azure can be cheaper for some storage-heavy workloads, while S3 can be better when the surrounding AWS ecosystem matters. The right choice depends on access pattern, region, redundancy, tier, request volume, and where the data will go next.

How do I copy data from S3 to Azure Blob without AzCopy or scripts? Connect both providers in Blober, create a workflow with S3 as the source and Azure Blob as the destination, select your buckets, and run. There is no AzCopy command, no AWS CLI loop, and no intermediate download to your disk. Files stream from S3 straight to Azure.

Can I migrate a whole bucket, or only individual files? Either. Select a single object, a prefix, or an entire bucket. Whole-bucket and mass-data migrations are the common case.

Does the data land on the tier I want? Yes. You choose the Azure access tier (Hot, Cool, Cold, or Archive) for the destination, and new blobs are written to that tier on arrival. There is no second pass to re-tier after upload.

Who pays for the data transfer? AWS charges egress (data transfer out) when data leaves S3, billed per GB. Azure lists data transfer in as free, while outbound bandwidth is priced separately[4]. So the transfer cost usually sits on the AWS side, the same as it would with any tool that reads from S3. Blober adds no per-GB fee of its own.

How large a migration can this handle? Transfers run through your machine, so speed depends on your connection. For moderate migrations, Blober avoids managed-service setup and can be rerun with skip-existing if interrupted. For datacenter-scale moves of 50 TB and up, a provider appliance or assisted migration may finish sooner.

Migrate S3 buckets to Azure Blob in bulk, with no AzCopy scripts and no per-GB transfer fee from us. One-time purchase, no subscription.

Download Blober at blober.io

Upload to GoPro Cloud 4x Faster with Parallel Transfers

If you shoot with a GoPro, you know the routine. After a day of riding, diving, or traveling, your camera has anywhere from 20 to 200 GB of footage. You plug your camera in or connect via Wi-Fi, and the GoPro app starts uploading to GoPro Cloud.

The upload is slow. Not because your internet is slow, but because GoPro's app sends files one at a time. It picks a file, uploads it, waits for confirmation, then starts the next one. If you have 100 clips from a weekend trip, each one sits in a queue while the previous clip finishes.

This sequential approach means you are never using your full upload bandwidth. Most internet connections can handle several simultaneous uploads. A connection with 50 Mbps upload speed could be pushing four or five files at once, but GoPro's app uses it for just one.

How Blober Handles GoPro Cloud Uploads

Section titled "How Blober Handles GoPro Cloud Uploads"

Blober uses parallel upload streams when transferring files to GoPro Cloud. Instead of sending one file at a time, Blober opens multiple concurrent connections and uploads several files simultaneously.

The result is straightforward: if your connection can handle four simultaneous uploads (and most can), you finish in roughly a quarter of the time.

This is not a theoretical number. It comes down to basic network utilization. GoPro's sequential uploads leave bandwidth idle between files and during handshake overhead. Blober keeps the pipe full by starting the next upload before the previous one finishes its server-side confirmation.

ScenarioGoPro AppBlober
50 GB weekend trip (100 clips)~4 hours~1 hour
120 GB week-long shoot (300 clips)~10 hours~2.5 hours
8 GB quick session (15 clips)~35 min~8 min

Times based on a typical 30 Mbps upload connection. Actual speeds depend on your connection, file sizes, and GoPro Cloud server conditions.

GoPro's web interface limits downloads to 25 files at a time. If you want to download 500 clips, you need to repeat the process 20 times.

Blober has no batch limit. Select 10 files or 10,000 and start the transfer. Blober works through the entire queue without stopping to ask you to select the next batch.

Uploads fail. Connections drop, laptops go to sleep, Wi-Fi switches networks. When a GoPro Cloud upload fails through the app, it often starts the file over from scratch.

Blober tracks progress per file. If a transfer is interrupted, Blober resumes from where it stopped. For large files (GoPro's 5.3K videos can easily be 5-10 GB each), this saves real time. You do not re-upload 4 GB of a 5 GB file because your connection dropped at 80%.

Upload From Anywhere, Not Just Your Camera

Section titled "Upload From Anywhere, Not Just Your Camera"

GoPro's app expects you to upload from the camera or phone. If your footage is on an SD card, a NAS, or already in another cloud provider, you cannot use the app to get it into GoPro Cloud.

Blober lets you upload to GoPro Cloud from any source it supports:

  • Local drives and SD cards: Import footage from your card reader directly to GoPro Cloud
  • NAS devices: Upload from Synology, QNAP, or any network drive
  • Other cloud providers: Move files from Dropbox, Google Drive, or AWS S3 into GoPro Cloud
  • DJI or Insta360 footage: Consolidate action camera media from multiple brands in one cloud

Some people ask why you would upload to GoPro Cloud at all. Fair question. Here is when it makes sense:

  • You already have a GoPro Plus subscription and want to use the cloud highlight reels and editing features
  • You want automatic camera-to-cloud backup but need a faster way to bulk-upload existing footage
  • You shoot with DJI or other cameras and want all your action footage in one place with GoPro's editing tools

If you are moving away from GoPro Cloud, Blober handles that too. Transfer your entire library to Backblaze B2, AWS S3, Dropbox, or a local drive.

Blober is a one-time purchase with a lifetime license. No subscription, no per-GB charges.

Download Blober at blober.io

How to Backup Google Photos Without Google Takeout (After rclone Lost Access)

Google Photos Does Not Have a "Download All" Button

Section titled "Google Photos Does Not Have a "Download All" Button"

If you have 10,000 or 50,000 photos in Google Photos and you want them on your computer, Google gives you two options:

  1. Select photos manually in the web interface. You can select up to 500 at a time, click download, and receive a zip file. Then repeat until you have covered your entire library.
  2. Use Google Takeout to request an export of your entire library. Google will prepare zip archives and email you a download link. This process can take hours or even days depending on library size.

Neither option lets you browse your library, pick a destination, and transfer everything in one step. There is no sync, no resume, and no way to send files directly to another cloud provider.

Google Photos has no download all button, Takeout takes hours, rclone lost library access, and manual download requires selecting photos one by one

Google Takeout: The Problems Nobody Talks About

Section titled "Google Takeout: The Problems Nobody Talks About"

Google Takeout is the official way to export your Google Photos library. On paper it works. In practice, it has real limitations:

  • Wait time. Google creates your archive in the background. For large libraries, this can take 12 to 48 hours.
  • Zip file format. Your photos arrive in multiple zip archives, often split into 2 GB chunks. You have to download each zip and extract them manually.
  • No folder structure. Takeout dumps all photos into flat directories organized by date. If you had albums, those names may appear as metadata JSON files next to the images, not as actual folders.
  • No resume. If a download fails, you start over. There is no incremental sync.
  • No direct cloud transfer. You cannot send Takeout exports directly to Dropbox, Backblaze, or a NAS. Everything goes through your browser first.

For someone with 200 GB of family photos, Google Takeout means hours of waiting followed by hours of downloading and extracting.

Google's official download options compared: manual selection limited to 500 at a time, Takeout takes hours, rclone API access revoked, and other tools do not work

rclone Lost Full Library Access in March 2025

Section titled "rclone Lost Full Library Access in March 2025"

Until early 2025, rclone had a Google Photos backend that could list and download your photo library. Then Google changed their API access policy.

Starting March 31, 2025, rclone can only download photos that were uploaded through the rclone API itself. If you uploaded your photos through the Google Photos app, the web interface, or any other method, rclone cannot access them anymore.

The rclone documentation states it clearly: "From March 31, 2025 rclone can only download photos it uploaded."

This means rclone is no longer a viable tool for backing up or migrating an existing Google Photos library. Other transfer tools like MultCloud, Flexify, and various CLI utilities face the same restriction or never supported Google Photos at all.

Blober downloads your entire Google Photos library without Takeout, with no manual selection, transfer to any cloud or disk, and auto-resume

Blober Downloads Your Entire Google Photos Library

Section titled "Blober Downloads Your Entire Google Photos Library"

Blober is a desktop application that connects to Google Photos and gives you a visual file browser showing your entire library. From there, you can:

  • Download all photos and videos to your local disk, external drive, or NAS
  • Transfer your library to Dropbox, Google Drive, Backblaze B2, AWS S3, or any other supported provider
  • Browse by album, date, or folder with a familiar file manager interface
  • Resume interrupted transfers automatically if your connection drops
  • Optionally replace files with existing filenames by setting destination deduplication to Overwrite the existing file. The default skips them instead

No Google Takeout. No zip files. No manual selection. You connect your Google Photos account, pick a destination, and Blober handles the rest.

FeatureGoogle TakeoutBlober
Bulk downloadYes, after hours of waitingYes, immediate
Folder structureFlat zip archivesAlbums and dates preserved
Resume on failureNoYes, automatic
Transfer to another cloudNo, browser download onlyYes, direct to any provider
Real-time browsingNoYes, visual file browser
Incremental syncNoRe-runs into a local drive or NAS can skip already-downloaded files

For repeat exports, see how task resume and destination deduplication prevent duplicate downloads. Resume an interrupted task to preserve its per-file progress. When you intentionally start a new export into the same folder, the destination skips files that are already there by default, and you can switch it to overwrite them instead.

Before and after comparison showing Google Takeout workflow versus Blober's direct Google Photos download and transfer

Back Up Google Photos to a Local Drive

Section titled "Back Up Google Photos to a Local Drive"

Connect Google Photos in Blober, select your local disk as the destination, and transfer. Every photo and video downloads to a folder on your computer. If you have 100 GB of photos, Blober will transfer them without creating zip files or requiring extraction.

Migrate Google Photos to Dropbox or iCloud

Section titled "Migrate Google Photos to Dropbox or iCloud"

If you are leaving Google Photos for another service, Blober lets you transfer your library directly. Connect Google Photos as the source and Dropbox as the destination. Your photos move from one cloud to the other without touching your local disk (or through it, if you prefer a local copy).

Create a Cold Backup on Backblaze B2

Section titled "Create a Cold Backup on Backblaze B2"

Pair Google Photos with Backblaze B2 in Blober. Your entire photo library gets copied to B2 at $6.95/TB/month for storage. This gives you an independent backup that does not depend on Google.


Google Photos is not a backup. It is a service that can change its terms, adjust its storage pricing, or restrict access at any time. The March 2025 API change proved that: tools that worked for years stopped working overnight.

Having a local copy of your photos, or a copy in a second cloud provider, means you are not dependent on a single company to access your own memories.

Blober makes that transfer possible without the pain of Google Takeout, without CLI configuration, and without selecting 500 photos at a time.


  • Anyone with a large Google Photos library who wants a local backup
  • Users leaving Google Photos for Dropbox, iCloud, or another service
  • Parents and families with years of photos who want a second copy on a hard drive
  • Photographers who used Google Photos as a sync target and need to migrate
  • Privacy-conscious users who want their photos on storage they control

Blober is a one-time purchase with a lifetime license. No subscriptions. No transfer fees. No transfer limits. It runs on Mac, Windows, and Linux.

Download Blober at blober.io

How to Download All Your GoPro Cloud Videos to Your Computer

GoPro Cloud stores your footage after it auto-uploads from your camera. But once your videos and photos land there, getting them out is a different story. There is no public API, no bulk download feature, and no way to transfer your media directly to another cloud provider.

If you want to move a single clip, you open the GoPro app on your phone, download it to your device, then manually upload it somewhere else. For a handful of files, that works. For hundreds of gigabytes of 5.3K footage from a year of riding, surfing, or travel, it does not.

GoPro Cloud is a dead end with no API, no bulk download, and no third-party tool support

No Other Tool Supports GoPro Cloud

Section titled "No Other Tool Supports GoPro Cloud"

This is not a matter of choosing the right CLI command or configuring a remote. GoPro Cloud is a proprietary system with no documented API for third-party developers.

  • rclone has never had a GoPro Cloud backend. It does not appear in any version of the changelog going back to 2012.
  • MultCloud and Flexify list dozens of cloud providers but GoPro Cloud is not among them.
  • CLI tools for GoPro focus on camera firmware and settings, not cloud storage transfers.

The result: if your footage lives in GoPro Cloud, every other transfer tool on the market leaves you stranded.

Comparison showing rclone, MultCloud, Flexify, and CLI tools all fail to support GoPro Cloud while Blober has full support

Blober Connects Directly to GoPro Cloud

Section titled "Blober Connects Directly to GoPro Cloud"

Blober is a desktop application (Mac, Windows, Linux) that connects to GoPro Cloud as a first-class provider. You sign in with your GoPro account, and Blober gives you a visual file browser showing all your uploaded media.

From there, you can:

  • Download all your GoPro footage to your local disk or NAS in one transfer
  • Transfer GoPro Cloud media to Dropbox, Google Drive, or any other supported provider
  • Upload DJI media to GoPro Cloud, letting you consolidate action camera footage from multiple brands in one place
  • Copy files between any two providers without routing data through a remote server

Blober runs entirely on your machine. Files stream directly between your computer and the provider APIs. No middleman, no SaaS relay, no monthly subscription.

Blober connects to GoPro Cloud with full support for browsing, transferring, and downloading footage to any cloud or local disk

Without Blober, backing up GoPro Cloud footage to Dropbox looks like this:

  1. Open the GoPro app on your phone
  2. Select a video
  3. Download it to your phone storage
  4. Open the Dropbox app
  5. Upload the video
  6. Repeat for every file

With Blober:

  1. Open Blober on your computer
  2. Connect your GoPro Cloud account and your Dropbox account
  3. Select the files (or select all)
  4. Click transfer

Blober handles the rest, including auto-resume if your connection drops.

Before and after comparison showing manual GoPro Cloud workflow versus Blober's one-click transfer to Dropbox or Google Drive

DJI Users: Consolidate Your Footage

Section titled "DJI Users: Consolidate Your Footage"

If you shoot with both a GoPro and a DJI drone or action camera, your footage ends up scattered across local drives, SD cards, and cloud services. Blober lets you upload DJI media directly to GoPro Cloud, Google Drive, Dropbox, or any combination of providers.

This means you can keep all your action camera footage in one place, regardless of which brand captured it.


GoPro Cloud is not a backup if you cannot get your files out. A backup requires that you can retrieve your data when you need it. Without a download or transfer mechanism, GoPro Cloud is storage you cannot control.

Blober turns GoPro Cloud into a real part of your backup workflow:

  • Pull footage from GoPro Cloud to a local drive as a cold backup
  • Mirror GoPro Cloud to Backblaze B2 or Wasabi for cheap long-term archival
  • Sync GoPro Cloud with Google Drive so your footage is accessible from any device

  • GoPro users who want to download their entire cloud library to a computer or external drive
  • Content creators who shoot on GoPro and DJI and need to consolidate footage
  • Travelers and adventurers who auto-upload to GoPro Cloud and want a second copy elsewhere
  • Photographers switching away from GoPro Cloud who need to migrate their media
  • Anyone who tried to bulk-download from GoPro Cloud and found there is no option

Blober is a one-time purchase with a lifetime license. No subscriptions. No transfer fees. No transfer limits.

Download Blober at blober.io

Blober vs Flexify

Both Blober and Flexify.io solve the same core problem: moving large volumes of data between cloud storage providers. They approach the problem from fundamentally different architectural and economic philosophies.

Flexify.io (founded 2015, Tampa FL) is a managed, cloud-based migration and virtualization platform built for enterprises moving tens or hundreds of terabytes in controlled, one-time projects. Blober is a local-first desktop workflow engine designed for continuous, repeatable transfers, with no subscriptions, no per-GB fees, and no third-party servers touching your data.


Flexify.io

  • Cloud-hosted migration engines deployed on Flexify-managed infrastructure
  • Data routes through Flexify servers (or, for managed 10 TB+ migrations, direct cloud-to-cloud)
  • Usage-based pricing: you pay per GiB transferred
  • Emphasis on API virtualization: translates Amazon S3 API to Azure Blob Storage on-the-fly
  • Supports ~25 object-storage providers (S3-compatible, Azure, GCS, Alibaba, etc.)

Blober

  • Runs entirely on your local machine (Windows, macOS, Linux)
  • Transfers go directly between your machine and each storage provider - no intermediary servers
  • All credentials stored locally and never transmitted to a third party
  • Supports unique providers like GoPro Cloud that no other migration tool covers

This distinction matters for users who care about cost predictability, credential ownership, data sovereignty, and ongoing workflows rather than one-time migrations.


AspectBloberFlexify.io
Pricing style✅ One-time licenseUsage-based (per GiB)
Current costDiscounted beta pricing~$0.03/GiB Flexify fee + provider egress ($0.05-$0.09/GiB)
Subscription✅ NoneSign-up required ($20 free credit)
Long-term cost✅ Fixed foreverGrows with every transfer
1 TB migration✅ One-time price~$80 to $120+ in fees

For a single 1 TB migration from AWS S3 to Google Cloud Storage, Flexify's self-service rate is approximately $0.08 to $0.12 per GiB, which works out to $80 to $120+ for that one job. With Blober, only your provider's standard egress fees apply; there is no Blober per-GB charge.


FeatureBloberFlexify.io
Cloud-to-cloud transfer✅ YesYes
Local filesystem integration✅ YesLimited
GoPro Cloud support✅ Yes❌ No
Metadata-based path templating✅ YesNo
Persistent task history✅ YesManaged dashboard
Workflow reuse✅ YesLimited
Resumable workflows✅ YesYes
API accessNoYes
Virtual S3 endpointNoYes
Credential storage✅ Local onlyCloud-managed
Data path✅ DirectThrough Flexify servers

With Flexify, your storage credentials are stored on their servers and your data may transit through Flexify-managed infrastructure. For regulated industries, sensitive media archives, or personal data, this introduces a third-party dependency and potential compliance exposure.

Blober eliminates this concern entirely:

  • Credentials never leave your machine. No third-party vault, no OAuth token stored in a SaaS dashboard
  • Data flows directly between your local machine and each cloud provider
  • Blober works offline with a one-time license
  • Full control over when, where, and how your data moves

Blober is the only migration tool that supports GoPro Cloud, letting GoPro users back up or transfer their media archives to any supported provider (AWS S3, Backblaze B2, Wasabi, local disk, etc.). Neither Flexify, rclone, nor MultCloud offer GoPro Cloud integration.

This makes Blober the go-to choice for photographers, videographers, and agencies managing GoPro footage across storage tiers.


Flexify.io is a mature enterprise platform (since 2015) with production-scale deployments and petabytes migrated. Blober is newer and currently in beta, with faster iteration and less operational overhead.

Blober offsets its maturity gap with:

  • Aggressive beta pricing: lock in your license before prices go up
  • Rapid feature development with direct community influence on the roadmap
  • No lock-in to ongoing fees: one purchase, unlimited use
  • Desktop-native architecture that is inherently simpler and more predictable

Choose Blober if you:

  • Transfer data regularly, not just once
  • Want full control over credentials and data flow
  • Need GoPro Cloud support (only Blober has it)
  • Prefer a native desktop UI over enterprise SaaS dashboards
  • Want predictable lifetime pricing with no per-GB surprises
  • Care about data sovereignty, with no third-party servers touching your files

Download Blober at blober.io

Blober vs Flexify vs rclone

Three tools dominate cloud data transfer in 2026 - each solving the problem from a completely different angle. Here's how they compare.


DimensionBloberFlexify.iorclone
Architecture✅ Local-first desktopManaged SaaSCLI utility
Pricing✅ One-time licenseUsage-based (~$0.03-$0.04/GiB + egress)Free
Ease of use✅ High (native GUI)Medium (web dashboard)Low (terminal only)
Provider count9+ and growing~25 (object storage)70+
GoPro Cloud supportYes (exclusive)❌ No❌ No
Credential control✅ Local onlyCloud-managedLocal config file
Data path✅ Direct (no middleman)Through Flexify serversDirect (local)
Workflow persistence✅ Built-inDashboard-basedNone (manual scripts)
Task history & resume✅ Built-inDashboard-basedLogs only
Metadata path templates✅ YesNoManual scripting
AutomationLimitedHighVery high
API virtualizationNoYes (S3-to-Azure gateway)No
Enterprise scaleHighHighHigh
Open sourceNoNoYes
Best forAgencies, creators, engineersEnterprises (petabyte migrations)Engineers, sysadmins

ScenarioBloberFlexify.iorclone
100 GB migration✅ One-time~$8 - $12Free
1 TB migration✅ One-time~$80 - $120+Free
10 TB migration✅ One-time~$800 - $1,200+Free
Recurring monthly✅ $0Compounds every runFree

Flexify charges per GiB transferred plus cloud provider egress fees. Costs add up fast for recurring workflows. rclone is free but demands engineering time. Blober sits in the sweet spot: pay once, transfer forever.


ConcernBloberFlexify.iorclone
Credentials stored✅ Local onlyFlexify serversLocal config file
Data transits 3rd party✅ NoYes (Flexify infra)No
Account required✅ NoYesNo
Offline operation✅ YesNoYes

For regulated industries, sensitive media archives, or personal data - avoiding third-party intermediaries is not a preference, it is a requirement. Both Blober and rclone keep your data path clean. Flexify introduces a managed middleman.


Blober is the only transfer tool that supports GoPro Cloud. Neither Flexify nor rclone can access GoPro's storage. If you manage GoPro footage - whether as a creator, agency, or production house - Blober is the only option for migrating that media to professional storage like Backblaze B2, AWS S3, or your local NAS.


  • rclone is the most powerful tool if you are deeply technical, automation-driven, and comfortable with terminal workflows. It is free and supports 70+ providers.
  • Flexify.io is ideal for enterprises running massive one-time migrations under strict SLAs, especially when virtual S3 endpoints or managed infrastructure are required. Budget accordingly - costs scale with data volume.
  • Blober fills the gap between them: professional-grade transfers with a native desktop GUI, local credential control, visual workflows, predictable one-time pricing, and exclusive GoPro Cloud support.

Blober's beta pricing locks in a lifetime license at a fraction of the cost competitors charge for a single large migration. For users who value simplicity, sovereignty, and long-term savings - Blober is the clear choice.

Blober vs MultCloud

MultCloud (founded 2012, Hong Kong) is a web-based platform for transferring, syncing, and managing files across 30+ cloud services. It is subscription-based and routes all data through MultCloud's servers.

Blober is a local-first desktop application that transfers data directly between your machine and cloud providers, with no middleman, no subscription, and no data caps.

Both tools target non-technical users who want cloud-to-cloud transfers without writing scripts. The difference lies in architecture, pricing, and trust.


MultCloud

  • Web-based SaaS: runs entirely in your browser
  • All data routes through MultCloud's servers in Hong Kong
  • Requires an account and OAuth access to your cloud accounts
  • Subscription required for meaningful use (free tier: 5 GB/month)

Blober

  • Native desktop application (Windows, macOS, Linux)
  • Data flows directly between your machine and each cloud provider
  • No intermediary servers. Your files never touch a third party
  • Credentials stored locally, never transmitted

AspectBloberMultCloud
Pricing style✅ One-time licenseSubscription (annual)
Free tierN/A (beta pricing)5 GB/month, 2 transfer threads
Mid-tier plan-$59.99/year for 1,200 GB/year
Top-tier plan-$99.98/year for 2,400 GB/year
Transfer threadsAutomatic parallelismFree: 2 threads, Paid: 10 threads
Data capNoneCapped per plan (5 GB to 2,400 GB/year)
Long-term cost (3y)✅ One-time purchase$180 to $300+

MultCloud's data traffic limits are a hard ceiling. Once you exhaust your annual quota, transfers stop until you renew. Blober has no transfer caps. Move as much data as your bandwidth allows.


FeatureBloberMultCloud
Cloud-to-cloud transfer✅ YesYes
Local filesystem integration✅ YesNo (web-only)
GoPro Cloud supportYes (exclusive)❌ No
Storage-optimized transfers✅ YesGeneric
Workflow persistence✅ YesScheduled tasks
Task history and logs✅ YesBasic dashboard
Metadata path templates✅ YesNo
Resumable transfers✅ YesLimited
Sync (two-way)PlannedYes
Email-to-cloud (PDF)NoYes
Credential storage✅ Local onlyMultCloud servers (OAuth)
Data path✅ DirectThrough MultCloud servers

This is where the difference is starkest. MultCloud requires OAuth access to your cloud accounts and routes all transferred data through its own servers. Their privacy page states data is "temporarily cached" during operations.

Blober takes the opposite approach:

  • Credentials never leave your machine. No OAuth tokens stored on third-party servers
  • Data flows directly between your local machine and each cloud provider
  • No account needed. Blober works with a license key, offline
  • No data caching. Nothing is stored, buffered, or logged on remote servers

For users transferring personal photos, sensitive business documents, or media archives, the question is simple: do you want your data flowing through servers in Hong Kong, or directly from your machine to your cloud provider?


MultCloud supports 30+ consumer cloud services (Google Drive, Dropbox, OneDrive, etc.) but does not support GoPro Cloud. If you need to move GoPro footage to professional storage like Backblaze B2, AWS S3, or Wasabi, MultCloud cannot help.

Blober is the only transfer tool with native GoPro Cloud integration, which makes it essential for photographers, videographers, and agencies managing action camera footage.


Choose Blober if you:

  • Need to move large volumes of data without annual caps
  • Want predictable, one-time pricing, not $60 to $100/year forever
  • Prefer local execution over web-based SaaS
  • Require data sovereignty, with no files routing through third-party servers
  • Need GoPro Cloud support (only Blober has it)
  • Value detailed task history, resumable workflows, and metadata-based organization
  • Care about credential security, with no OAuth tokens stored in the cloud

Blober vs rclone

rclone is the industry-standard CLI tool for cloud storage automation among developers and sysadmins. It is extremely powerful, supports over 70 storage providers, and is completely free and open-source. Its tradeoff is complexity - every job requires flags, config files, and terminal expertise.

Blober is built for users who want rclone-level capability without managing flags, scripts, or terminal state. It replaces stateless CLI execution with persistent, visual workflows that anyone can set up and repeat.


rclone

  • Command-line only (experimental web GUI exists, but limited)
  • Configuration files and flags - every job requires manual setup
  • Excellent for scripting and cron-based automation
  • Steep learning curve for non-technical users
  • No built-in workflow persistence - you must manage your own scripts

Blober

  • Native desktop GUI (Windows, macOS, Linux)
  • Visual setup of sources, destinations, and filters
  • Saved workflows with one-click execution
  • Built-in task history with resumable state
  • Designed for repeatability and clarity - no terminal required

FeatureBloberrclone
Interface✅ GUICLI
Provider countGrowing70+
GoPro Cloud support✅ Yes❌ No
Local filesystem✅ YesYes
Cloud-to-cloud✅ YesYes
Workflow persistence✅ YesNo (manual scripts)
Metadata path templates✅ YesManual scripting
Task history & resume✅ YesLogs only
EncryptionPlannedBuilt-in
AutomationLimitedExtensive
Open sourceNoYes
Data path✅ DirectDirect (local)

rclone supports over 70 providers - but GoPro Cloud is not one of them. If you shoot with GoPro cameras and want to move your media from GoPro's cloud to Backblaze B2, AWS S3, Wasabi, or your local NAS, rclone simply cannot help.

Blober is the only transfer tool with native GoPro Cloud integration, making it the obvious choice for photographers, videographers, action sports creators, and agencies managing GoPro media libraries.


rclone requires upfront configuration, careful flag selection, and scripting discipline to safely repeat jobs:

Terminal window
rclone copy remote:bucket/path dest:bucket/path \
--transfers 4 --checkers 8 --retries 3 \
--filter-from filters.txt --log-file transfer.log

Forget a flag? Change a path? The job silently behaves differently. There is no built-in history of what ran, when, or whether it succeeded.

Blober stores each workflow as a durable configuration with immutable execution history. If a transfer is interrupted, Blober resumes based on stored state rather than re-running a stateless command.

This difference becomes critical for:

  • Long-running transfers over unreliable connections
  • Media archives with thousands of files
  • Users who run transfers infrequently and forget the exact flags
  • Teams where multiple people need to trigger the same workflow

Both rclone and Blober are local-first tools - your credentials stay on your machine. This is a shared advantage over SaaS competitors like Flexify and MultCloud where credentials and potentially data flow through third-party servers.

Where Blober adds value over rclone:

  • No terminal exposure - credentials are managed in a secured desktop app, not plaintext config files
  • Encrypted credential storage - not a ~/.config/rclone/rclone.conf file on disk
  • Visual audit trail - every transfer logged with timestamps, file counts, and status

AspectBloberrclone
CostOne-time licenseFree
SupportProduct supportCommunity forums
UpdatesIncluded with licenseCommunity-driven
Target userCreators, agencies, engineersEngineers, sysadmins

rclone being free is a genuine advantage. Blober earns its price by saving time, reducing errors, and opening cloud transfers to users who would never touch a terminal.


Choose Blober if you:

  • Prefer visual tools over terminal commands
  • Want repeatable workflows without writing scripts
  • Need GoPro Cloud support (only Blober has it)
  • Need clarity, task history, and one-click resumption
  • Transfer data occasionally but need it to work reliably every time
  • Value convenience and productivity over maximum flexibility
  • Want credentials stored securely - not in a plaintext config file

Download Blober at blober.io