Transfer GoPro Cloud Files in 45 Seconds with Blober
45-Second Demo
Section titled “45-Second Demo”This video shows the full process of creating a Blober workflow with GoPro Cloud as the source.
What’s Shown
Section titled “What’s Shown”1. Connect GoPro Cloud
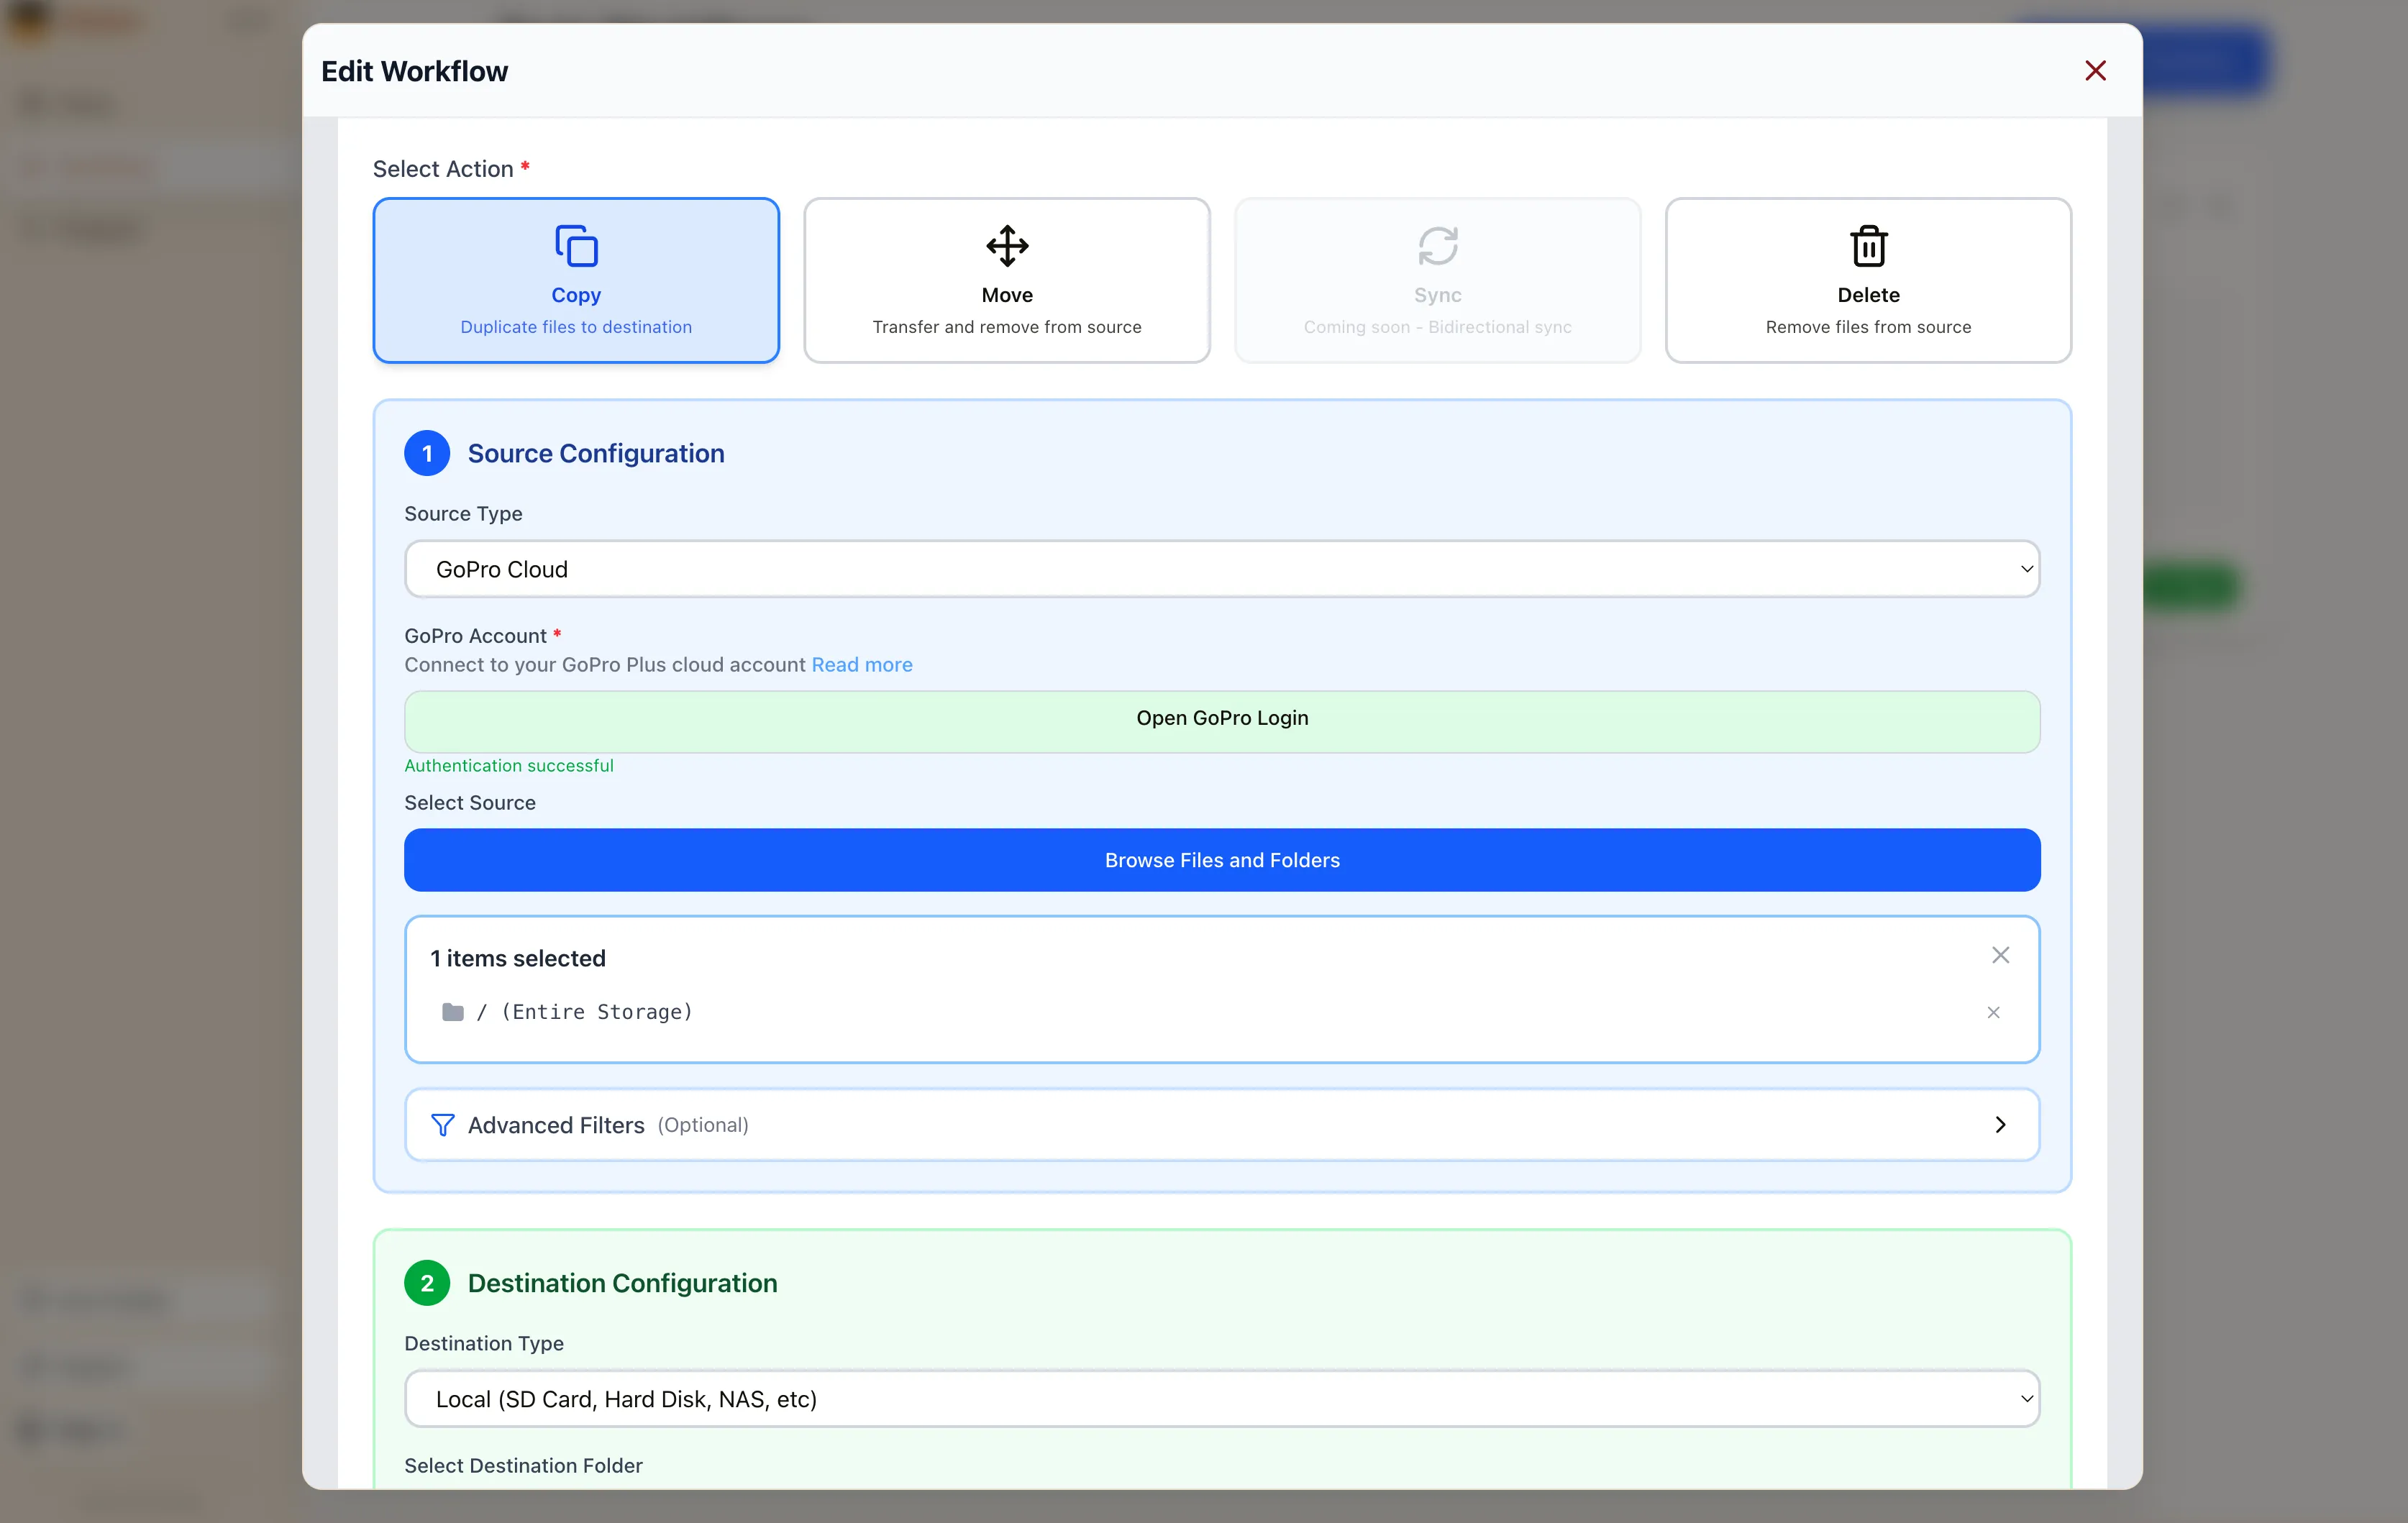
Section titled “1. Connect GoPro Cloud”Select GoPro Cloud as your source, click Open GoPro Login, and sign in. Blober captures your session. No API keys, no config files, no CLI.
2. Browse Your Media
Section titled “2. Browse Your Media”Click Browse Files and Folders. Blober loads your GoPro Cloud library. Files are listed with date and size.
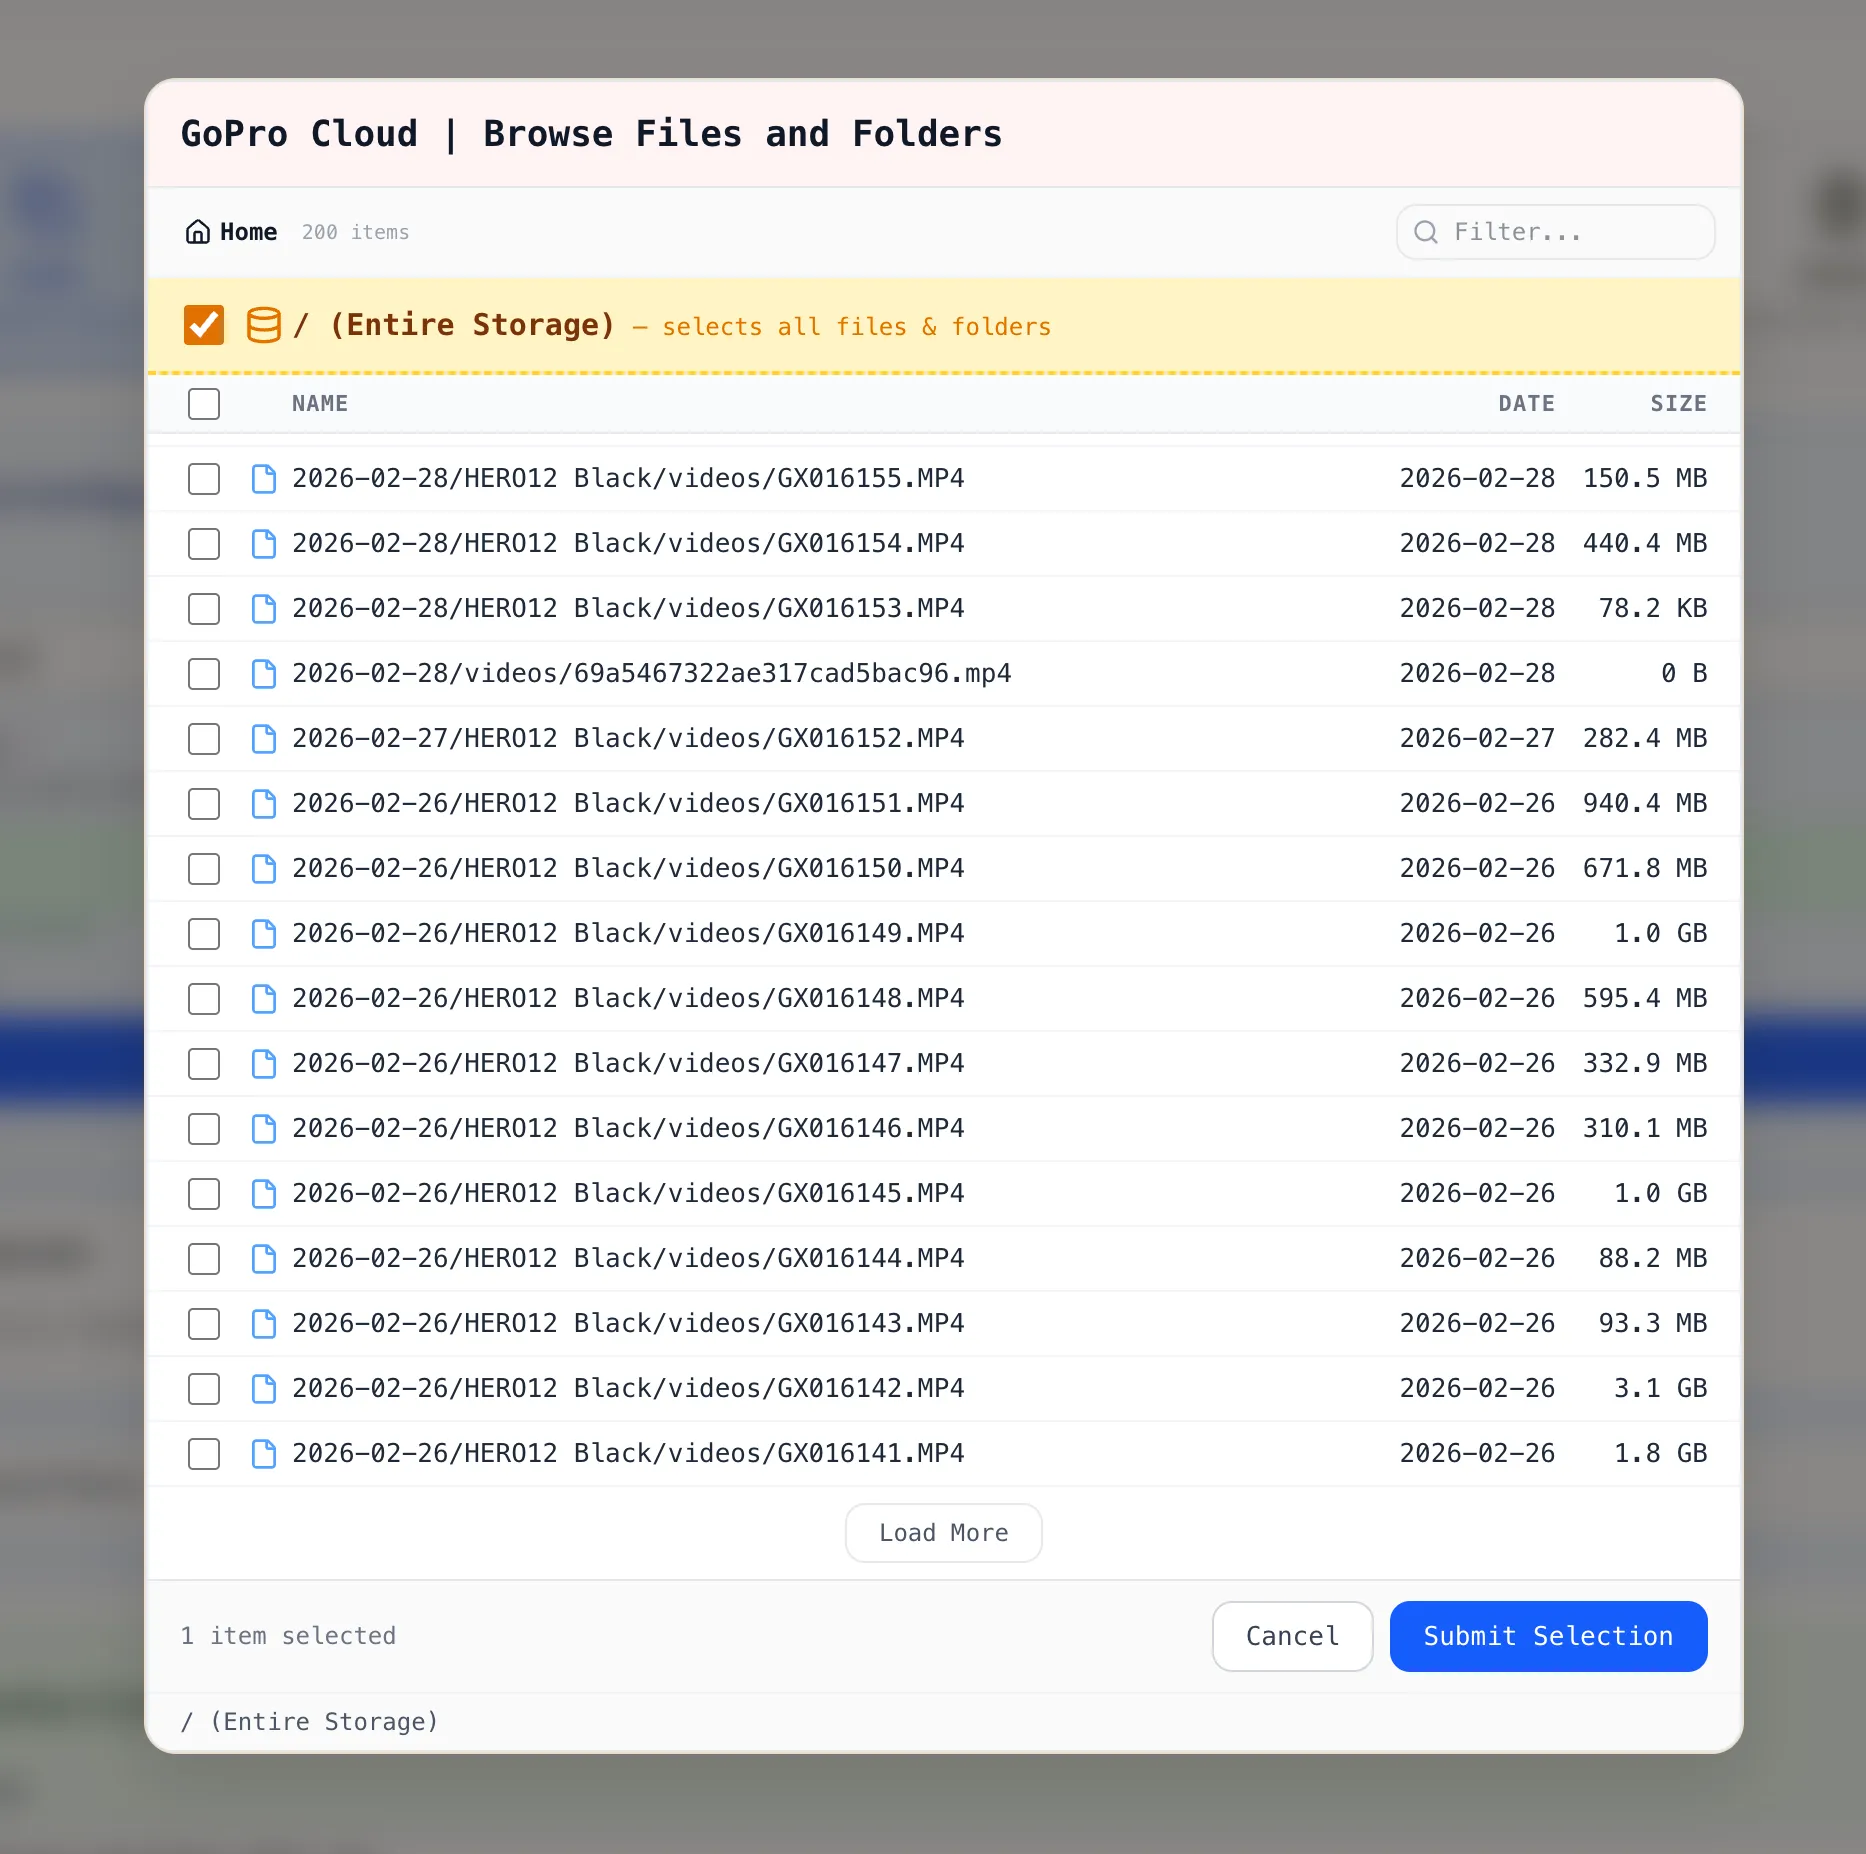
You can select:
- Individual files by clicking a single file
- Multiple files by checking several files across folders
- Entire directory by ticking the / (Entire Storage) checkbox
3. Create the Workflow
Section titled “3. Create the Workflow”Click Submit Selection. The workflow editor shows your GoPro Cloud source with the selected items. Pick your destination (local disk, Backblaze B2, AWS S3, Dropbox, or another supported provider), configure options, and click Save Workflow.
4. Run It
Section titled “4. Run It”Close the workflow editor with the X button in the top-right corner. On the Workflows page, click the green Run button on your workflow card. Blober starts the transfer with parallel downloads, progress tracking, and automatic resume.
Why It Matters
Section titled “Why It Matters”GoPro’s web portal limits batch downloads to 25 files at a time, bundled as ZIPs. Large downloads often fail. There is no bulk export and no “Download All” button.
Blober is the only tool that connects to GoPro Cloud. rclone, MultCloud, and Flexify do not support GoPro as a source.
- No manual downloads. Files move directly from GoPro Cloud to your destination.
- No file limits. Transfer 10 files or 10,000 in one run.
- No subscription. Blober is a one-time purchase.
- No middleman. Everything runs on your machine. Your credentials stay local.
Get Started
Section titled “Get Started”- Download Blober (macOS, Windows, Linux)
- Connect your GoPro Cloud account
- Create a workflow and run it