
Box Setup: Connect & Transfer Files
Box is a cloud storage and file sharing service. In Blober you browse your Box by navigating the folder tree. Box doesn't let you type paths, so you pick a folder or the whole account as a source or destination.
What you can do
Section titled "What you can do"- ✅ Browse folders and files
- ✅ Upload and download files
- ✅ Create folders
- ✅ Delete files and folders
- ✅ Copy and move files within Box
Prerequisites
Section titled "Prerequisites"- A Box account that holds your files (free or paid)
- A free Box Developer account to create and configure the app in the Developer Console
- A Box app with User (OAuth 2.0) auth created in the Box Developer Console
Authentication
Section titled "Authentication"Blober needs three pieces of information: the Client ID and Client Secret from the app you create in the Developer Console, plus the email of the Box account that holds your files. You paste them into Blober and then sign in to Box to grant access.
What you'll need from the app:
| Field | What it is |
|---|---|
| Client ID | A long string that identifies your app |
| Client Secret | A secret string paired with the Client ID |
| Box account email | The email of the Box account that holds your files |
The email is used to keep separate Box accounts apart when they share the same app. Enter the same email every time you connect.
Setup steps
Section titled "Setup steps"- Create a Box Developer account (free trial, needed to create the app)
- Create a Box app with User (OAuth 2.0) auth
- Add the redirect URI
- Enable the permissions and copy your credentials
- Connect Box in Blober
:::tip Prefer a shortcut? Use rclone's public Box app keys Skip app creation and paste rclone's public Box app credentials into Blober instead:
| Field | Value |
|---|---|
| Client ID | d0374ba6pgmaguie02ge15sv1mllndho |
| Client Secret | grWXGU7zW6034GI54GuswaDQdE30QOfn |
These belong to a widely shared public app (the one rclone uses), so they work
for quick personal transfers. They are not the default in Blober - a shared
app means shared rate limits, so for anything beyond casual use create your own
app and keep the quotas and permissions yours. You still need a Box account and
enter its email to authorize. You can confirm these are rclone's real public
keys in the rclone source: the Box backend
defines rcloneClientID and the obfuscated rcloneEncryptedClientSecret.
:::
Required permissions
Section titled "Required permissions"In the Box app's Application Scopes section, you need both of these:
| Checkbox | What it does |
|---|---|
| Read all files and folders stored in Box | Lets Blober see and download your files. |
| Write all files and folders stored in Box | Lets Blober create, upload, and change files. |
If either is missing, Blober can't connect fully - enable both, then reconnect.
Setup Guide
Section titled "Setup Guide"1. Create a Box Developer account
Section titled "1. Create a Box Developer account"The Developer Console (where apps are created and configured) is read-only on a standard free Box account - you can't save any changes there. You need a free Box Developer account to create and configure the app.
- Go to developer.box.com and click Get started (or sign up at account.box.com/signup/n/developer)
- Enter your name, email address, and a password. Use an email address that is not already registered with Box - the developer account needs its own, unused email.
- Accept the terms and click Get Started
- Confirm your email address to activate the account
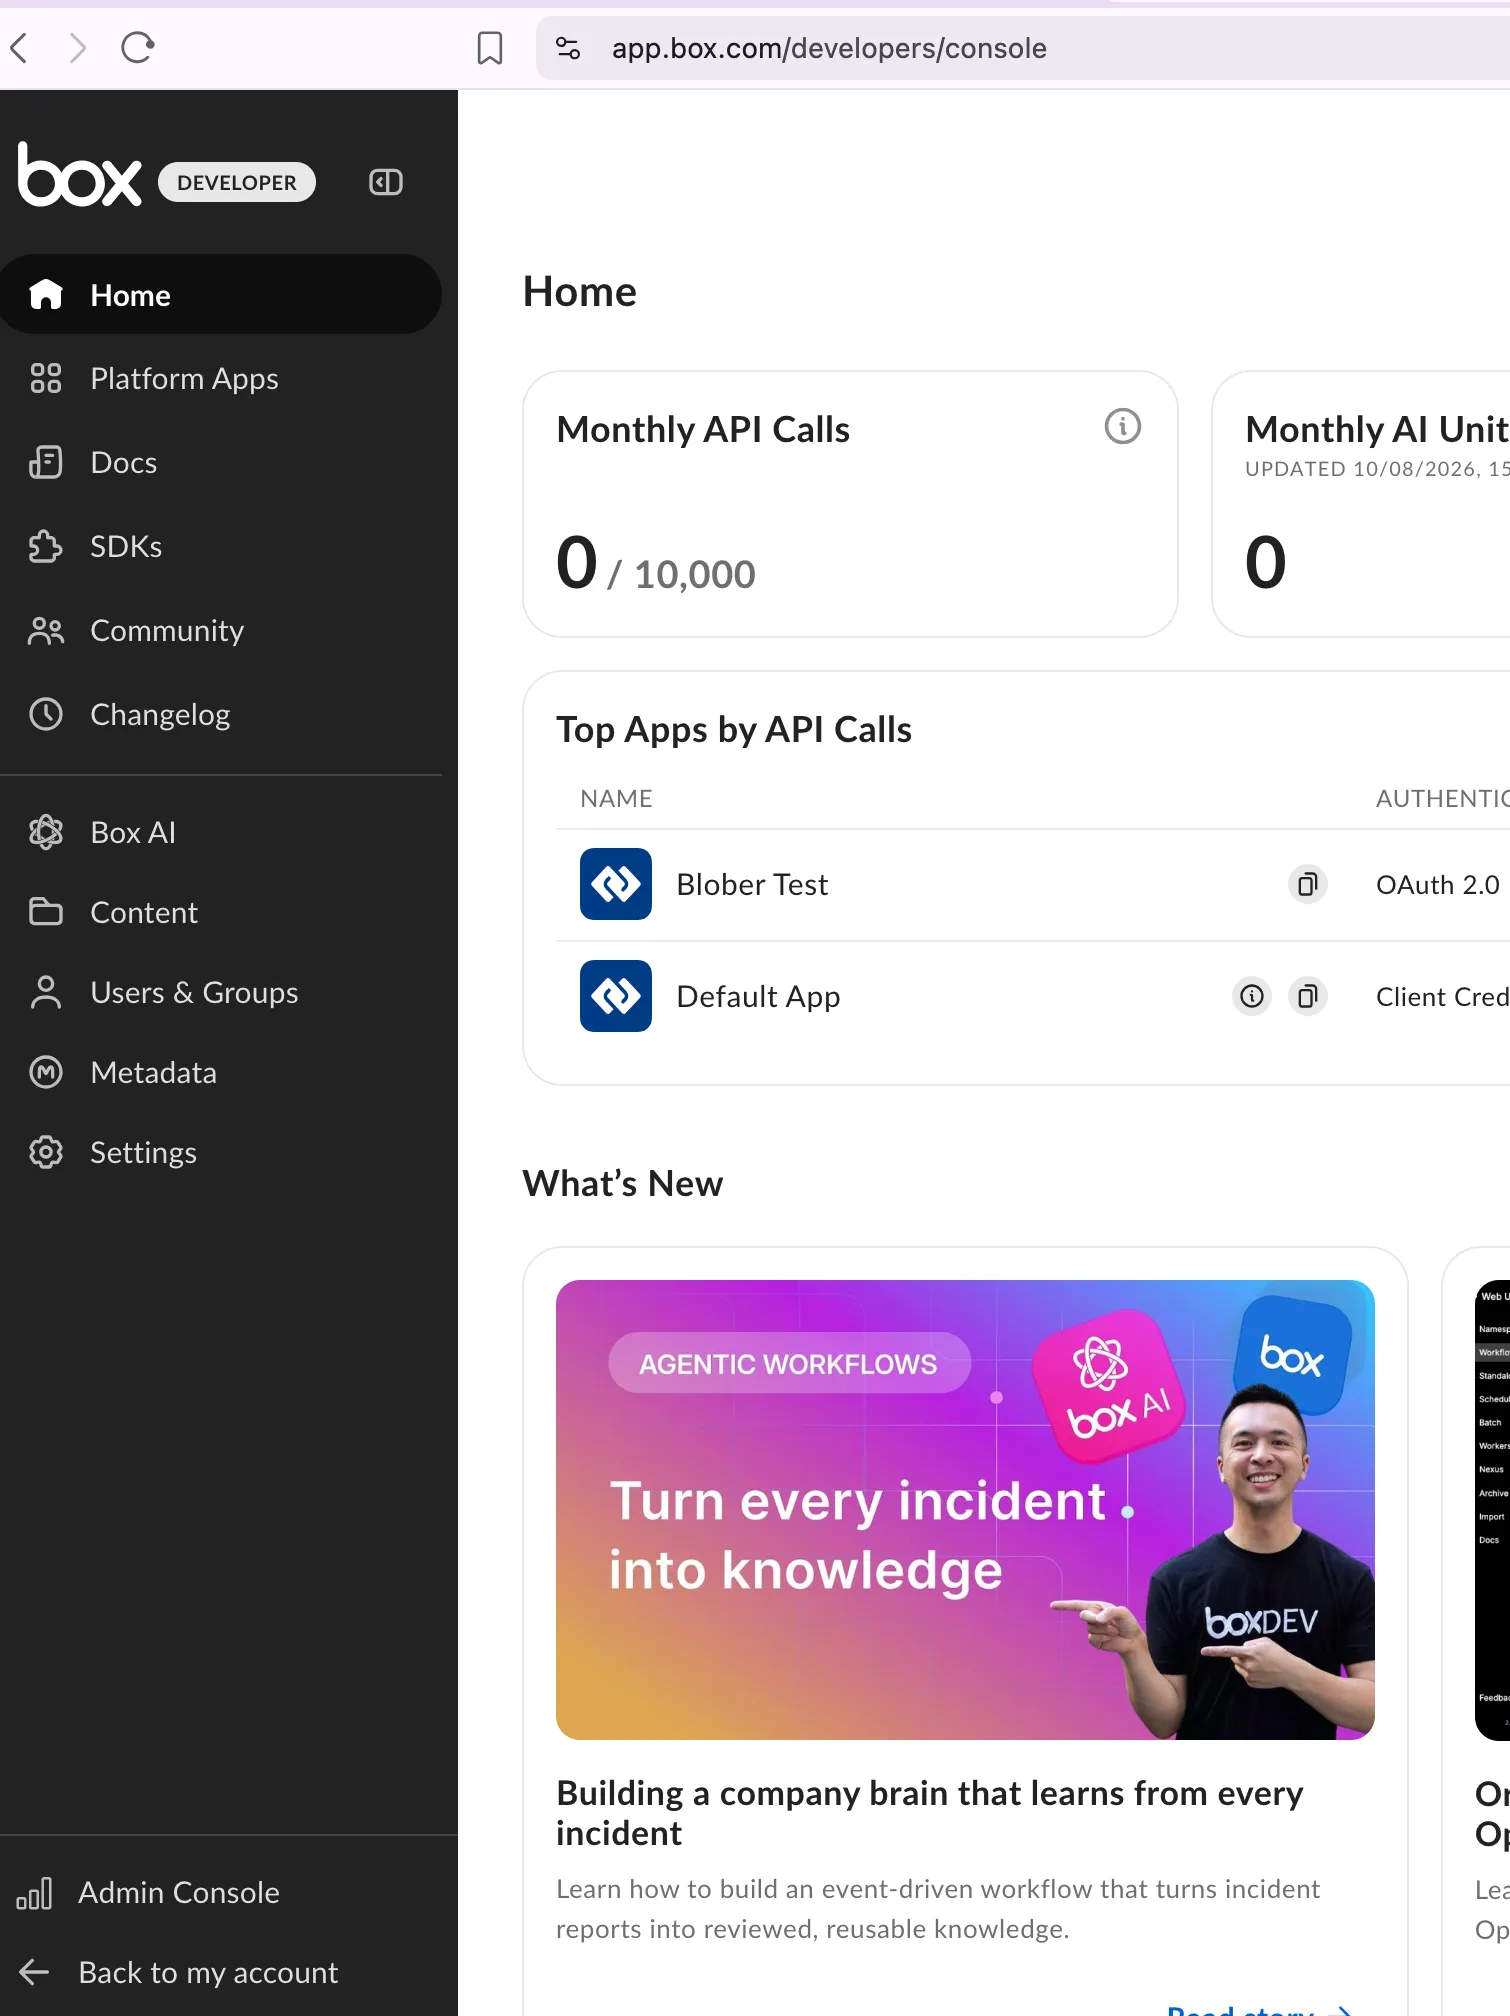
- Open the Developer Console at app.box.com/developers/console
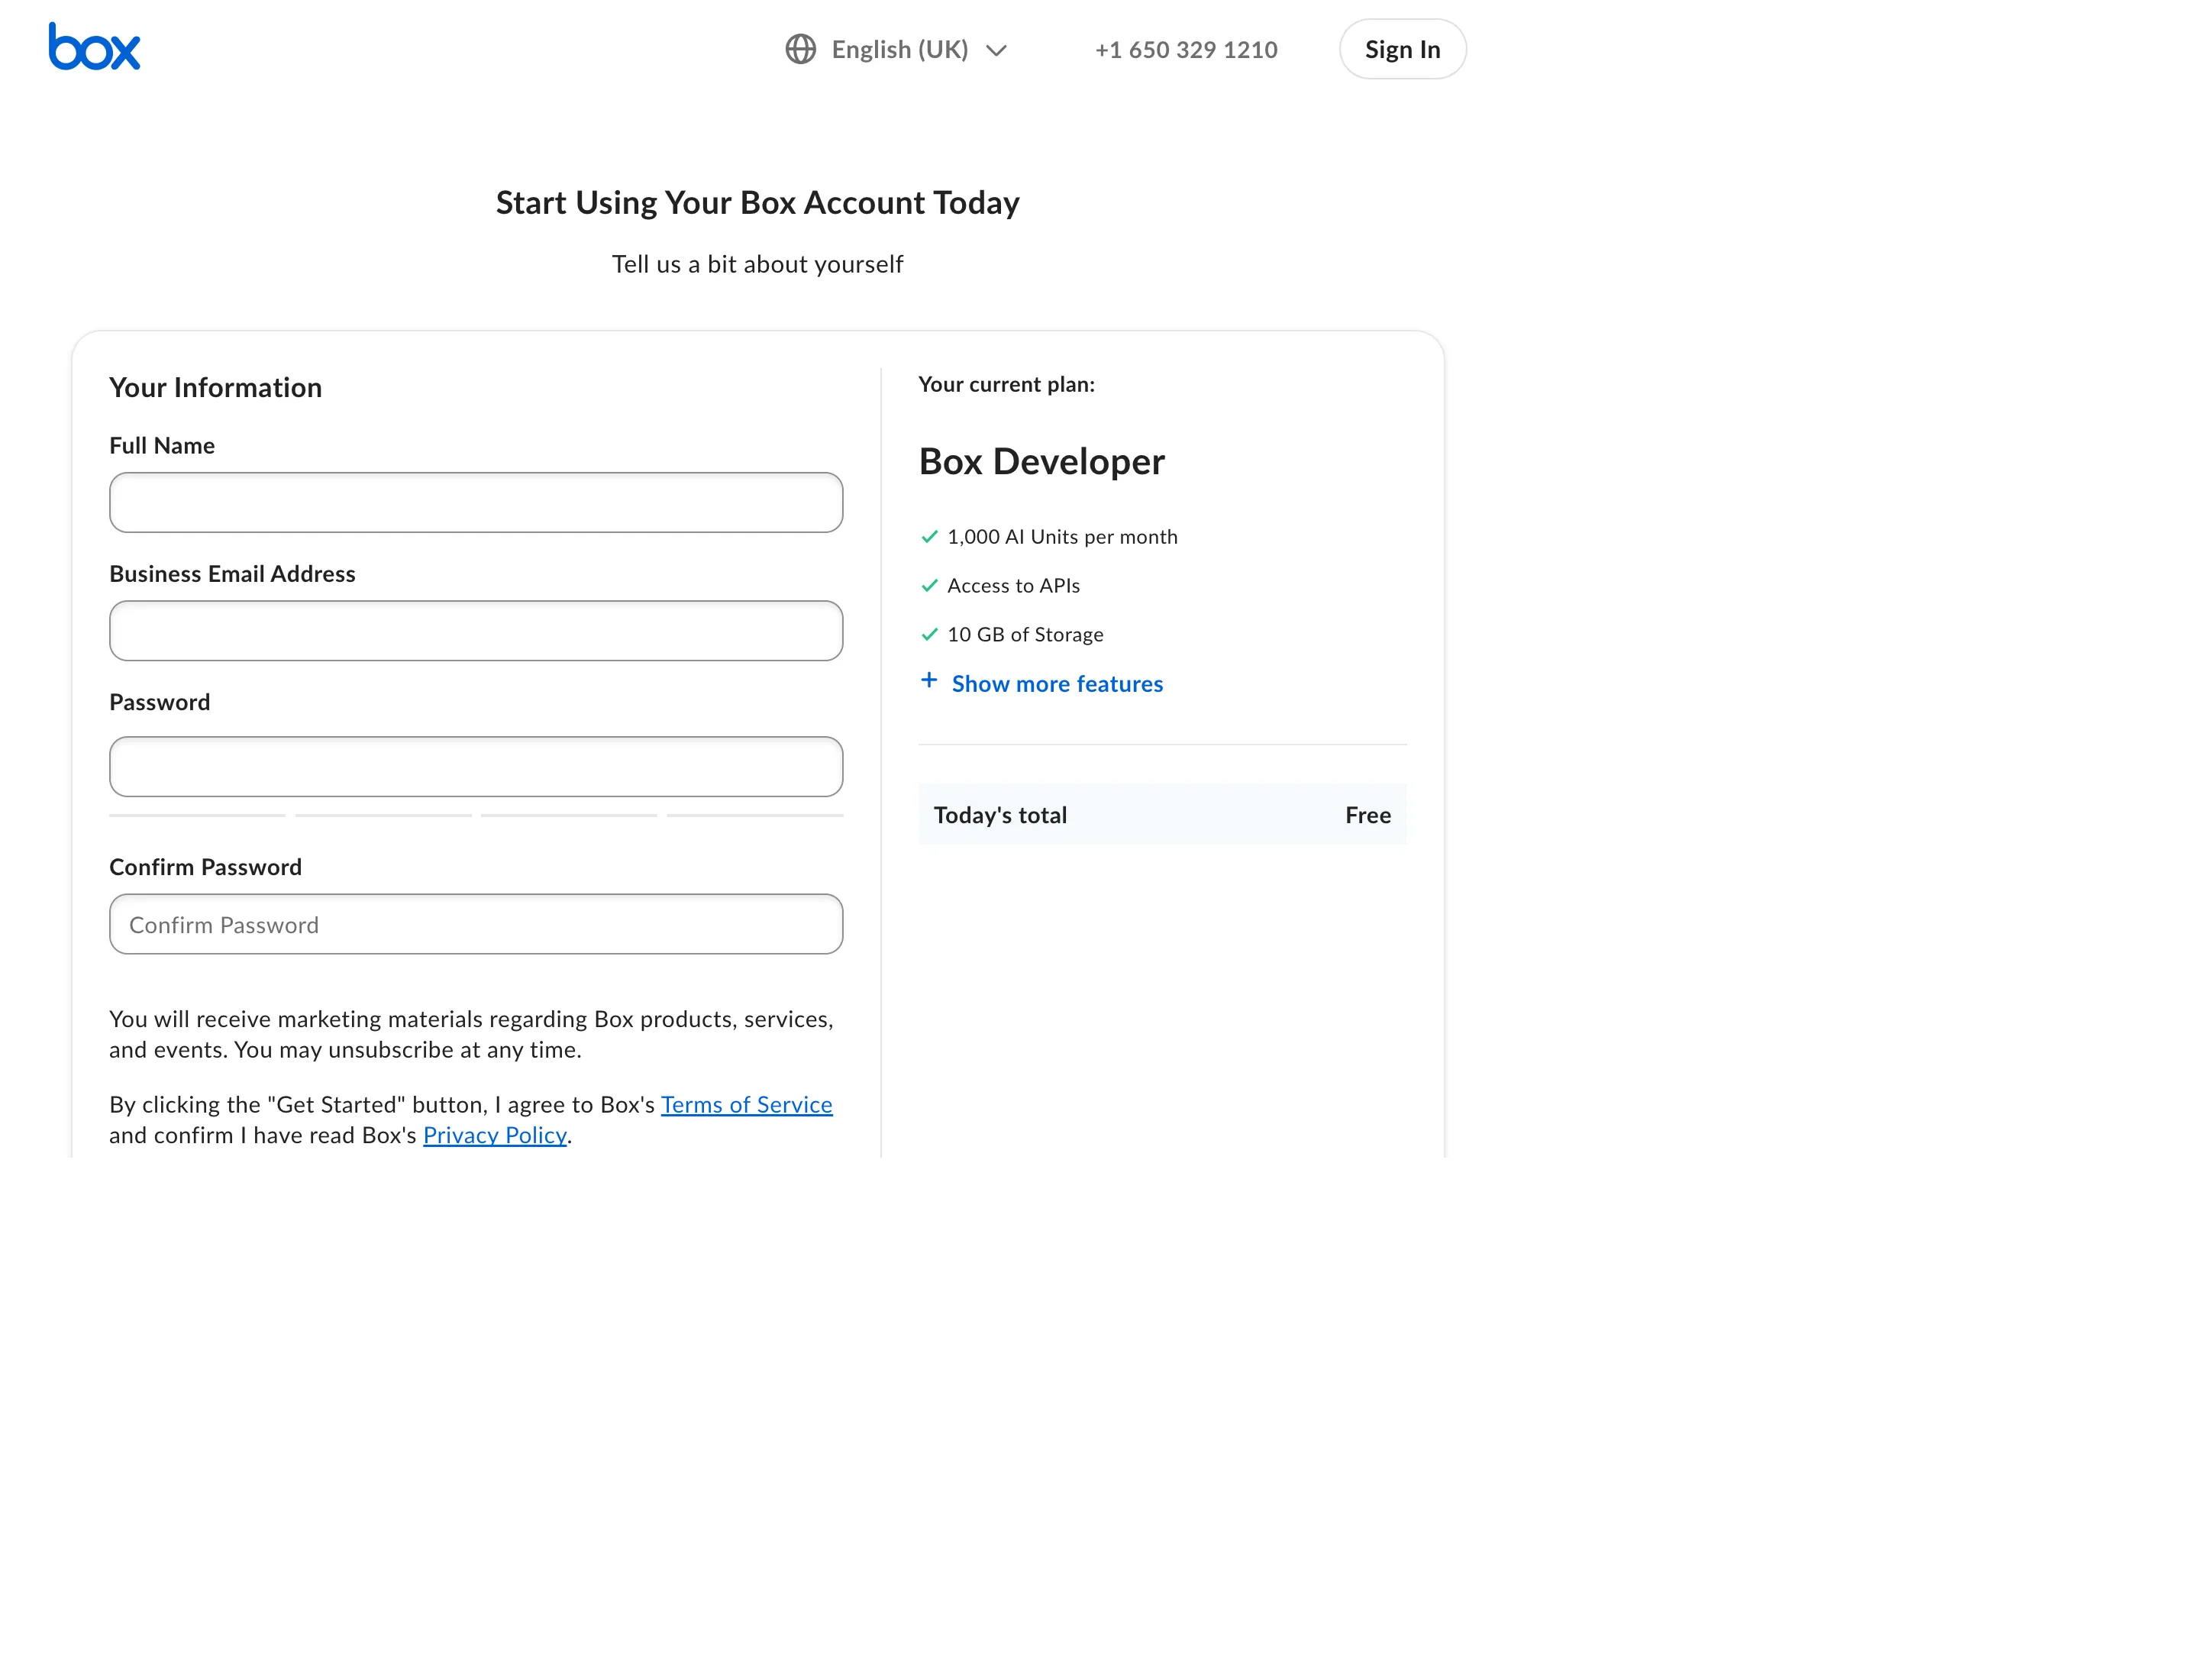
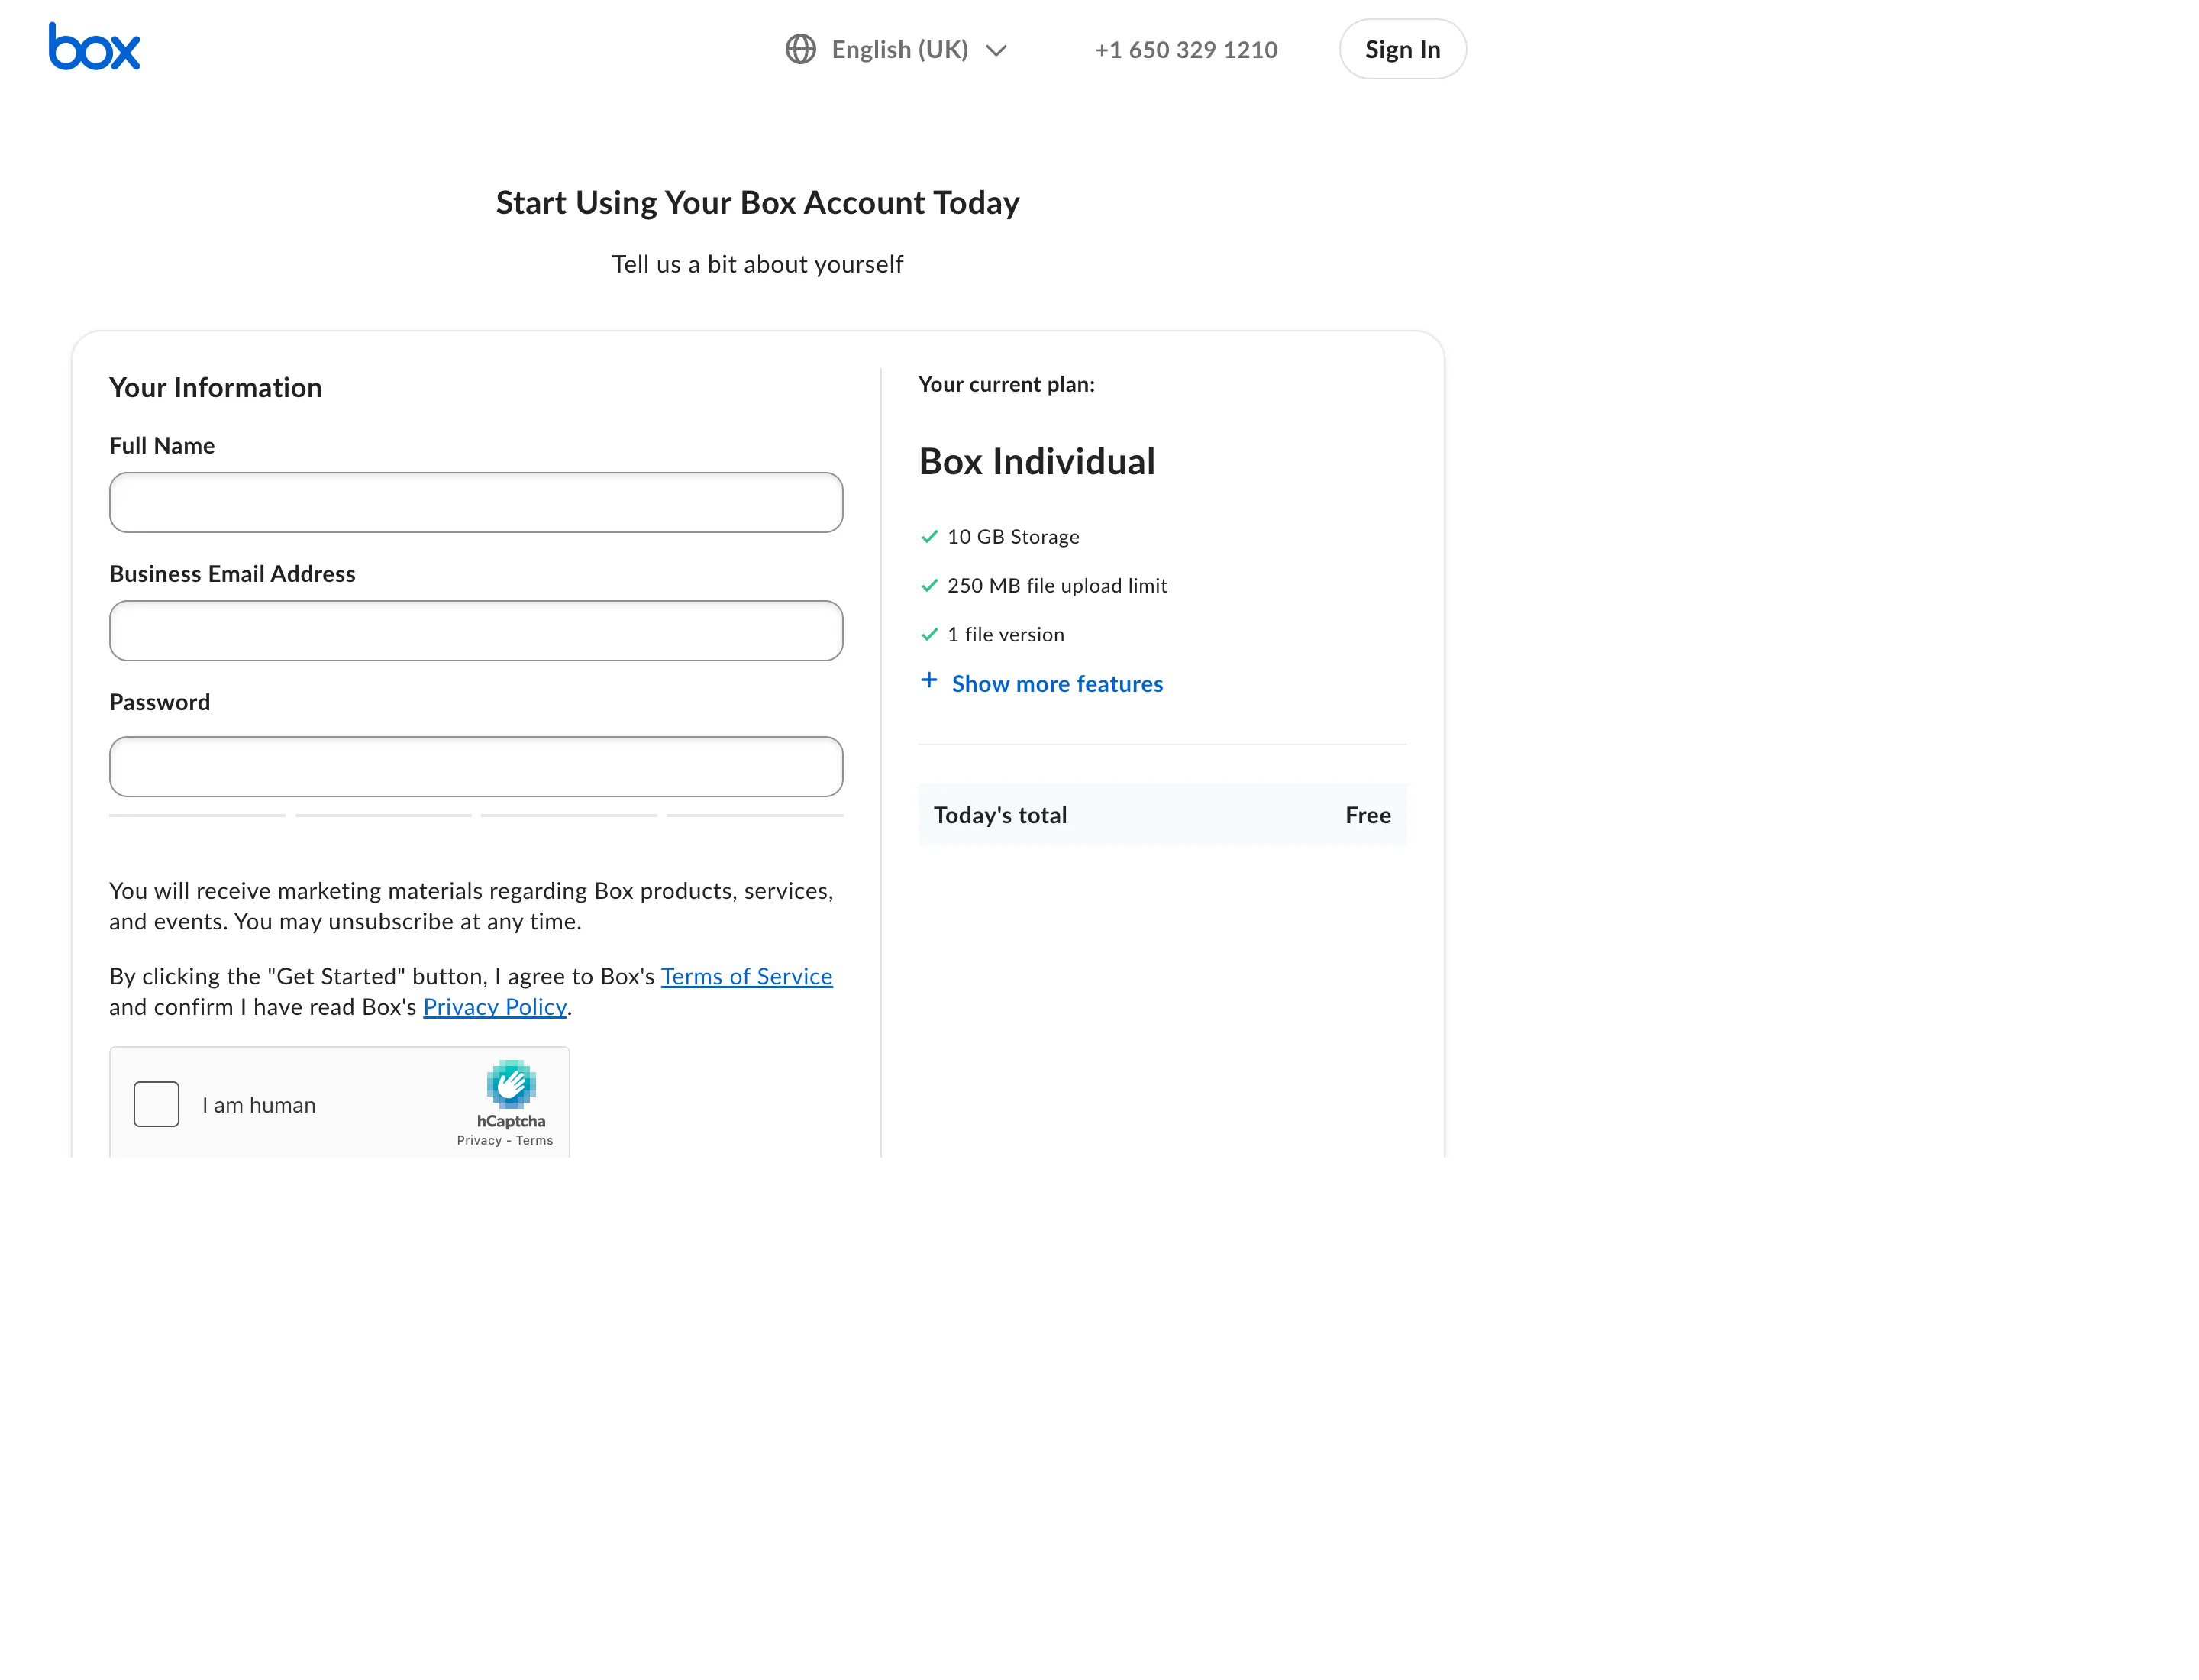
Developer account vs. a regular Box account
Section titled "Developer account vs. a regular Box account"Use a Box Developer signup, not the ordinary free "Box Individual" signup. The two differ on the signup page and in the app afterwards:
| Box Developer account | Box Individual (free) | |
|---|---|---|
| Signup plan shown | "Box Developer", includes Access to APIs | "Box Individual", storage only |
| API access | Yes (OAuth 2.0, JWT, Client Credentials) | No usable API / locked console |
| Location selector | No location step | May ask to select a location |
| Left navigation | Shows Admin console and Dev console | Does not |
Once signed in, expand the left navigation - a developer account shows Admin console and Dev console there; a regular free account does not.
2. Create a Box app
Section titled "2. Create a Box app"- Open the Box Developer Console
- Click New App (top right)
- Enter an App Name (e.g.,
Blober) - Under App Type, choose User - do not choose Server (Server is for service accounts, can't be used with Blober, and you can't change the type later)
- Click Create
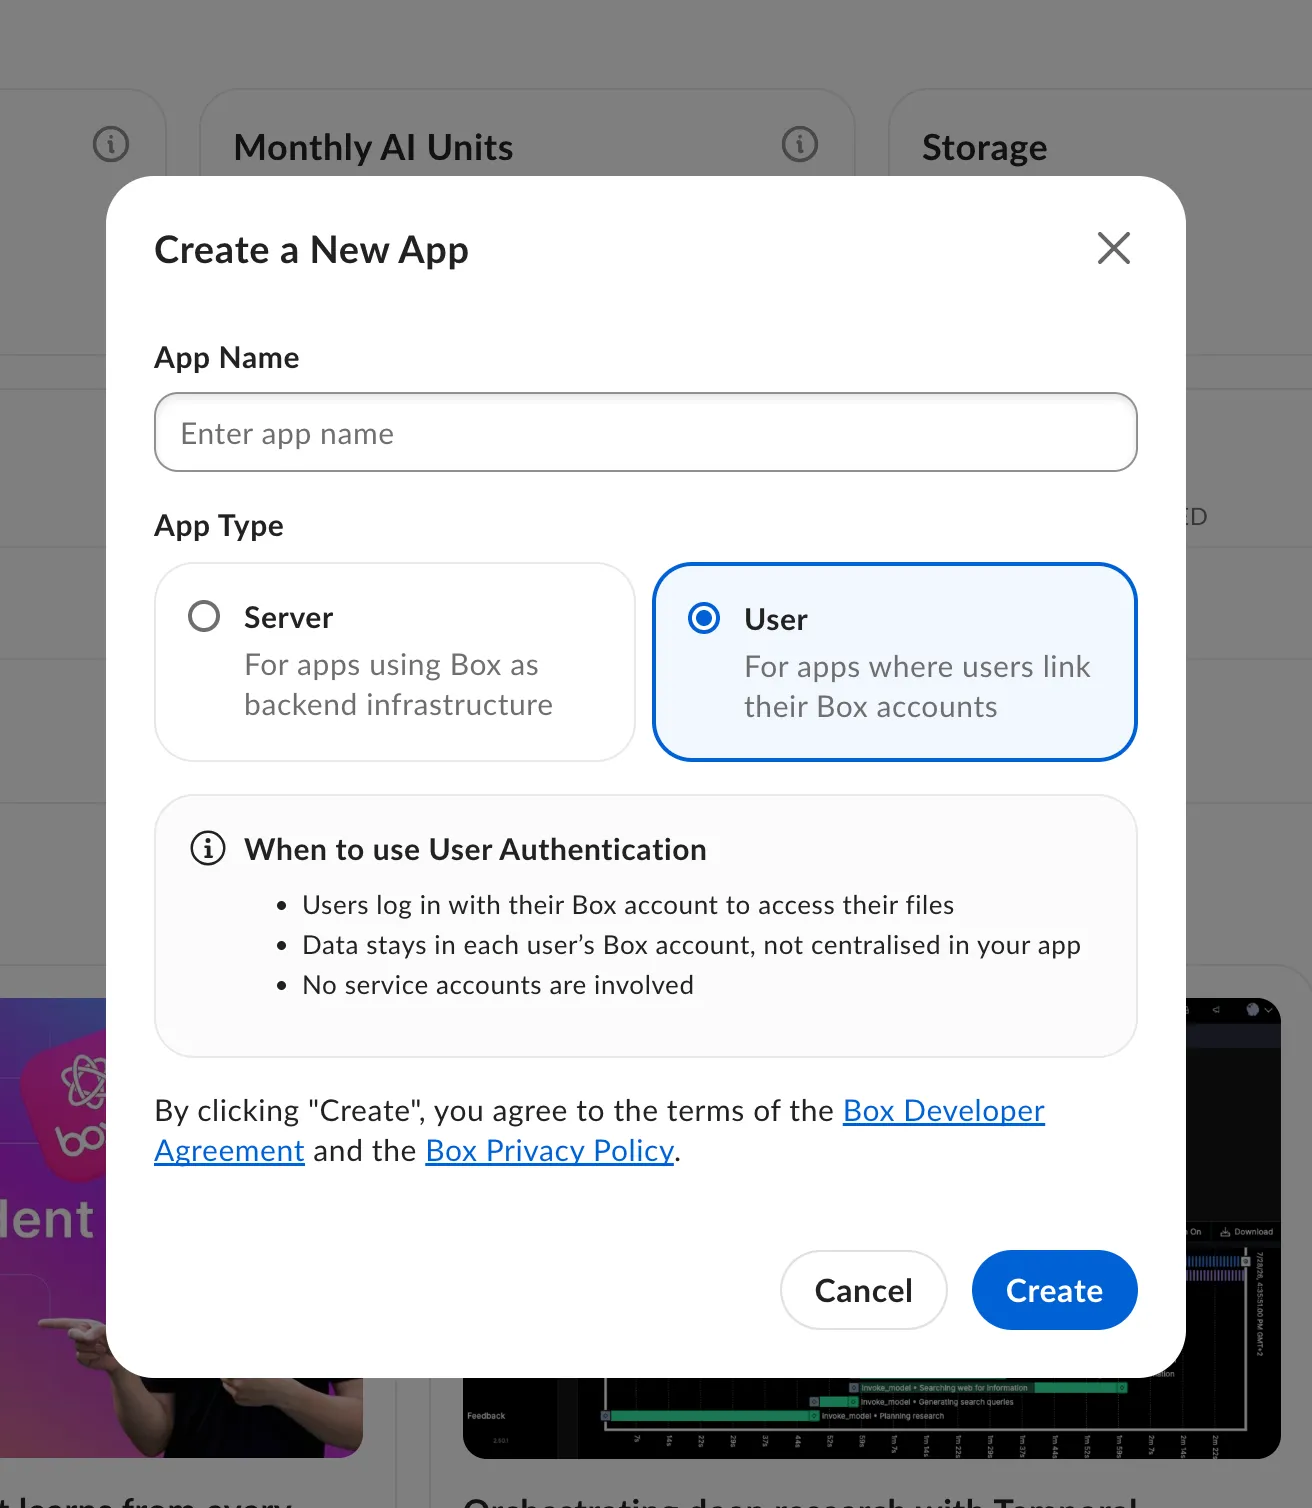
If the form shows a Select Method option, ignore it - it only applies to Server apps. A User app uses OAuth 2.0 automatically.
3. Add the redirect URI
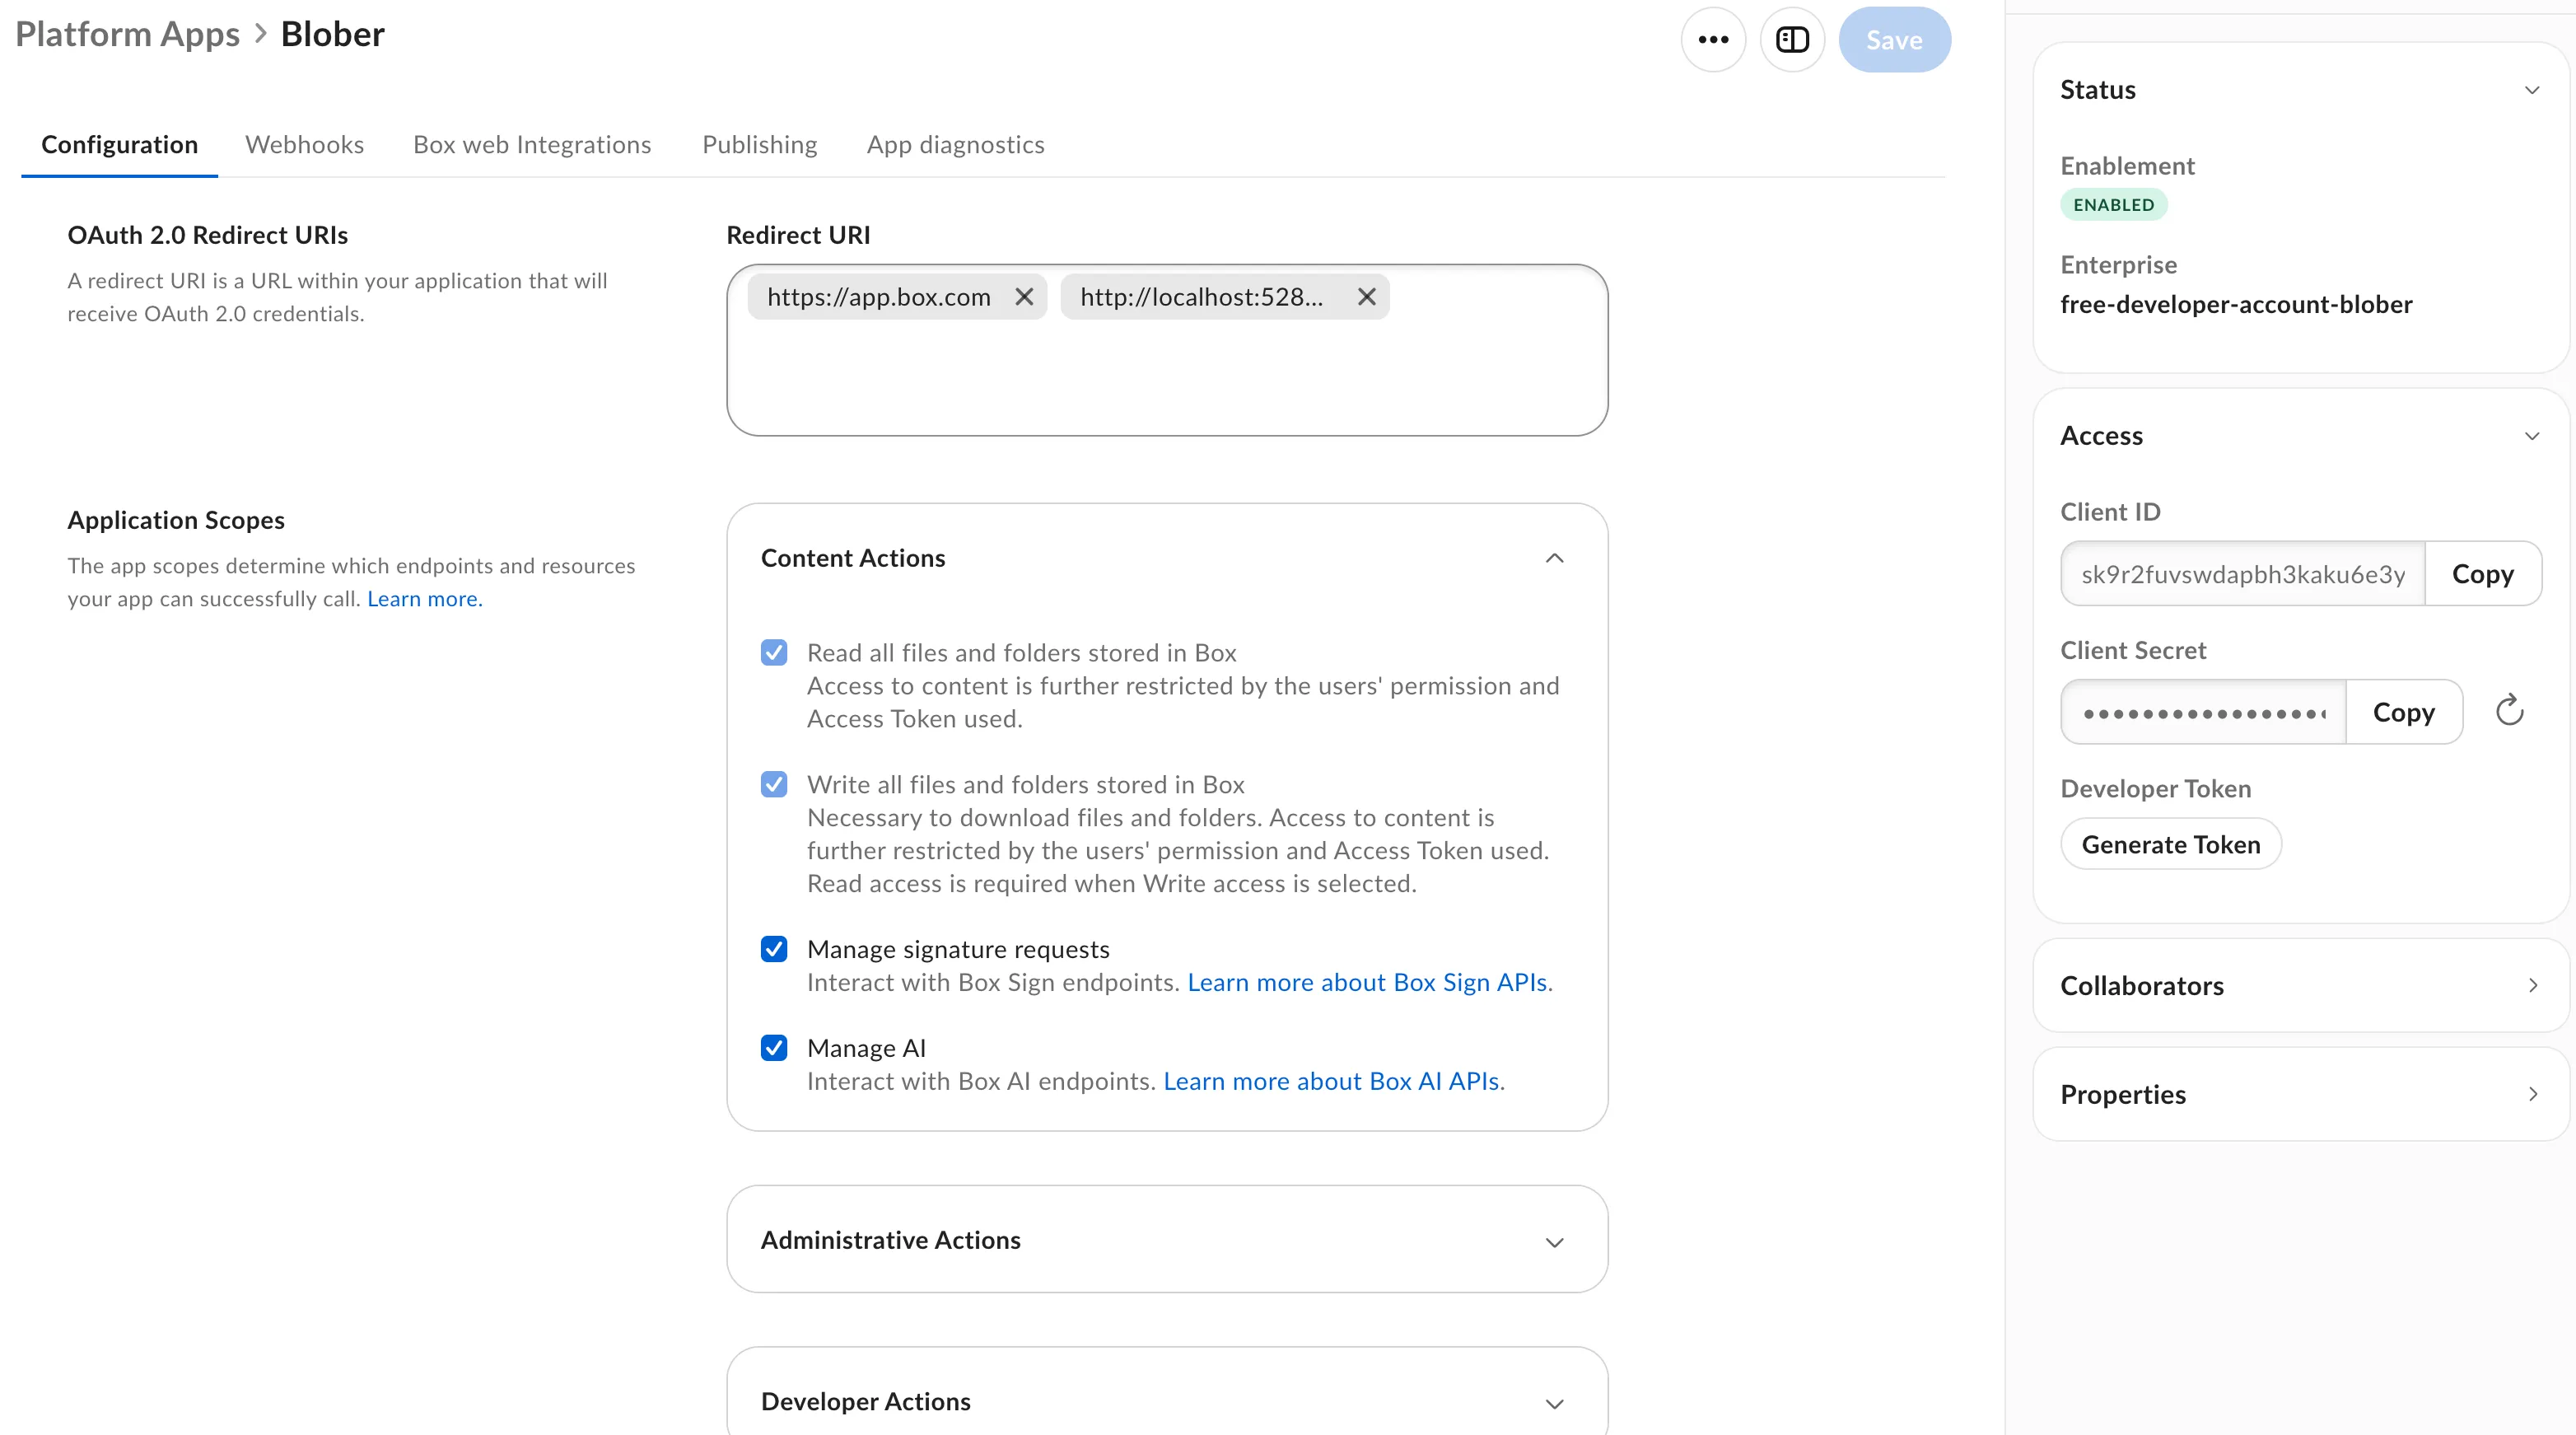
Section titled "3. Add the redirect URI"- Open your app and click the Configuration tab
- Scroll to the OAuth 2.0 Redirect URI section
- Click Add Redirect URI and enter exactly:
http://localhost:52847/oauth/box/callback - Click Save Changes

The redirect URI section is missing?
If there is no "OAuth 2.0 Redirect URI" section on the Configuration tab at all, the app was created as the wrong type. Only User apps have this field. If you see Client Credentials Grant or JWT as the authentication method, you created a Server app - Box can't convert it, so create a new app and choose User.
4. Enable the permissions and copy your credentials
Section titled "4. Enable the permissions and copy your credentials"- On the Configuration tab, scroll to Application Scopes and leave the default permissions selected. They are already correct for Blober - Read all files and folders stored in Box and Write all files and folders stored in Box are turned on by default.
- Click Save Changes.
- Click the App Details panel (top right).
- Copy the Client ID.
- Reveal and copy the Client Secret (see note below).
- Keep both somewhere safe - you'll paste them into Blober.
5. Connect Box in Blober
Section titled "5. Connect Box in Blober"- In Blober, go to Workflows => New Workflow
- Select Box as source or destination
- Paste your Client ID and Client Secret, and enter the email of the Box account that holds your files
- Click Authorize Box Access - a browser window opens
- Sign in with the Box account that holds your files and grant access
- The browser redirects back to Blober and you're connected
File Organization
Section titled "File Organization"Box has no path-based API. Blober resolves paths by walking the folder tree from the root (0) and matching folder names, creating missing folders automatically when uploading.
- Names are case-insensitive but case-preserving (a folder can't contain both
Photosandphotos) - Folders are created automatically when uploading to a path that doesn't exist yet
- The root of your Box is the top-level "All Files" view (folder id
0), so selecting the entire drive is simply picking this root
How Uploads Work
Section titled "How Uploads Work"Files of any size your Box plan allows can be transferred to and from Box.
- Files up to 50 MB upload in one go
- Files over 50 MB are split into parts and uploaded in sequence
- Parent folders are created automatically if they don't exist
Deduplication
Section titled "Deduplication"- Default: Skip if a file with the same name exists
- Used for: Destination
Choosing Overwrite the existing file uploads a new version onto the same file id, so Box keeps its version history and the destination never ends up with two files of that name.
For the policies (skip, overwrite), where the control appears, and how deduplication differs from resuming a task, see Deduplication.
Rate Limiting
Section titled "Rate Limiting"Box applies limits on how many requests you can make per minute. If you hit a limit, a transfer may pause or fail - wait a moment and try again.
Reconnecting after a while
Section titled "Reconnecting after a while"Box security tokens are valid for 60 days or one use. If Blober hasn't connected to Box for a while, you may be asked to reconnect - just click Authorize Box Access again and sign in. No files are affected.
Troubleshooting
Section titled "Troubleshooting""Authentication failed" or 401 errors
Section titled ""Authentication failed" or 401 errors"- The connection expired. Disconnect Box in Blober and connect again.
"Box refresh token is invalid or expired - re-authorize"
Section titled ""Box refresh token is invalid or expired - re-authorize""- The connection needs refreshing. Re-authorize Box in Blober (this doesn't affect your files).
"Insufficient permission" (403) errors
Section titled ""Insufficient permission" (403) errors"- The Box app isn't set up to read/write your files. Follow the setup steps and enable both the Read all files and folders stored in Box and Write all files and folders stored in Box checkboxes, then reconnect.
- If the error mentions a specific folder, you may not have access to it in Box itself. Check the folder's sharing in Box.
Redirect URI errors (redirect_uri_mismatch / redirect_uri_missing)
Section titled "Redirect URI errors (redirect_uri_mismatch / redirect_uri_missing)"If the redirect URI doesn't match, Box shows an Application Error page with
Error: redirect_uri_mismatch and you're never redirected back to Blober.
- Register the exact Redirect URI
http://localhost:52847/oauth/box/callbackin the app's Configuration tab - exact match, no trailing slash,http(nothttps), port52847, and the full path/oauth/box/callback. - Click Save Changes after adding it.
- If you configured multiple redirect URIs, ensure the one Blober uses is among them.
"Some changes in the configuration could not be saved"
Section titled ""Some changes in the configuration could not be saved""Box shows this when one of the fields on the Configuration tab is invalid, so the whole save is rejected. With a redirect URI, the usual causes are:
- A regular (non-developer) Box account (most common) - the Developer Console is read-only on standard free accounts. If the console also shows "Log in or sign up for a Box Developer account to access all of the Developer Console features," you need a free Box Developer account at account.box.com/signup/developer. Create the app there, then the redirect URI and scopes will save.
- A trailing slash on the URI - enter it exactly as
http://localhost:52847/oauth/box/callbackwith no trailing/. - A stray space or character - type it, don't paste from a source that may add invisible characters.
- A duplicate URI - if it's already in the list, remove the duplicate.
- Another invalid field on the same page - try saving with only the redirect URI added (leave scopes/CORS unchanged), save, then add the scopes and save again. If something like an empty or malformed CORS entry is the problem, clear it.
Missing credentials
Section titled "Missing credentials"- Ensure both Client ID and Client Secret are filled in, with no leading/trailing whitespace.
Files not appearing
Section titled "Files not appearing"- Refresh the file list in Blober.
- If the file was deleted to Box Trash, it won't appear in normal browsing.
How to revoke access
Section titled "How to revoke access"- Go to your Box account settings and find Authorized Applications
- Remove the Blober app
- In Blober, remove the existing connection
Revoking access invalidates all tokens immediately.
Limitations
Section titled "Limitations"- No path-based navigation: Blober walks the folder tree, so you pick a folder (or the whole Box) rather than typing a path.
- No separate "Shared with me" view: folders shared with you appear inside your normal file list (see File Organization).
- Files are processed one at a time: folders are handled after the files they contain.
- Deletes go to the Box Trash: deleted items still count toward your quota until the Trash is emptied.
- Filename rules: names up to 255 characters, no
\ / < > : " | ? *, no leading/trailing spaces, and names are case-insensitive (soPhotoandphotocan't both exist).